Category Archives: Cycling

New post on auntiehelen.co.uk

Hi all,

This is just a note for those who subscribe to this blog for information when I make new posts – the blog has now moved! I have bought a new domain, http://www.auntiehelen.co.uk, and all new posts will be made only on there (this blog will remain here as a reference).

If you’d like to follow my new blog, please do so!

And today’s new post is: http://www.auntiehelen.co.uk/new-touring-luggage-radical-banana-bags/

Thanks!

Auntie Helen

Leave a comment

Filed under Cycle Tours, Cycling

Alfie gets a new chain tensioner

I have mentioned on previous blog posts the problems that I have with the Sora derailleur on my Alfine-11 trike.

You may, of course, ask: “Why does someone with an internal hub gear need a derailleur anyway?” The reason is that I have a triple chainring at the front of the trike and thus need a chain tensioner to take up the variation in chain length when changing these gears (plus when folding the trike as well).

When the trike was originally supplied, ICE felt that, as the Alfine-specific chain tensioner wasn’t rated for a triple chainset like mine, it would be better to fit a derailleur which could handle the different chain lengths, so they fitted a Sora derailleur.

This is how ICE explained fitting the Sora (when discussing it last week):

We used a Sora because it was a reasonable quality and price with sufficient capacity for the clearance needed (by adjusting the B screw)… Shimano also make chain tensioners for the Alfine but they say that the capacity is only for 16T total difference on the front chainset.

I have a 21 or 22T difference on my front chainset which is why they didn’t go for the Alfine chain tensioner.

However, I’ve had trouble with my Sora derailleur over the time I’ve had the trike. One problem is that the clearance isn’t quite right in some cases so the jockey wheel cage rubs against the plastic chain guard (carrier) that keeps the chain around the hub. You can just see the problem at the bottom of this photo.

8

There was also an appalling tendency, when removing the back wheel, for the jockey wheel cages to grab onto the chain guard and not let go. This was a problem for me when fixing rear wheel punctures or doing other maintenance that necessitated removing the rear wheel.

17

And this was ICE’s comment about the issue of the jockey wheel cage rubbing on the chain guard/carrier:

Normally the position of the top jockey wheel cage is set by the B screw and winding this in would move it away from the contact point (or away from sprockets). The Sora is designed for a largest sprocket of 27T. The plastic chain guard is less than that equivalent so the Sora should clear OK normally. However, that normal capacity is based on the biggest sprocket position on a cassette whereas the Alfine guard is in roughly the position of something like an 18T sprocket so the parallelogram action may be putting the cage too close.

What this means is that, on a normal bike, as you go to the higher gears at the back – the outer edge nearer the derailleur – there are fewer teeth. My alfine has 18 teeth at the back which is a lot more than some of the smaller chainrings at the rear and as the derailleur doesn’t move outward (doesn’t need to) it isn’t able to clear the chain guard/carrier properly. The Sora derailleur works OK but not brilliantly.

But the biggest problem, and the one that caused me to completely change the chain tensioner, was that my Sora derailleur completely seized up. These things, when on a usual bike, will be almost constantly moving, up and down the gears; on Alfie I cycle 95% of the time in the big ring and the other 5% in the middle ring, I don’t use the granny ring at all. This meant that the derailleur moved only a few times per ride. Combining this lack of movement with me cycling all through a snowy winter when our roads were well salted and by early February the derailleur was completely seized. No matter how much we oiled it and leaned on it, it wouldn’t move. The gear hanger that attaches it to the trike started bending ominously, too, and we were unable to separate the derailleur from the hanger, so it became clear I needed to do something about this.

This was the situation earlier today with the Sora derailleur. I have three photographs of its positioning with the front chainring in the large, middle and granny rings. The Sora derailleur should swing to the left of the photo as I ran down the gears – as you can see in the pictures below, it stayed put and the chain just got slacker and slacker. (The jockey wheel cage section did take up some of the change in chain length but could not cope with the full range of variation).

This is the Sora derailleur when the chain is in the big ring at the front
1 Sora in big ring

This in the middle ring
2 Sora in middle ring

And this in the granny ring – the chain hangs very slack to the right of the photo.
3 Sora in granny ring

Here are all three together (click to enlarge):
3 photos Sora

As mentioned above, I contacted ICE when I realised I was going to have to do some major maintenance on the derailleur to see what they suggested. Neil replied:

Not sure about taking it apart at the pivot for service. I think it may not want to come apart and we have never had a close look to see if that is possible. It is a relatively low end unit and may be riveted up for life. Soaking it in oil should free it up if it was going to but sounds like you have tried that.

He suggested that I buy a replacement Sora from any bike parts shop and fit that, taking careful note of how the original Sora was locket out (by ICE) when I bought the trike.

The next day I telephoned to order a replacement gear hanger and spoke to Neil at ICE (who had sent me the email with info about it all) and he had clearly been thinking a bit more about it all and wondered if maybe the Alfine tensioner might work better for me. Knowing that it didn’t have a wide enough range for a triple chainset is less of an issue if I only use two of the three chainrings (big and middle), and am only ever likely to use the granny ring when going up a colossal hill whereupon I would be going so slowly that a slack chain isn’t the end of the world.

We talked for a long time (Neil is excellent like that!) and he gave me lots of information about what to buy (there are two types of Alfine chain tensioner, I need the CT-500 and not the CT-510) and where to get them from (not currently available in the UK but were available from various German bike shops). He said they were just assembling another trike with an Alfine 11 and were putting a Sora derailleur on it but he would be interested to hear how I got on with the Alfine Chain Tensioner.

I ordered the gear hanger from ICE for just over £10 and the next day it arrived. I also ordered the Alfine Chain Tensioner CT-500 from Bike24 in Germany and it arrived two days later. It actually cost less than a replacement Sora Derailleur, 15 Euros.

And here is the chain tensioner – note that it comes with three shims to help align the tensioner to the chainline. I went for black rather than silver in the hope that it doesn’t show the dirt and oil as much!
4 new alfine chain tensioner

Before we started on fitting the chain tensioner I dealt with something that would probably have caused us lots of annoying splinters – a slight fraying of the gear cable on the Alfine 11. You can see a tiny bit of metal sticking up here. It seems impossible to have your hand anywhere near the back of the trike without that thin metal shard puncturing your finger!

5 alfine cable dodgy end

I had bought some smart red ferrules from eBay so, after trimming the spare cable (it was always too long) we put a nice smart red stopper on it.

6 new red ferrule

I had also done a major service of both brakes including cables (which also got smart red ferrules on, although I will need to replace both cables before next winter as they’re pretty grotty inside).

Anyway, time now to remove the old derailleur.

James was on hand to help me with this as I never seem able to undo quicklinks on the chain. He was able to separate the chain very quickly.

Next task was to take off the right hand side axle bolt and washer so that we could get to the gear hanger. The gear hanger is held on with a small screw.

7 removing gear hanger

Fortunately this undid very easily and wasn’t corroded like most other things I am servicing on the trike seem to be at the moment!

8 removing gear hanger

Off it comes, with its permanently-attached Sora derailleur.
9 removed sora

We fitted the new, shiny gear hanger and put the axle bolt back on (it helps hold the hanger in place).

10 new gear hanger

It was a very simple job to screw the alfine tensioner onto the end of the gear hanger. We squinted a bit at it and decided that the narrow shim (probably 1mm wide) might make things line up marginally better so we put that on, tightened everything up and then James started threading the chain through.
11 alfine CT added

James joined the chain back together and we pedalled the trike, going up and down the front chainrings to see how it worked. “Very well” was the answer!

What was nice was that there was no adjustment of the B screw (there isn’t one!) or any other things to line up – it was just a case of attaching it, re-joining the chain and all is done!

Despite Shimano’s recommendation that 16T is the maximum range, this tensioner seemed perfectly able to cope with my 22T range and in fact had even more movement possible at both extremes of its swing. It was also interesting to note that it doesn’t have any springs involved in the top pivot (where it is screwed into the gear hanger), the only springs are on the jockey cages to tighten those up. The pull of the chain is plenty to move the tensioner as necessary and the forces from the jockey cage springs move it if necessary.

Here you can see three photographs of the tensioner position when the chain is on the three chainrings at the front.

This is when the chain is on the big ring.
12 Alfine CT big ring

This is when the chain is on the middle ring.
13 Alfine CT middle ring

And this shows the position with the chain on the granny ring.
14 Alfine CT granny ring

And here are all three positions for the front chainring (click to enlarge):
3 photos Alfine

After another quick task (tightening the friction shifter on my front chainring bar-end shifters which was also looking rather corroded) Alfie’s fettling session was complete!

After a cycle ride of 24 miles I can report that the new chain tensioner works really well! It makes a slight noise when in the big ring (probably related to the fact that the chain is probably a little bit short) but in the middle ring and granny ring it is completely silent. It holds the chain much tauter, which is good, and the shifts all seem to work well. Overall I am really happy with this change and think it was well worth it!

1 Comment

Filed under Alfie the Trike

Alfie gets new teeth – changing the Alfine-11 sprocket

A couple of weeks ago my chain snapped whilst out riding.

After being rescued by car by my husband I changed the chain and did some general trike fettling, after which it became clear the chain was skipping over the rear sprocket (the sprocket had done 11,000 miles and was therefore probably rather worn).

Clearly I needed a new sprocket but had no idea how to go about changing it or whether any old sprocket would do.

So I sent an email to the ever-helpful Huw at Madison and he replied:

Basically, it’s a very easy job, you don’t need any specialist tools, just a few spanners and a screwdriver, you will need to remove the cassette unit (the plastic device that the cable routes into).

After taking the cassette unit off (part CJS-700 on the exploded view) you just need to prise a circlip off with a screwdriver, there should be a few notches in the hub where you can get purchase on the circlip.

Once the circlip is off (the circlip will be very tricky to get off) it is just a matter of taking the sprocket off and replacing it on it’s splines, then re-fitting what you’ve removed.

I have attached the exploded view for your hub and the Service Instructions which briefly explain the task, if you’ve done the servicing I’m sure you will find this an easy task.

So, fortified by the knowledge he thought I’d be fine, I went ahead and ordered a new 18T Alfine Sprocket (part number CS-S500, the Shimano Alfine Single Sprocket with Chain Guide 18 Tooth Black/Silver) which was just £7.99. Not a bad price at all!

The part arrived but I held off doing the sprocket change until a day when my husband would be around to help me. Mindful of Huw’s warning about the circlip I thought trying to do it myself with one weak arm might be a bit risky.

So today was the day – James had a day off work, the sun was shining and it was time to do a bit of trike maintenance!

So this is the view of the trike hub attachment in the lowest gear.

1

In order to remove the rear wheel you need to first disconnect the cable attachment for the hub gear. You can see here how the cable is attached to the hub – a notch in the hub assembly traps a metal widget.

3

And from the side.

4

The trigger shifter shows I am in the lowest gear.

5 Shifter low

In order to disconnect the gear cable and remove the rear wheel you have to first put the hub into top gear (11th). Fortunately with an Alfine you can change gear whilst stationary.

6 Shifter high

And this is what the cable now looks like going into the hub – the rubber bellows have extended and the cable is wrapped right round. The widget holding the cable is now right underneath the hub.

7

Here is the view from the back.

8

As the cable is so long it’s easy to grab it and pull and so rotate the gear innards upward, leaving the cable slack. I tend to find with my finger the place where the widget is attached and rotate it round, rather than pulling the cable, but either way works. This way is oilier though!

9

I’ve rotated the cassette unit right round now (as if it’s in first gear) and you can see how much slack there is in the cable.

10

It’s easy to pull the cable out of the guide area and disconnect the widget so it’s all loose.

11

Here is the hub now unattached to its gear cable. I try to put the gear cable out of the way but it has a terrible tendency to get in the way whilst you’re trying to remove the wheel!

12

Next thing to do is remove the blue and green axle washer thingies so that the wheel can be removed. Green for the right (starboard), blue for the left. You can see on the photos that they have a notch that is what stops the axle turning when you put the wheel in – the central hole is not round but shaped and this keeps the wheel in position. Blue and green washers are for vertical dropouts (which is what I have on my trike).

13

And here is the axle without the bolts. Note that the bolts are chewing away at my gear hanger!

14

And the other side (I forgot to clean this side before the photography!)

15

And now the job I hate – removing the wheel. I find this is always difficult for me, on a trike with a normal derailleur or with a hub gear. There’s something about trying to work your way round a derailleur/chain tensioner that just doesn’t work well for me!

However, on Alfie there is a more significant issue which causes more of a problem – my chain tensioner/Sora derailleur always instantly grips the carrier (the plastic guide either side of the rear sprocket) and won’t let it go.

16

17

I struggled with this for five minutes before calling James to help me. He was able to sort it out for me as he’s more adept but this is something that worries me about getting a rear wheel puncture when out on my own – will I manage to get the wheel off on my own? Fortunately I’ve only had 3 rear wheel punctures in 37,000 miles so they aren’t that common (and only one was when I was on my own and I managed).

Part of the problem is that my Sora derailleur has partly seized. When we changed the chain two weeks ago James spent ages freeing it up but once again it doesn’t want to rotate at all – you can see here a photo of the offending bit with an allen key stuck in it (I was hoping to remove it to give it a bit of a clean but it was not possible to undo it).

18

This bit should swing forward and backward to help tension the chain; it’s stuck in its mostly forward position which means it doesn’t get out of the way properly when trying to remove the wheel (plus the chain is a bit slack when in the granny ring).

19

And the main reason we’re pretty gentle with it? The gear hanger that it is attached to isn’t as strong as I’d like (I have previously broken one) and I don’t have a spare. I shall get on the phone to ICE and order one before I have a proper go at removing this part but I think this chain tensioner doesn’t like not moving very much.

20

So I now have a trike minus its rear wheel and after a spot of lunch and a cup of tea it was time to attack the hub.

Here it is in all its glory.

21

First job is to remove the topmost bit which has the large yellow dot on it.

outer widget

This was dead easy – just rotate it anticlockwise and it undoes.

22

The next bit to remove is the cassette unit (the thing with the sticking-out arm).

cable arm

23

This just lifted straight off!

24

This was all seeming rather easy so far.

Next item is a little rubber ring thingie.

rubber widget

25

There were warnings on the Shimano info document to put this on the right way up so I carefully placed it on my bit of cardboard so I knew which way up it should be.

And this is what we now have. The sprocket and its carrier are now just held on by the Circlip Of Doom.

circlip

26

Right at the bottom you can see the notch in the circlip. This was all we had to help ease the thing off.

26 second one

James attacked it with a screwdriver.

27

And then with two…

28

Success! The thing was removed in just a couple of minutes.

29

Now the old sprocket just lifted straight off.

30

Here’s the mucky hub without the sprocket.

31

Old sprocket (on the left) and new on the right.

32

We cleaned the spindle etc of oil and gunk and random bits of hair! Much better.

33

34

The new, very clean sprocket and its carrier slotted straight on.

35

And now, the Circlip of Doom.

Taking it off wasn’t as bad as we had feared, putting it back on was a bit of a struggle.

We got it started OK.

36

And then you get to this point – we had to nudge it down so that it was on the very bottom of the pile of things on the spindle. You can see the two ends of it indicated by the arrows – not there yet!

37 with arrows

And here’s the pic without arrows.

37

Almost there!

38

Did it!!! Only took about ten minutes.

39

So now it’s easy putting it back together – first the rubber ring thingie (that I had kept the correct way up). I cleaned it up a bit before replacing it.

40

Before I put the cable cassette thingie on I decided to give it a clean.

41

Couldn’t get all the gunk out so we took it apart (two tiny screws) and that helped a lot.

42

43

Once screwed back together again, we just had to line up the red dots on the carrier and the spindle and it all went in place. Then it was lining up the yellow dots for the outer metal widget and everything clicked into place beautifully.

44

A side view of the lovely clean sprocket!

45

Now all we had to do was put the wheel back on the trike. This went better than I had expected (well, I got James to help me from the beginning).

The difficulty (apart from fighting with the derailleur/chain tensioner and lots of mucky chain) is ensuring the arm thing is in the correct place. It has a real tendency to twist itself into the wrong position and get stuck. We managed to overcome its perversity this time without too much hassle.

Once the wheel is firmly in place we add the green and the blue non-turn washers either side, then tighten the bolts each side of the axle.

And then the last thing – to attach the gear cable! This involves once again sticking my finger underneath to rotate the top widget thing (with the yellow dot on) to bring it round so that the hole for the cable widget is there and I can slot the cable in. Then it is slowly released and all is done!

46

47

I haven’t had a chance to test my new sprocket except for cycling across the front lawn (about 10 metres) but the chain didn’t skip for that distance so it looks like it’s been a success!

[EDIT] All works very well! Took it out for a 26 mile ride today and the new sprocket works excellently [END EDIT]

All in all this was a pretty painless task and not as mucky as I suspected either.

The entire kit that I have removed is available to buy separately for under £14 so I think next time I’ll treat the trike to a new one of these too.

all parts

9 Comments

Filed under Alfie the Trike

Mudguards – a possible anti-rattle modification?

Those who have read my previous blog post 10,000 miles of slow sprinting will be in no doubt that I get irritated by rattling mudguards.

Tony Collins posted a couple of comments on my blog suggesting a possible fix for this. So after procrastinating for ages (mucky mudguards and annoying rattles are just a pain and it’s never quite the right moment to sort ’em out!) I finally decided to get round to it on the penultimate day of the year. I had already reached my year’s cycling target of 8,000 miles so had no excuse not to fiddle with the trike.

Fortunately for me in my several years of trike ownership I have become on very good terms with ICE and, having previously destroyed a couple of mudflaps and complained to ICE about them, they had sent me a little package of replacement mudflaps and nuts and bolts. I had used one of this package but still had three left (clearly they had already decided I was going to continue in my mudguard-destroying ways). Tony Collins had sent me a parts list of the required nuts and bolts but I was just able to fetch my little parcel from ICE from the shed – bonus!

So here are the three mudflaps and three sets of nuts and bolts

DSCF8064

A close-up of the nuts and bolts.
DSCF8066

As it happens I have managed not to tear off any of the mudflaps in annoyance this time (I learned my lesson when I did this on the Trice Q and ended up covered in mud the next rainy ride – those flaps do make quite a difference!) so I didn’t need to use the replacement flaps. What I was planning to do was to put a second bolt through the flap lower down to keep it in place (they are currently able to rotate from side to side a little).

Undoubtedly there’s a reason that they are not bolted firmly in place; however, they do tend to get rattly over time and the only way I can stop the rattle is by wrenching the flap to the side so it’s jammed tight and doesn’t move and then it’s quiet. So a second bolt ought to hopefully help. We also decided to liberally apply some glue in the hopes that that would also quieten things down a bit.

Now, before I started the job I needed to give the mudguards a good old clean, so I had them in the shower with me after my morning’s cycle ride and made sure they were as clean as I could get. As you can see from the picture below, I have already had to replace one mudflap (which was torn off when wheeling the trike up a kerb) which is why ICE sent me the parcel of spares. However, it’s also clear that the nuts and bolts are less keen on their watery environment. This one has rusted in place now (it’s been on the trike for about a year) and it’s impossible to undo with an allen/hex key as the top has all just crumbled.
DSCF8068

DSCF8072

This is the other side which still has the original rivet. that looks much better visually but this side is much more rattly.

DSCF8076

Here you can see a previous modification I undertook to reduce the rattle slightly – a small piece of plastic milk bottle stuck around the inside of the rivet to reduce the space. It worked surprisingly well – and indeed has lasted several months just jammed in place like that!

DSCF8079

However, plastic milk bottle bits don’t quite have enough oomph to overcome a determined mudguard rattle and seeing as it’s winter and Alfie has to wear his mudguards all the time (it’s been rather wet in England!) I really needed to do something more permanent and functional.

Here was the operating table set up ready to go!
DSCF8082

My husband is a handy chap to have around as he has a lot of DIY equipment and, more importantly, a significant amount of common sense about how to do these things.

He gathered a bit of kindling from our log pile, clamped that to the table and then started to drill a hole through the rubber of the flap, through the metal of the guard and then the other side of rubber. To make things less prone to move around we stuck some masking tape over it all.

DSCF8084

Here it is after the first hole was drilled.

DSCF8086

Without the masking tape – you might just see daylight through it!

DSCF8087

DSCF8088

At this point we decided to put some glue around the mudflap to hopefully keep it in place more effectively when on the bike. James found his tube of Evo-Stick glue and, after a bit of a battle with it to unblock the nozzle, we managed to squirt glue around the mudguard and generally over my fingers (I’m still picking bits of dried glue off my hands two hours later!)

We then tried to push the nut through but the hole was a bit too small. Should have checked that one beforehand!! Time for some more drilling (spot the glue oozing out of the mudflap/mudguard interface!).

DSCF8089

The hole was now big enough and I just had to put the bolts through (with a washer each side).

It was difficult to know how much to tighten the bolt up. Too much and the rubber all gets twisted, too little it might all shake loose. As it was the mudguard was deforming and the glue was becoming quite obvious so this isn’t as attractive a solution as I had hoped.

DSCF8091

Anyway, I did it up to what I thought was a reasonable tightness and then we dabbed some threadlock on the exposed nut head of the bolts. This is where lots of water will be flying around so it’s a pretty hostile environment overall.

DSCF8094

It looks better on the outside, although you can still see where the bolts have deformed the rubber (and our glue is very evident). I might put a bit of insulating tape or something over this little pocket once the glue has dried.

DSCF8098

So after the glue had mostly dried I re-fitted the mudguards to the trike.

DSCF8112

DSCF8108

So, does it work? Do my modifications, which have made the mudflaps less attractive (glue-filled pockets for the whole world to see), pass the “Does It Rattle Test”? I don’t know, I haven’t been out cycling yet, but here’s hoping! I shall report back tomorrow…

Update
It works! No rattling!

I’ve now cycled 25 miles with my newly-furbished mudguards and it seems that the rattling issue has (at least temporarily) been fixed. Hurrah.

I can now hear the rattling of my bell and the noise of the chain through the chain tubes seems louder…

Leave a comment

Filed under Alfie the Trike, Cycling

10,000 miles of slow sprinting!

Today Alfie the ICE Sprint passed a very significant milestone:

Alfie's Mileage Anniversary

So I thought it would be worth writing about how he has survived the last 17 months and what sort of maintenance he has needed in that time.

Statistics for the first 10,000 miles
Firstly, some statistics and information (for those of you who like that kind of thing). This also shows that I rather nerdily keep a track of lots of info about my cycling.

This is what the expenditure on the trike has been over his first 10,000 miles
Trike costs

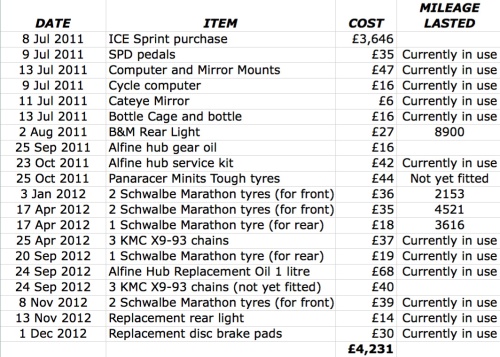
And this is how long the various consumable parts have lasted. Those items still on the trike don’t have a mileage beside them. Also note that I changed the supplied Marathon Racer tyres to normal Marathon ones that I already had (and had used for about 1000 miles) after about 500 miles as I got two punctures on the same day. I’m not a fan of the Marathon Racers, they are too puncture-prone for my liking. The Marathons seem much better. Marathon Pluses have too much rolling resistance for me and I don’t mind fixing the odd puncture.
How long do things last

And of course I have kept a record of the punctures I’ve had since I got Alfie – more than I got with the Trice Q but I think it’s a fairly random thing, although I’m surprised to have had two rear punctures in 10,000 miles as I only had one in 25,000 miles on the Trice Q.
Puncture log

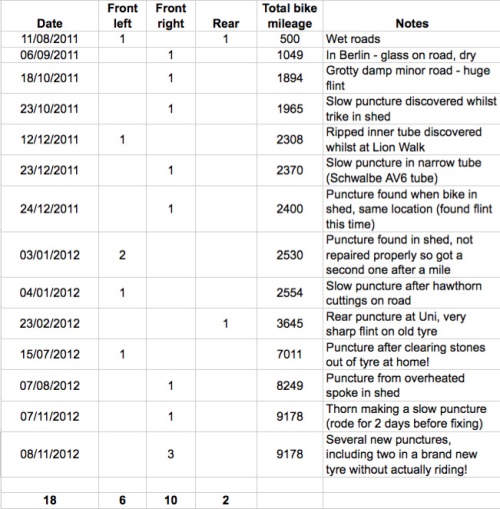
You’ll notice that five of those punctures have been discovered when getting the trike out of the shed at home. This is a good reason to have a spare trike for those times when you’re in a hurry and you need to take alternative bicycle transport!

How does Alfie look after 10,000 miles?
So now all those statistics are out of the way, how has Alfie survived generally?

The main thing to note about my cycling is that I go out for about two hours per day every day, whatever the weather. He gets washed down now and again, a bit of chain oil every few months or so, but that’s about it. This is not a trike that is kept in a nice warm house and serviced regularly, it’s an everyday workhorse that has to survive the worst of living in the countryside with mucky roads, deep puddles and an owner that’s often in a hurry to put him back in the shed and go and have a shower/cup of tea.

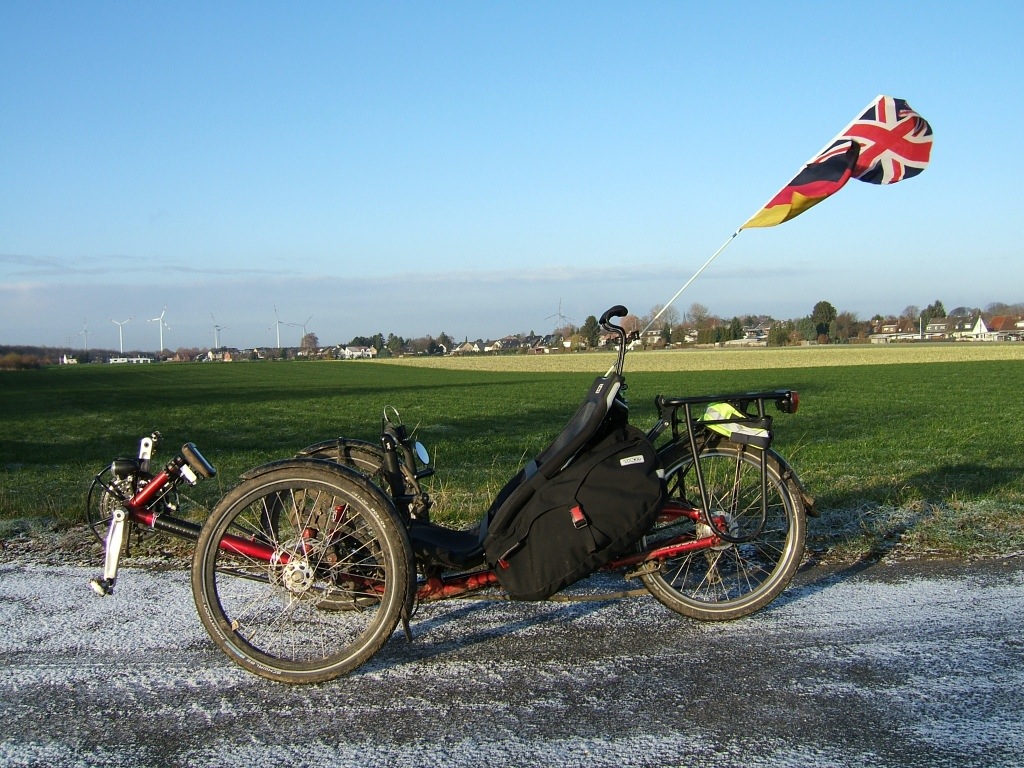
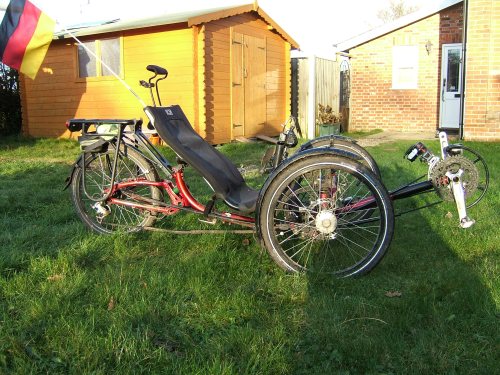
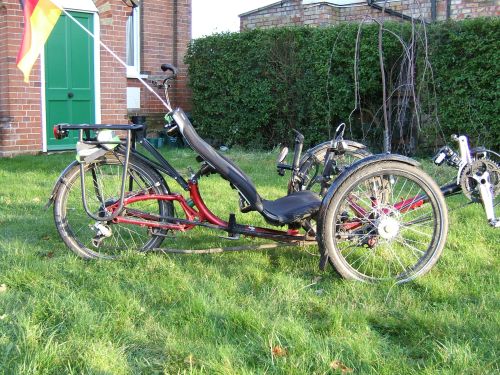
As I passed my 10,000 miles milestone today I decided to take some photos of Alfie as he looked when I got home (at 10,015 miles, 16,117km).

Here he is outside the shed waiting for a clean.
DSCF7960

DSCF7961

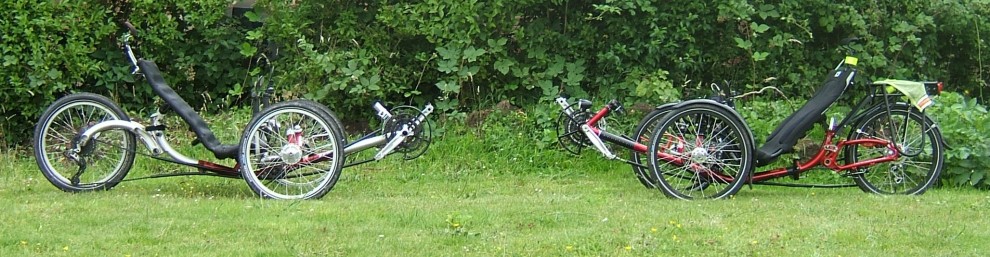
I took a lot of photographs of the various bits of the trike that do tend to get mucky in the rain. Here is the axle which has the dynohub cable and also the cable for the bike computer (wrapped around the bottom of the king post).
DSCF7964

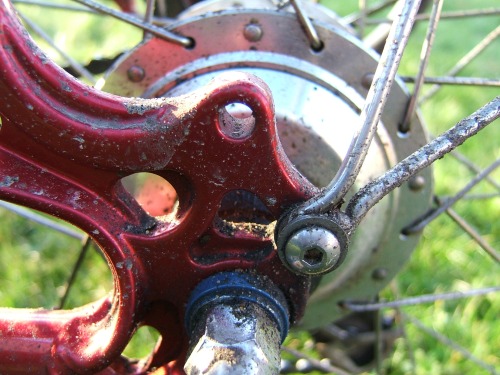
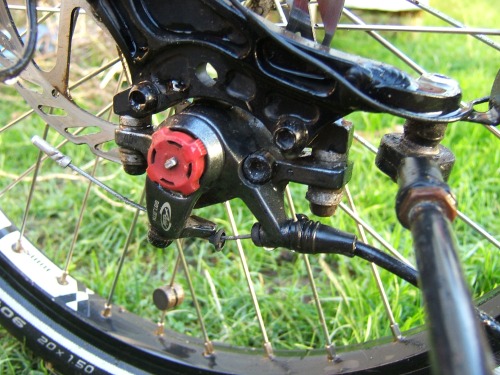
This is a view from the top of the left hand side disk brake. This brake is on top of the wheel, the other brake hangs underneath and gets muckier (thus I have already had to change the pads on the right hand side brake but not the left one).
DSCF7965

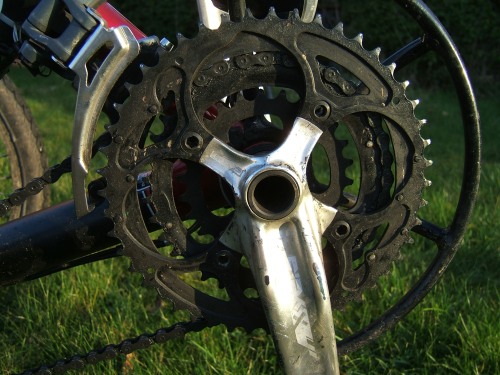
Front chainring still looking pretty good although the cranks have had the odd scrape and have some marks on them.
DSCF7967

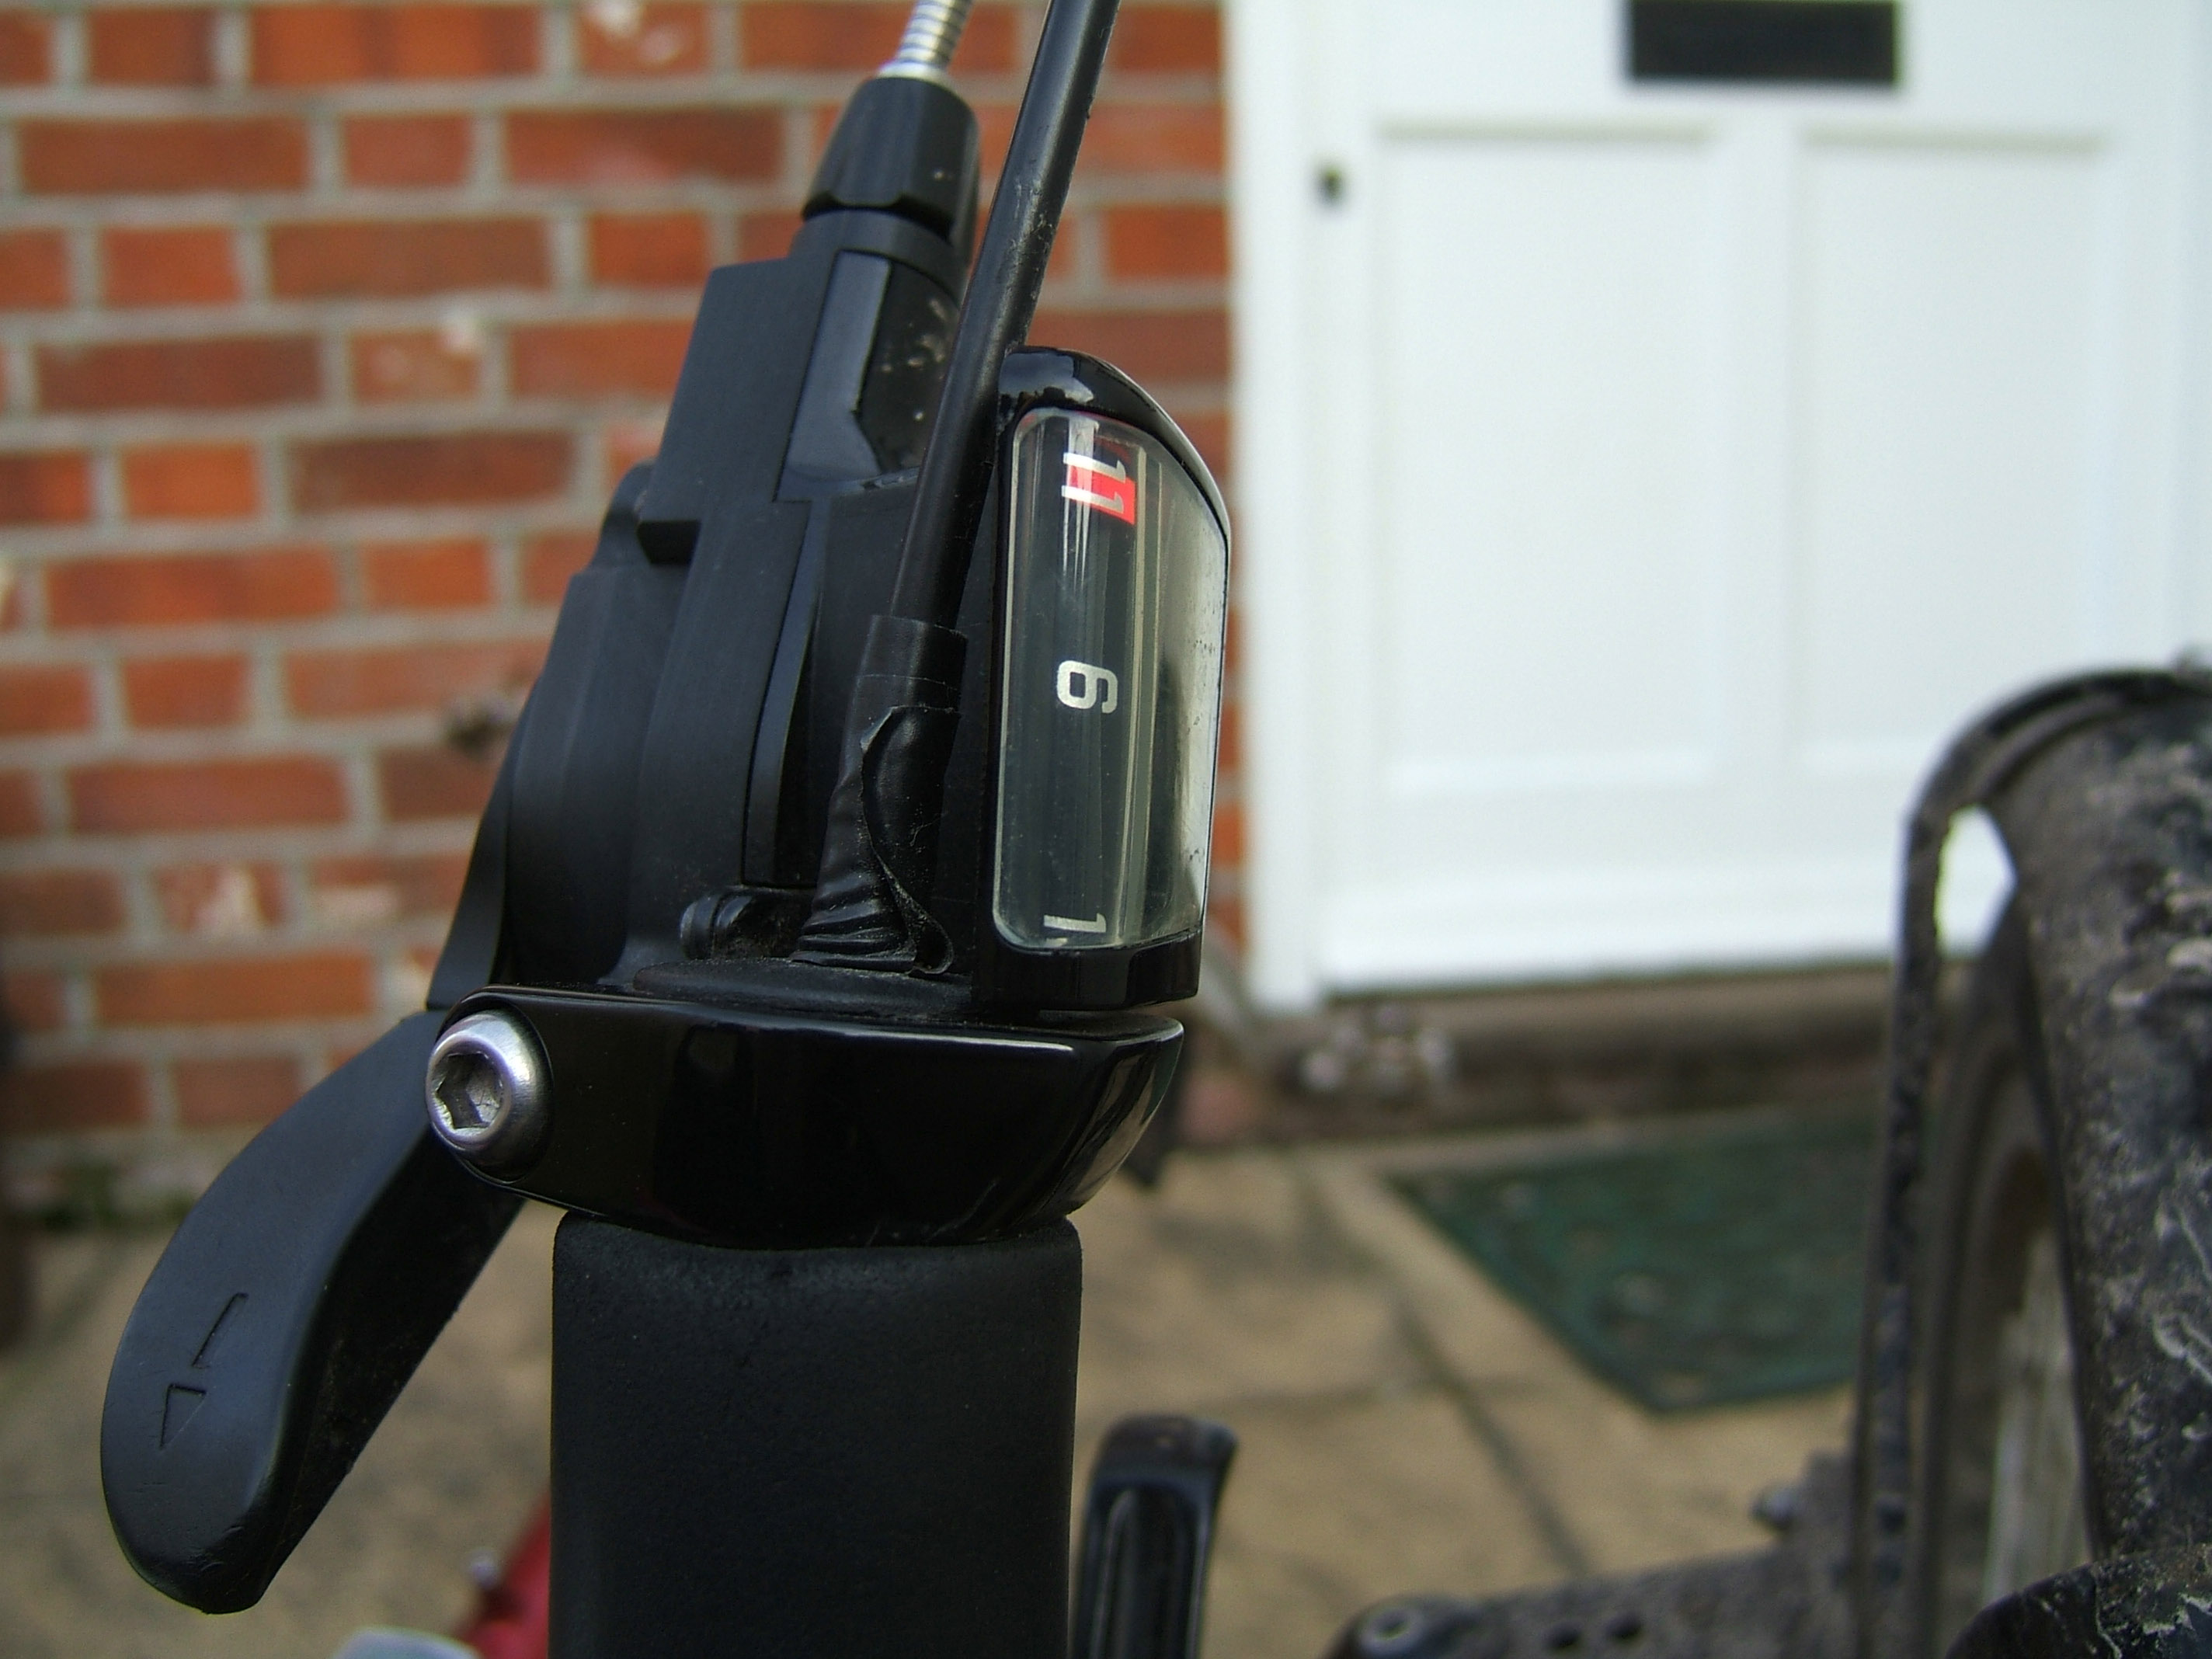
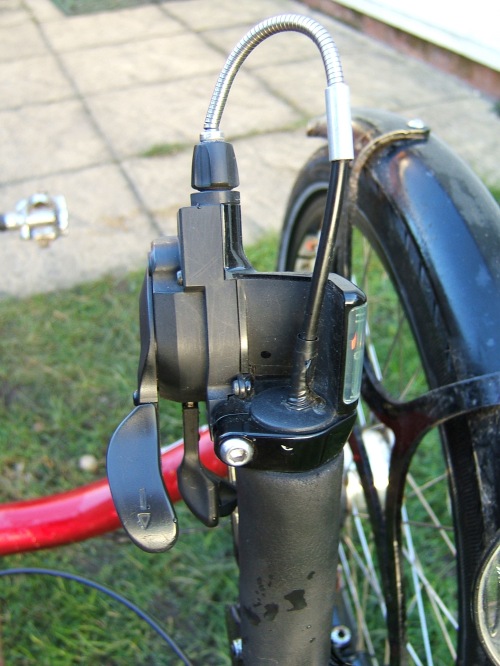
The Alfine trigger shifter is still working well, with just a slight scarring of the plastic on the down shifter after 10,000 miles of lots of clicks! You can see the gaffer tape wrapped around the cable where it disappears into the bar end stopped is wrinkling up where the cable tries to pull through. That was my repair on my Berlin to London ride so it’s survived six months OK!
DSCF7969

DSCF8004

DSCF8005

A lot of muck gets thrown up onto the handlebars when you’re riding in the rain. The screws holding the brake and gear systems in place on the handlebars are getting quite rusty – it will be interesting if I have to undo them in the future!
DSCF7970

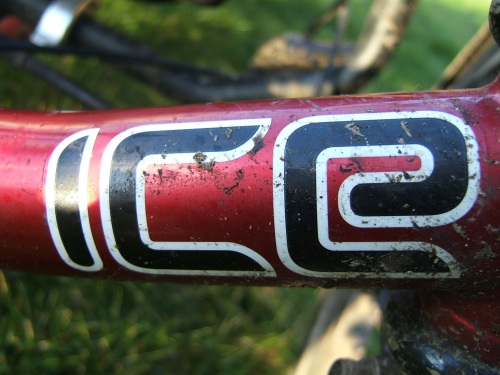
A mucky logo. Sorry ICE!
DSCF7971

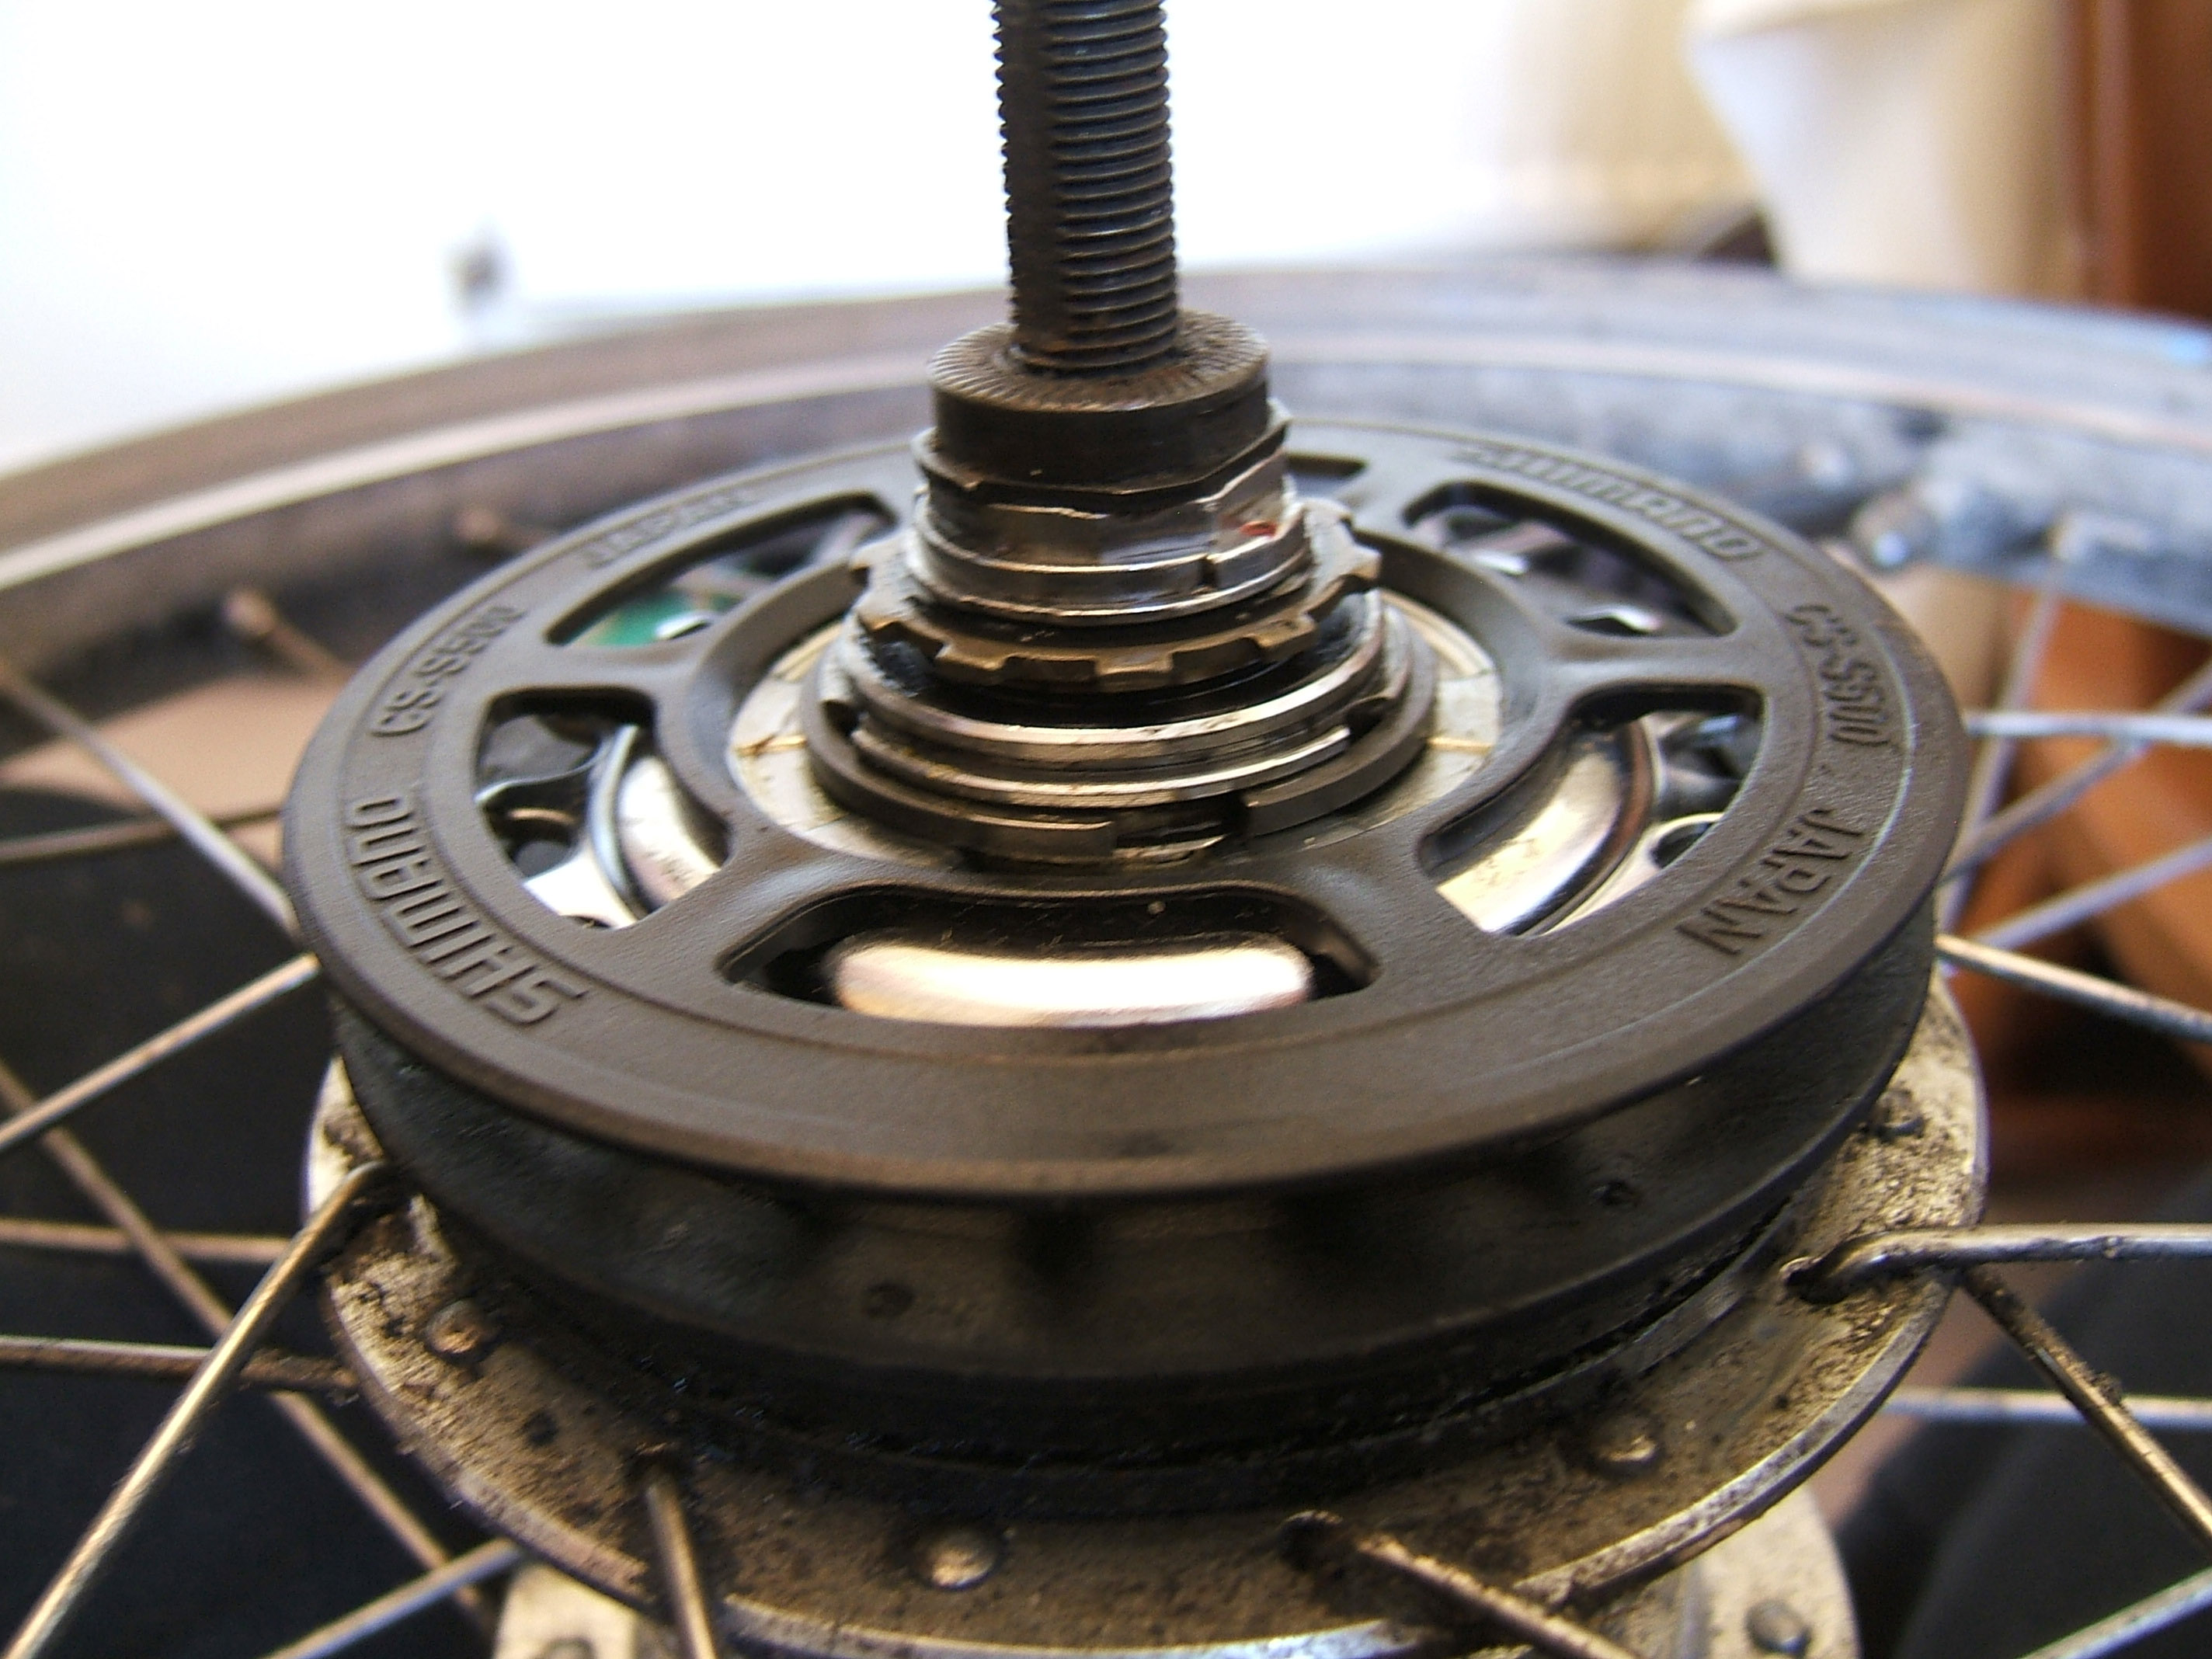
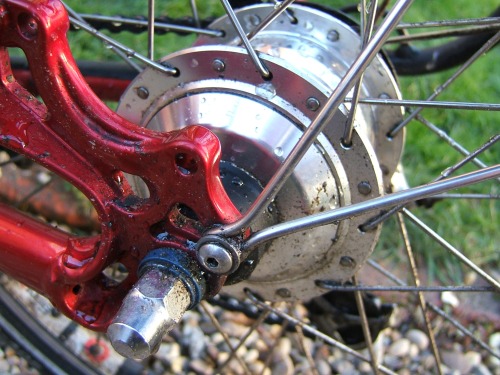
My Alfine hub gear gets more attention than the rest of the trike as it has its service every 4000 miles or so. When I wipe it the metal comes up lovely and clean whereas the dynohub has dulled in the last 10,000 miles. A better quality of stainless steel on the hub? Or perhaps it gets less road grot thrown up at it.
DSCF7972

A side view of the hub. Where the mudguard is screwed to the frame is a fantastic little pocket for bits of mud and grime that is very difficult to clean.
DSCF7973

The rear parking brake which hangs off the bottom of the back wheel gets the worst of all road conditions, periodically having a bath if I go through a big puddle. It doesn’t work as effectively as it used to but is enough to lock the bike in place when I pop into a shop or something.
DSCF7975

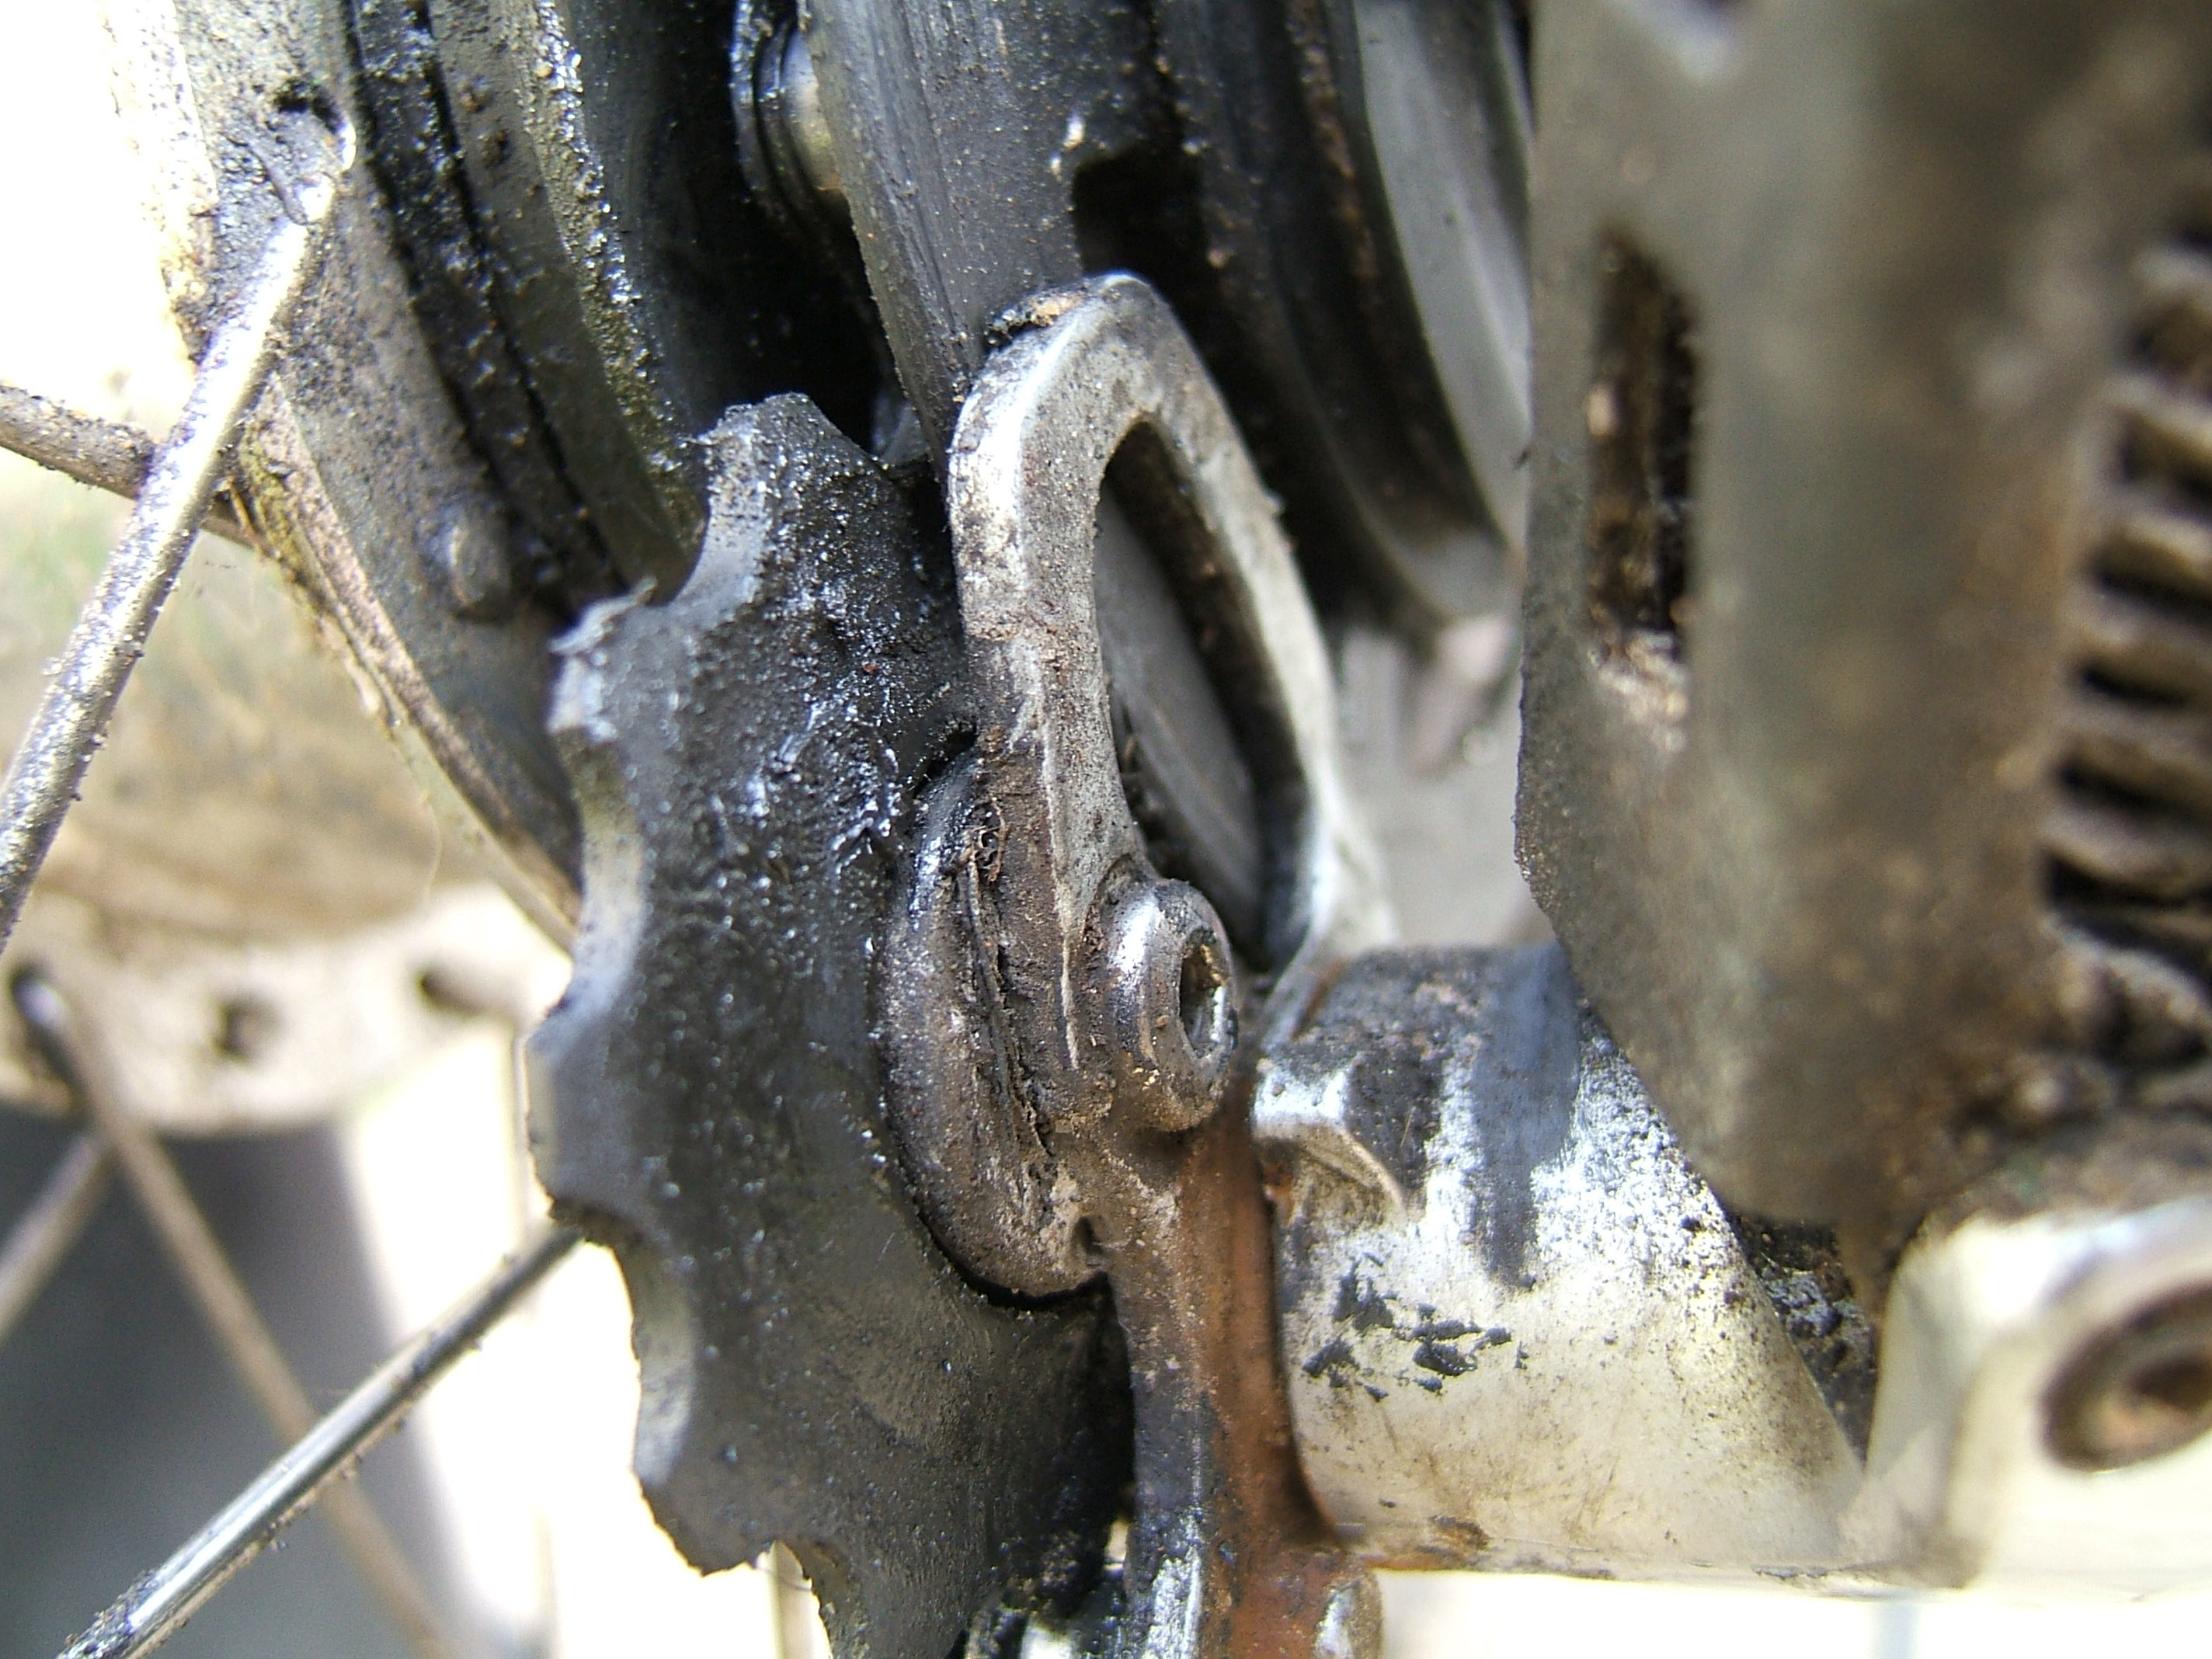
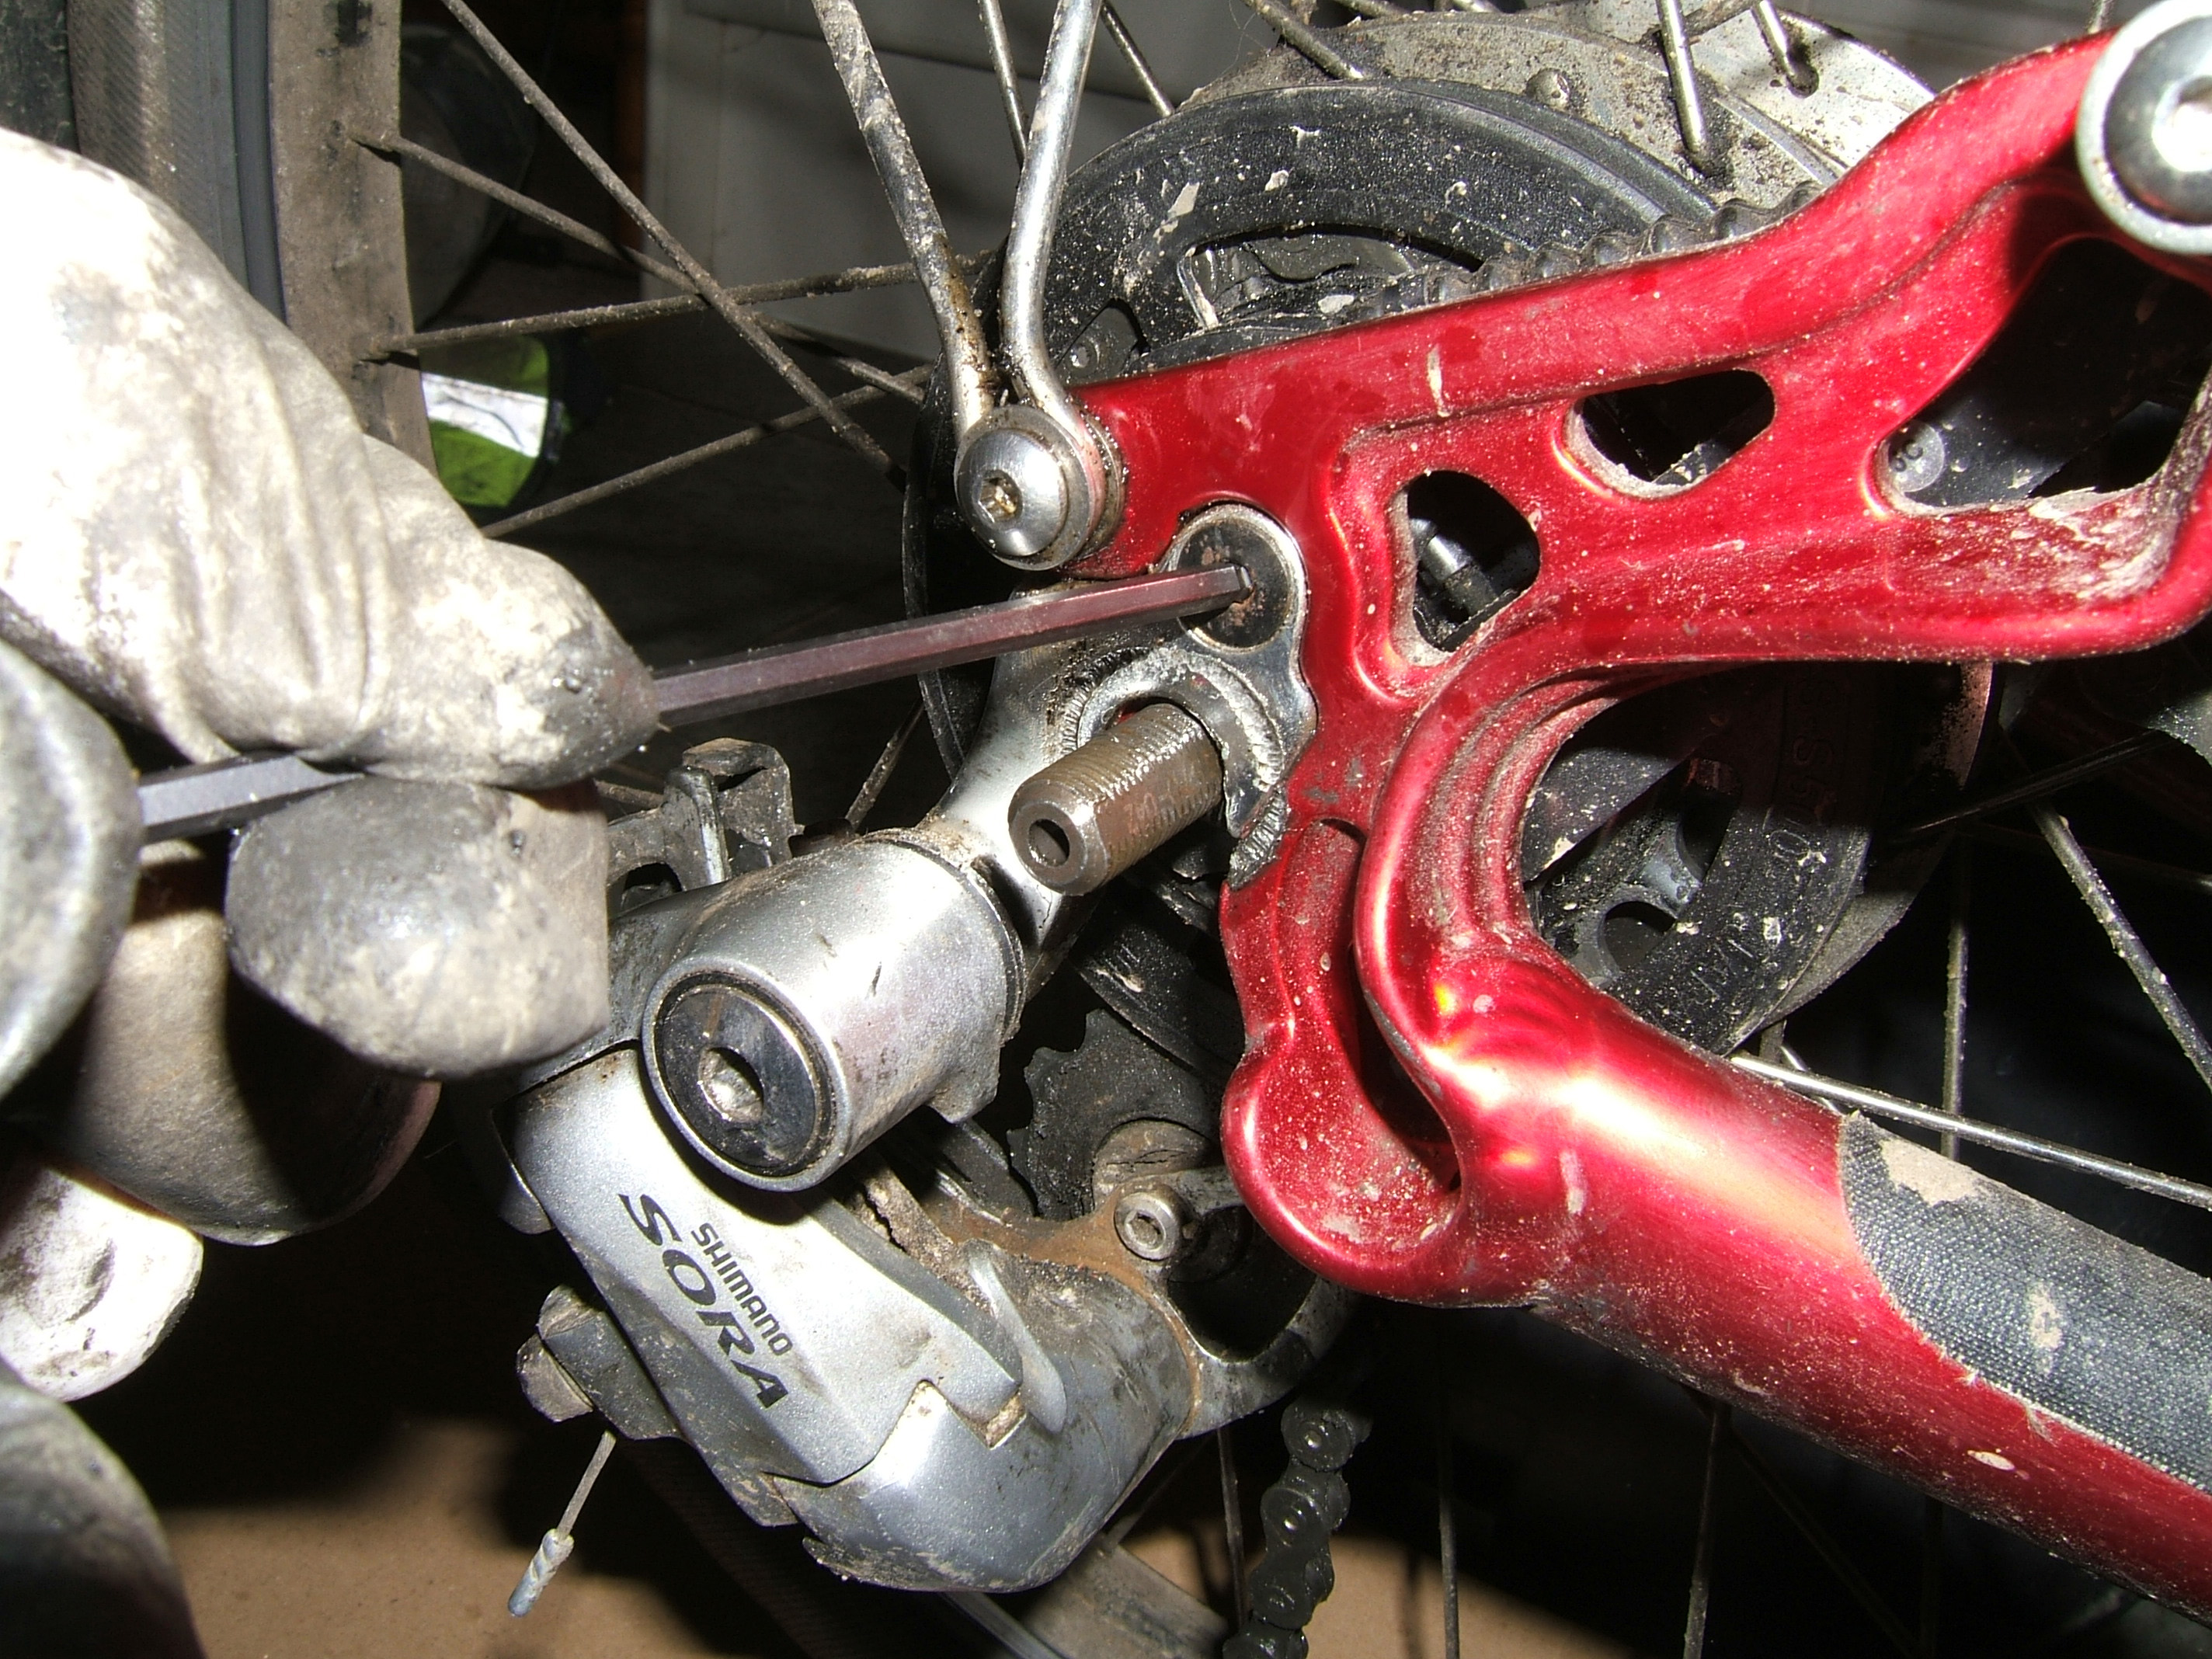
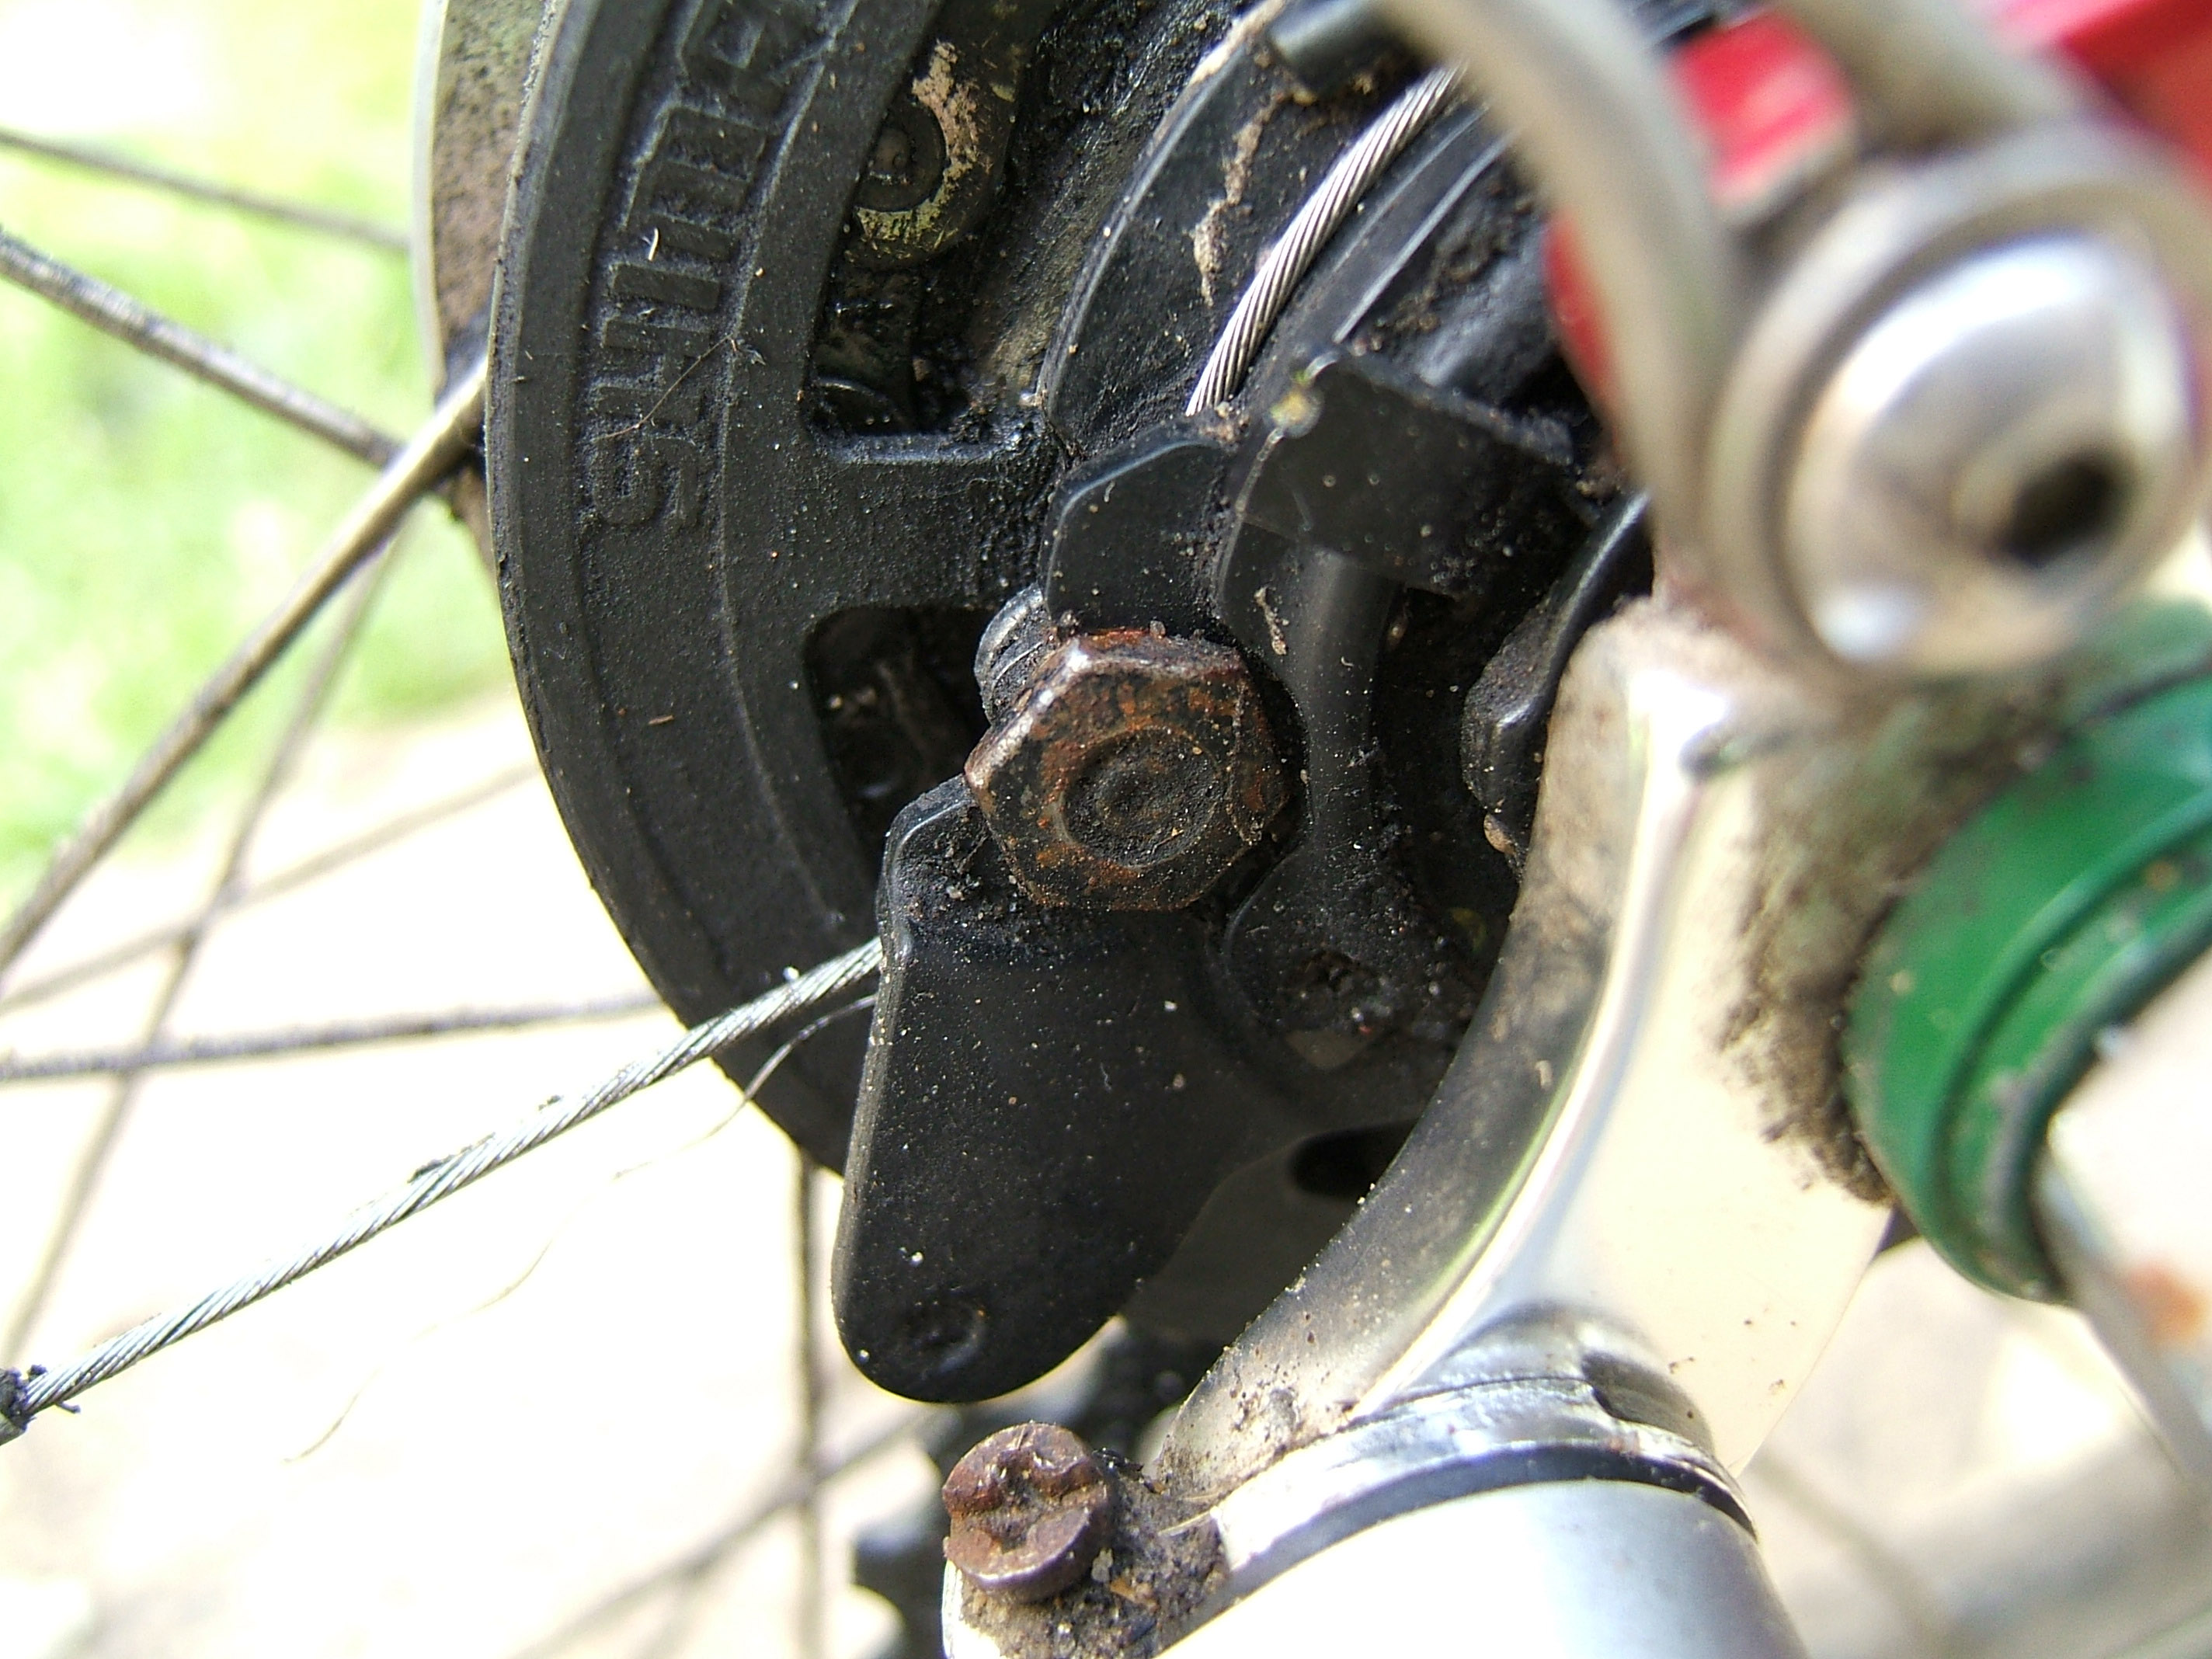
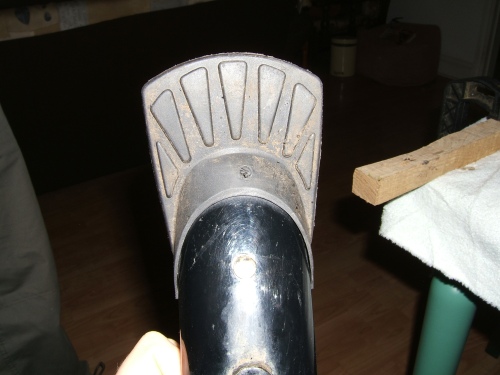
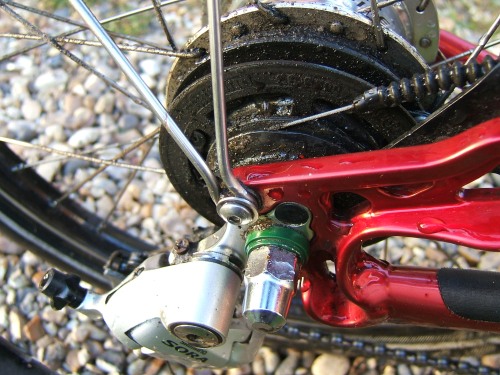
Now this is the only real problem that I foresee at the moment. This is the little mount for the bike computer on the front right wheel. You can see an allen/hex key socket in the centre of the picture – however this has completely rusted in place and it’s impossible for me to loosen it. I wanted to do so when I accidentally bent the arm of the mount and hoped to take it off and flatten it out. In the end I had to bend it back into place in situ and I hope there’s no other reason I ever have to undo this bolt as I think it may be Mission Impossible.
DSCF7976

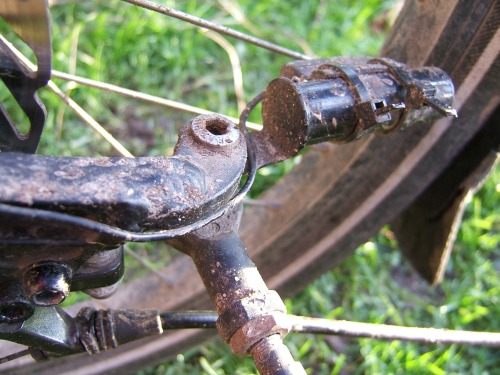
Another view of this completely stuck section – the bottom bit of metal is the right hand track rod which is how the trike steers.
DSCF7977

EDIT: One of the people who left a comment on this blog told me that the allen bolt at the top is not meant to be undone, you should instead undo the bottom bolt. So I had a go and lo and behold it worked! So this isn’t actually the problem I thought it was.

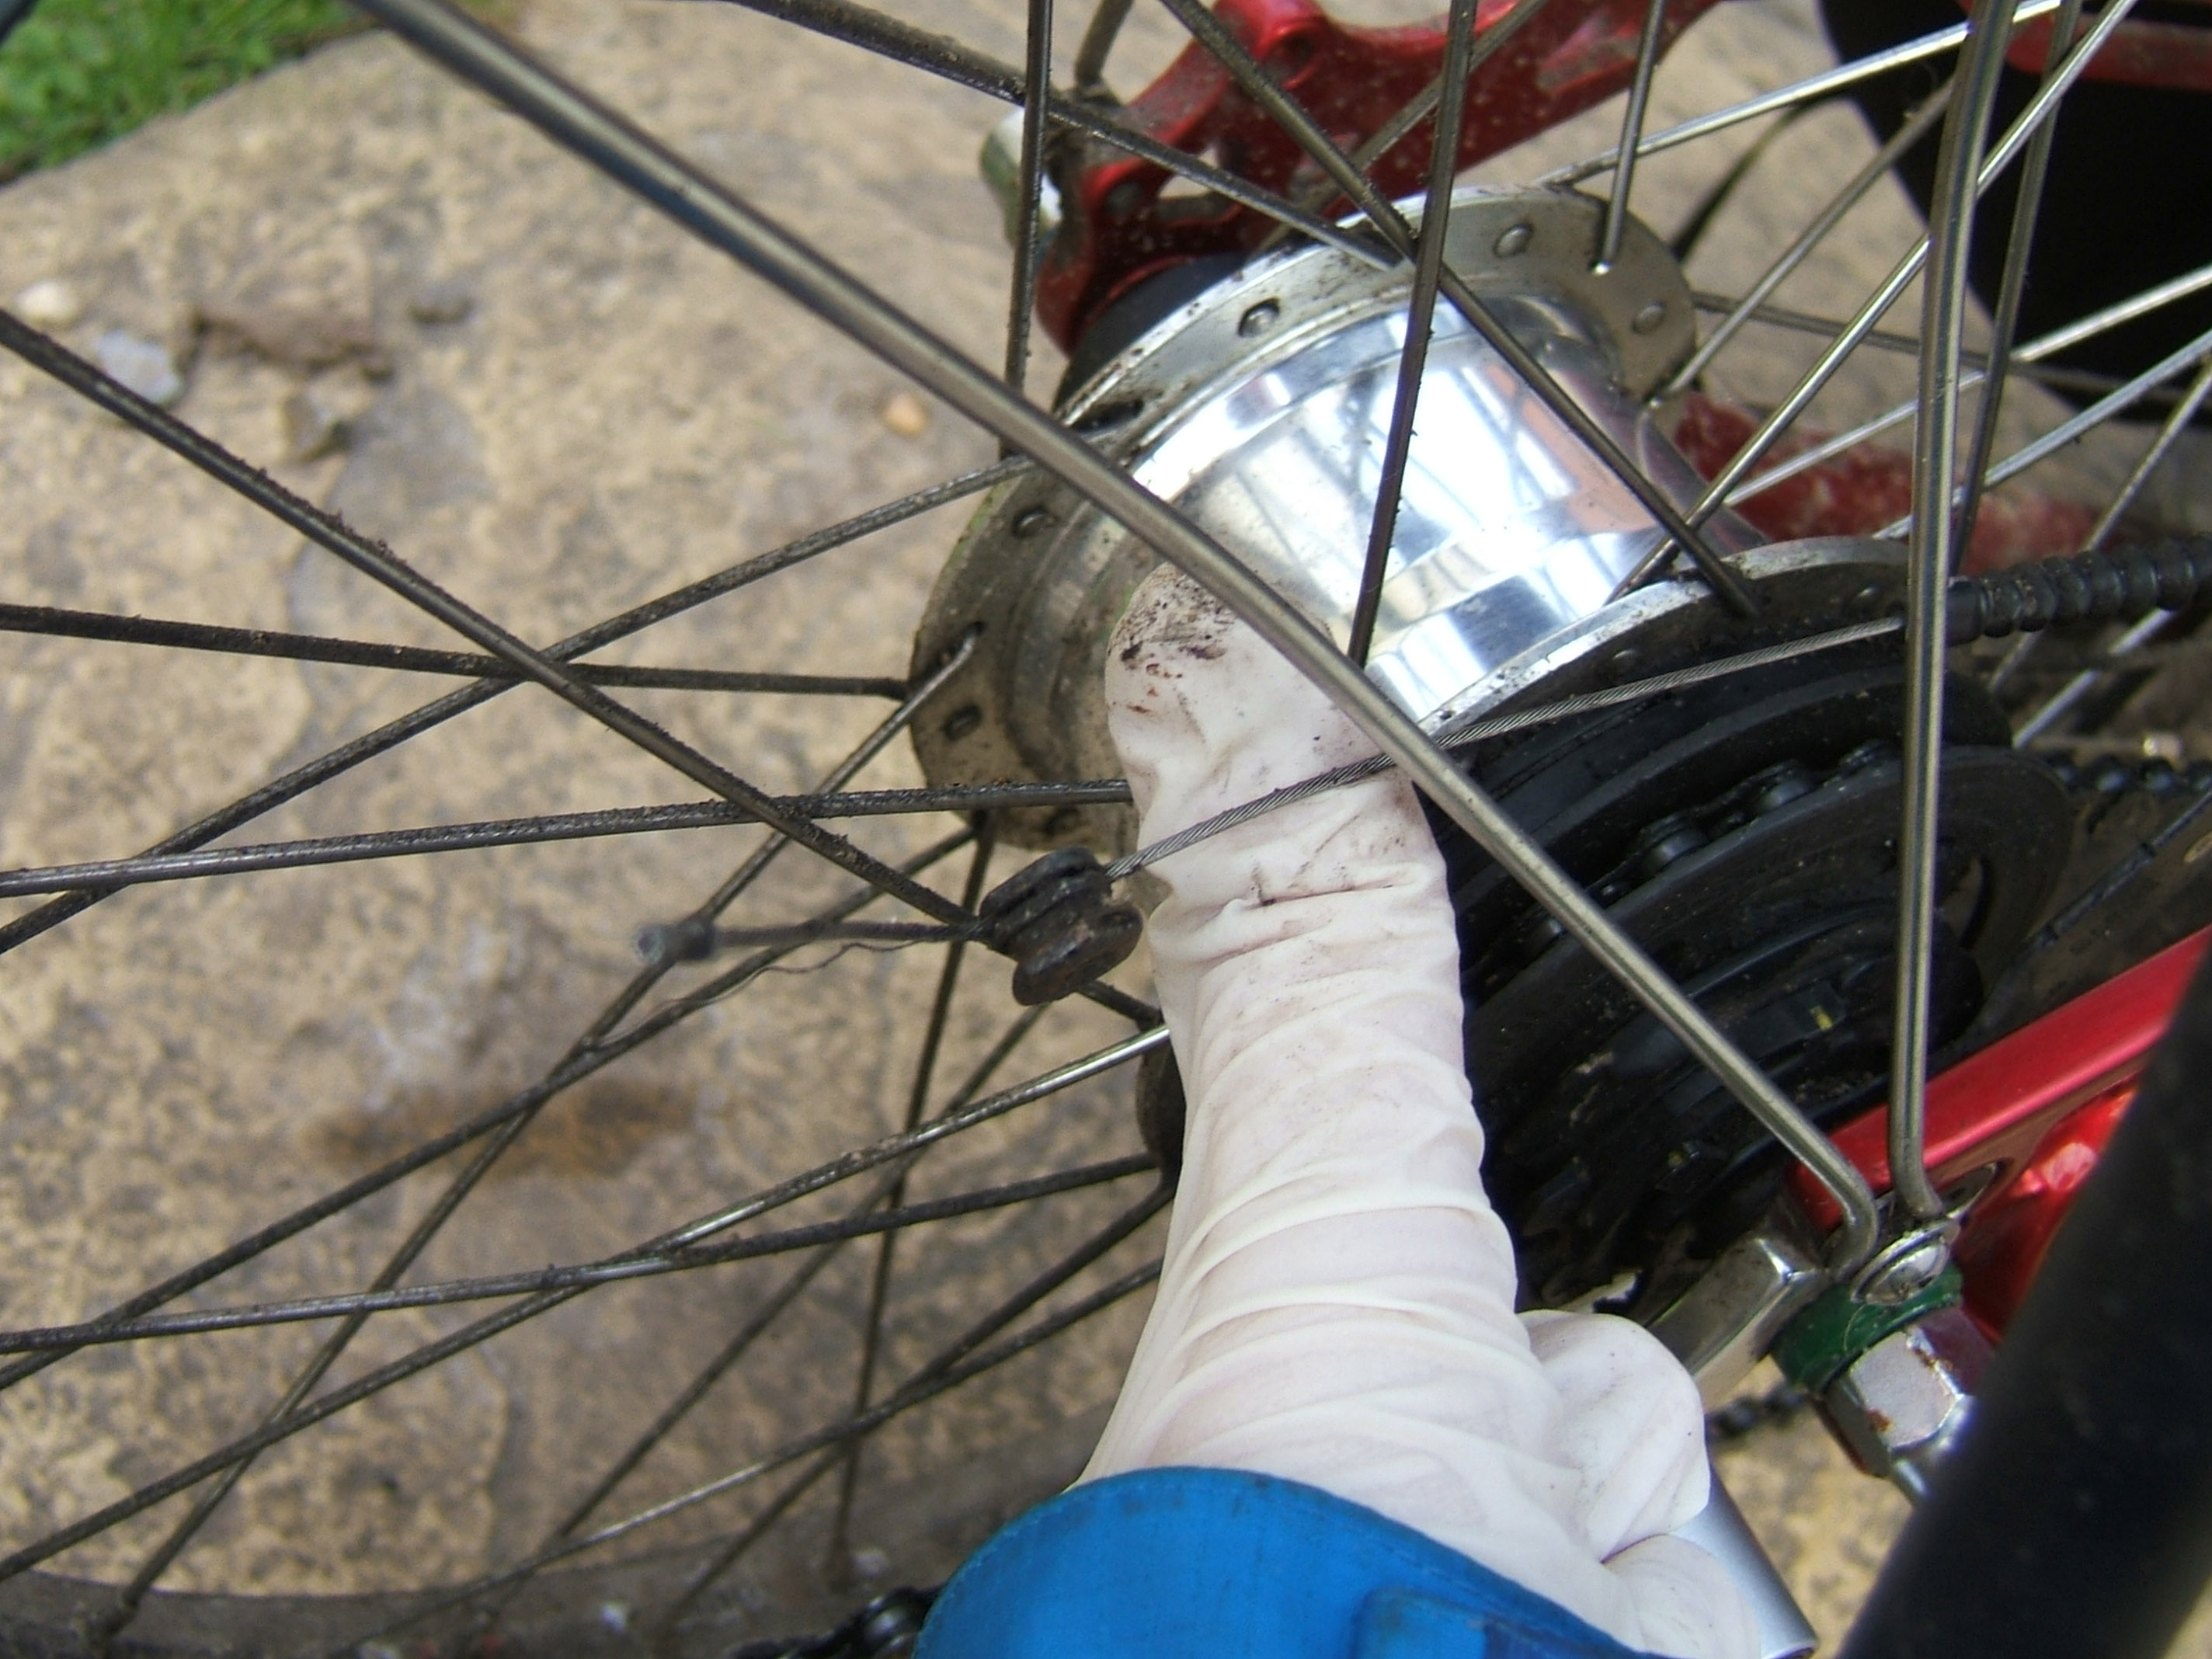
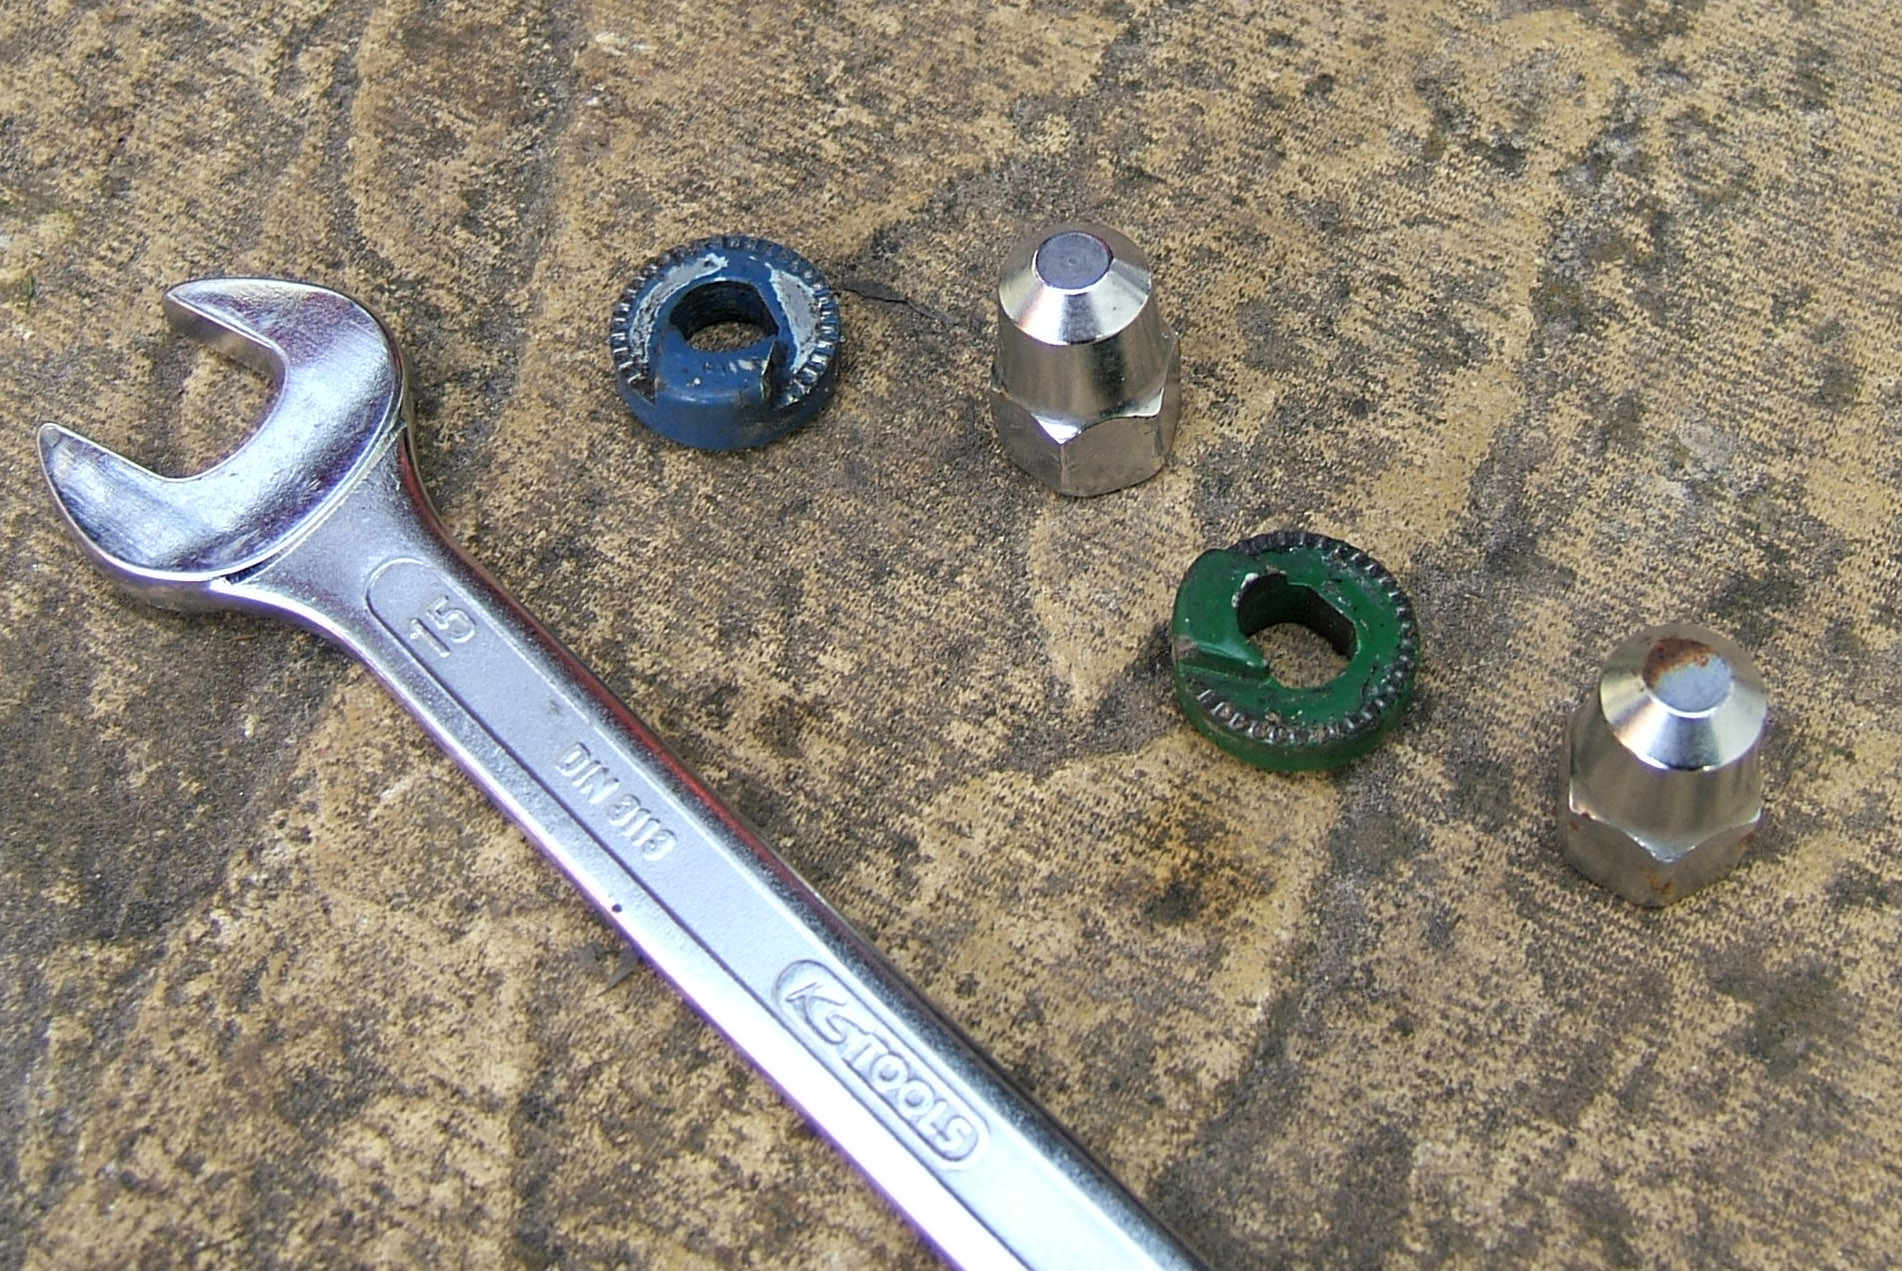
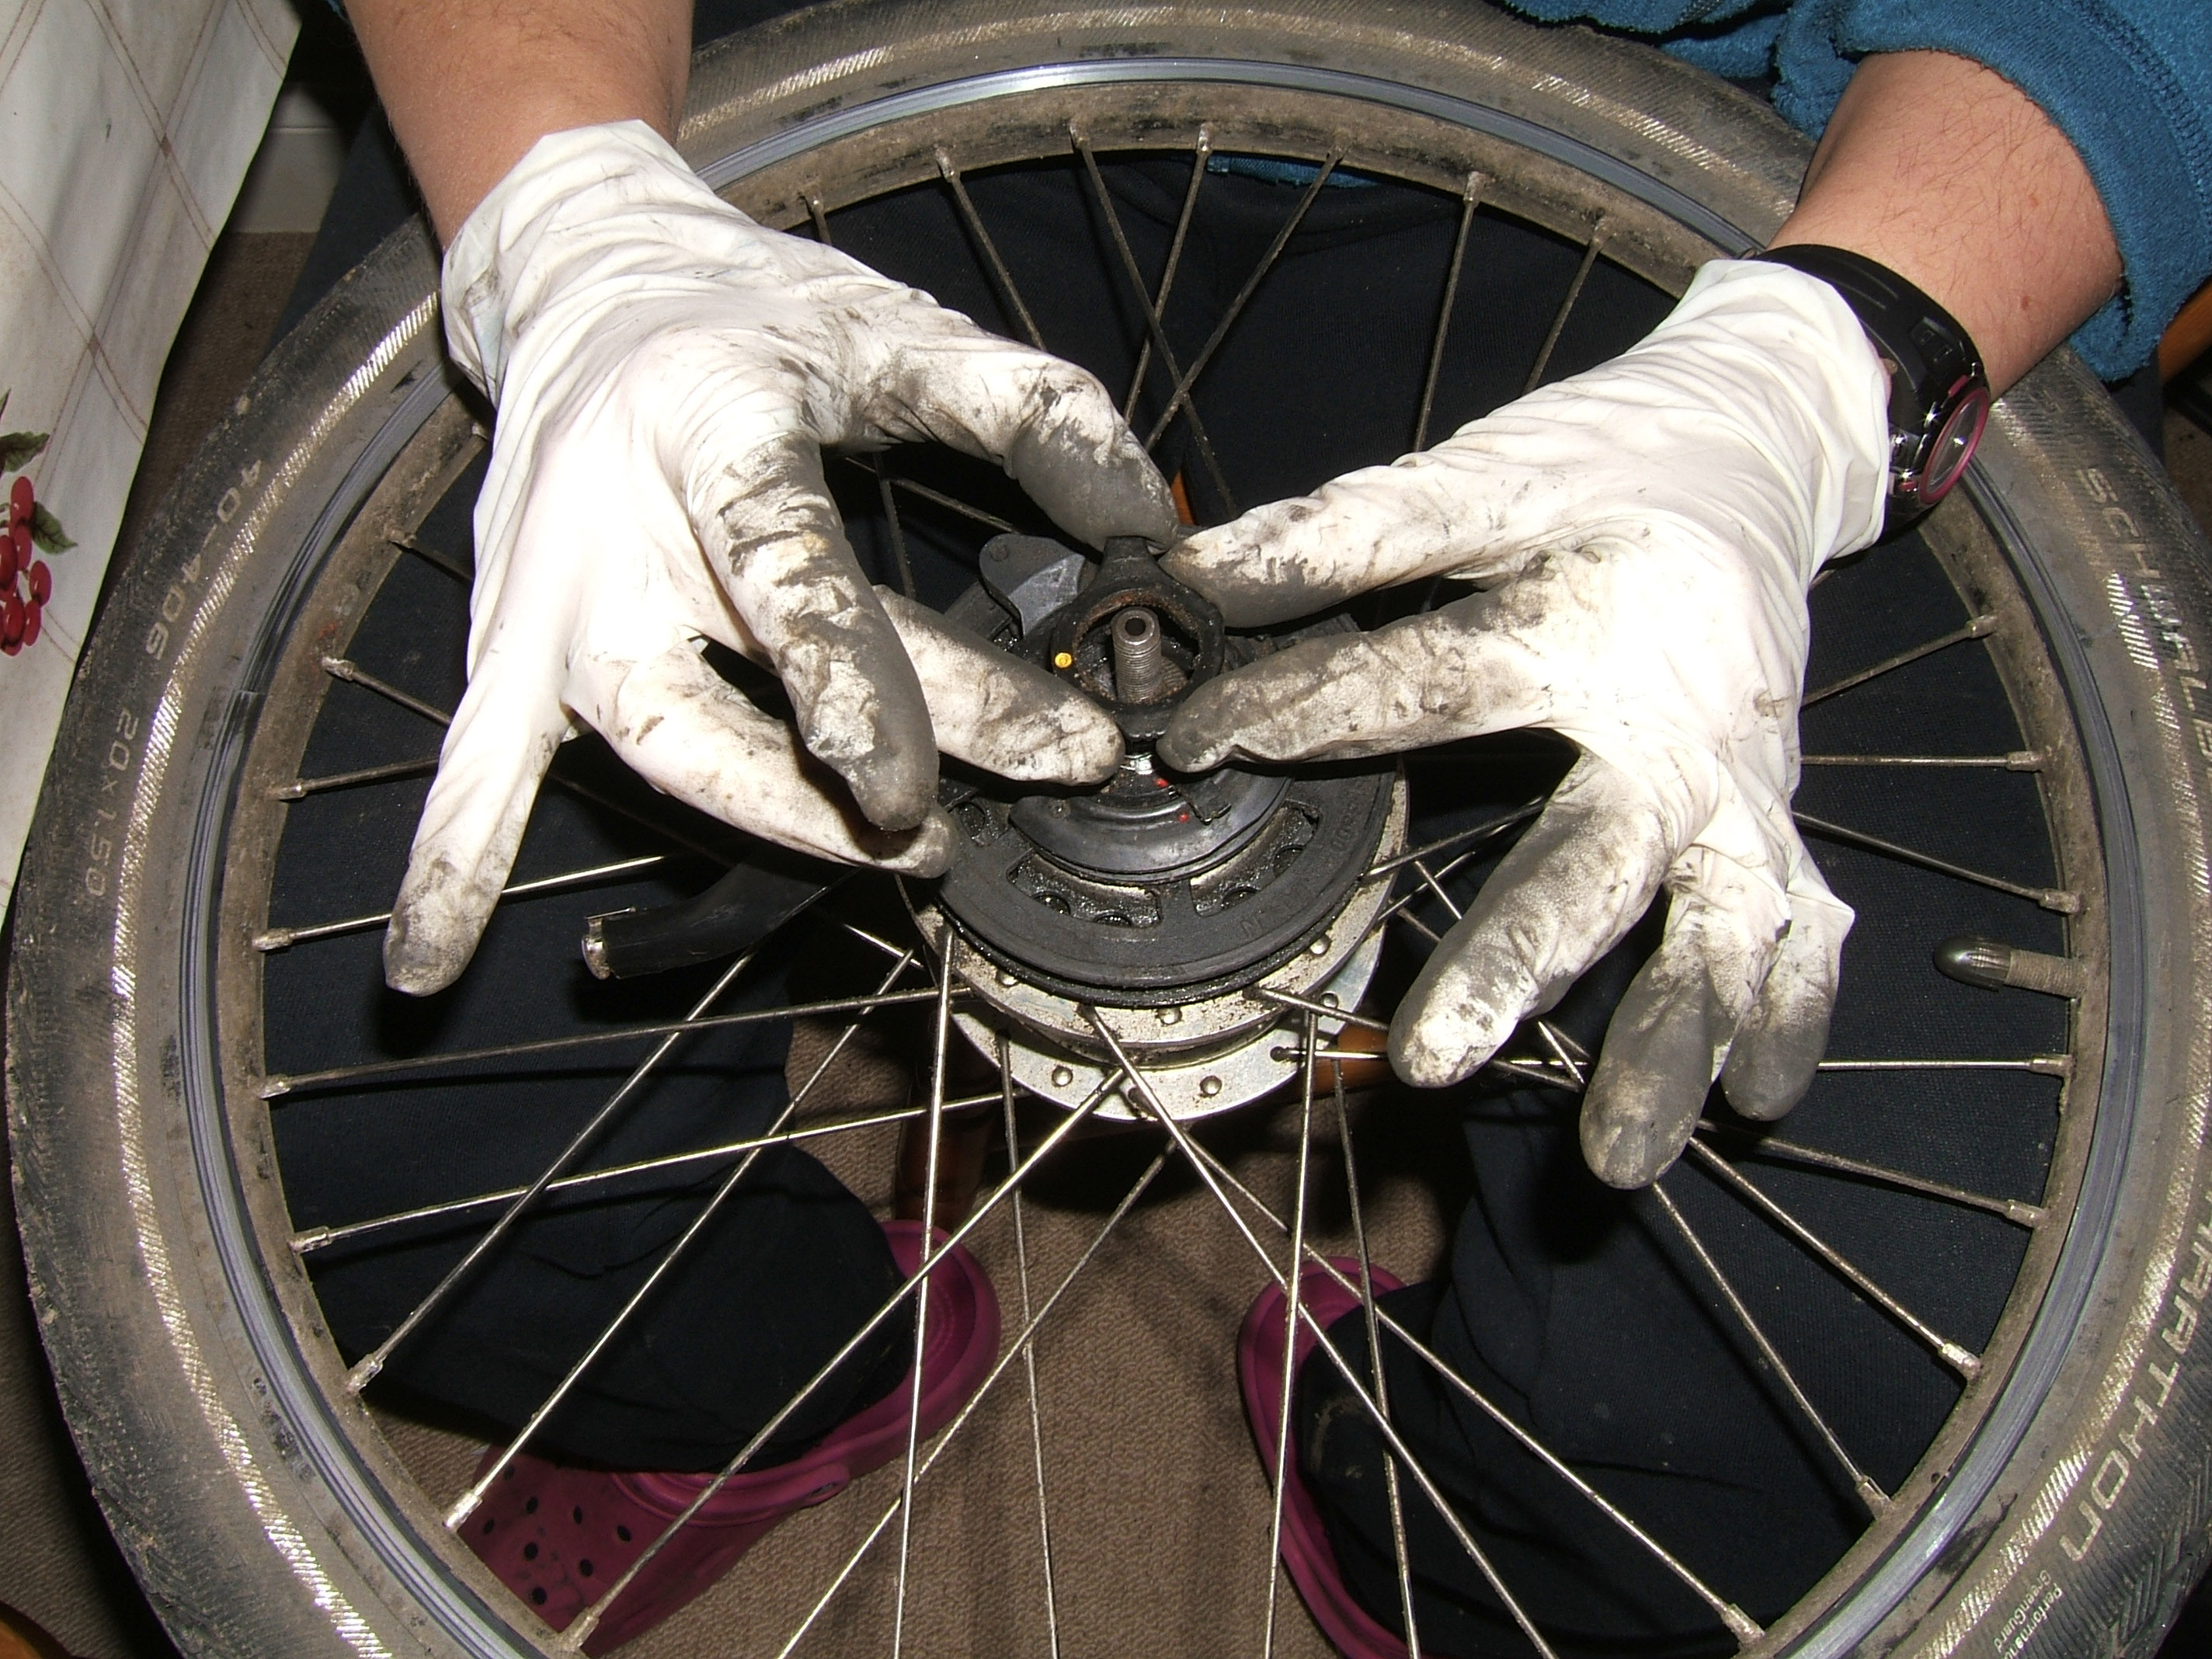
Here are some pics of me undoing this bolt.

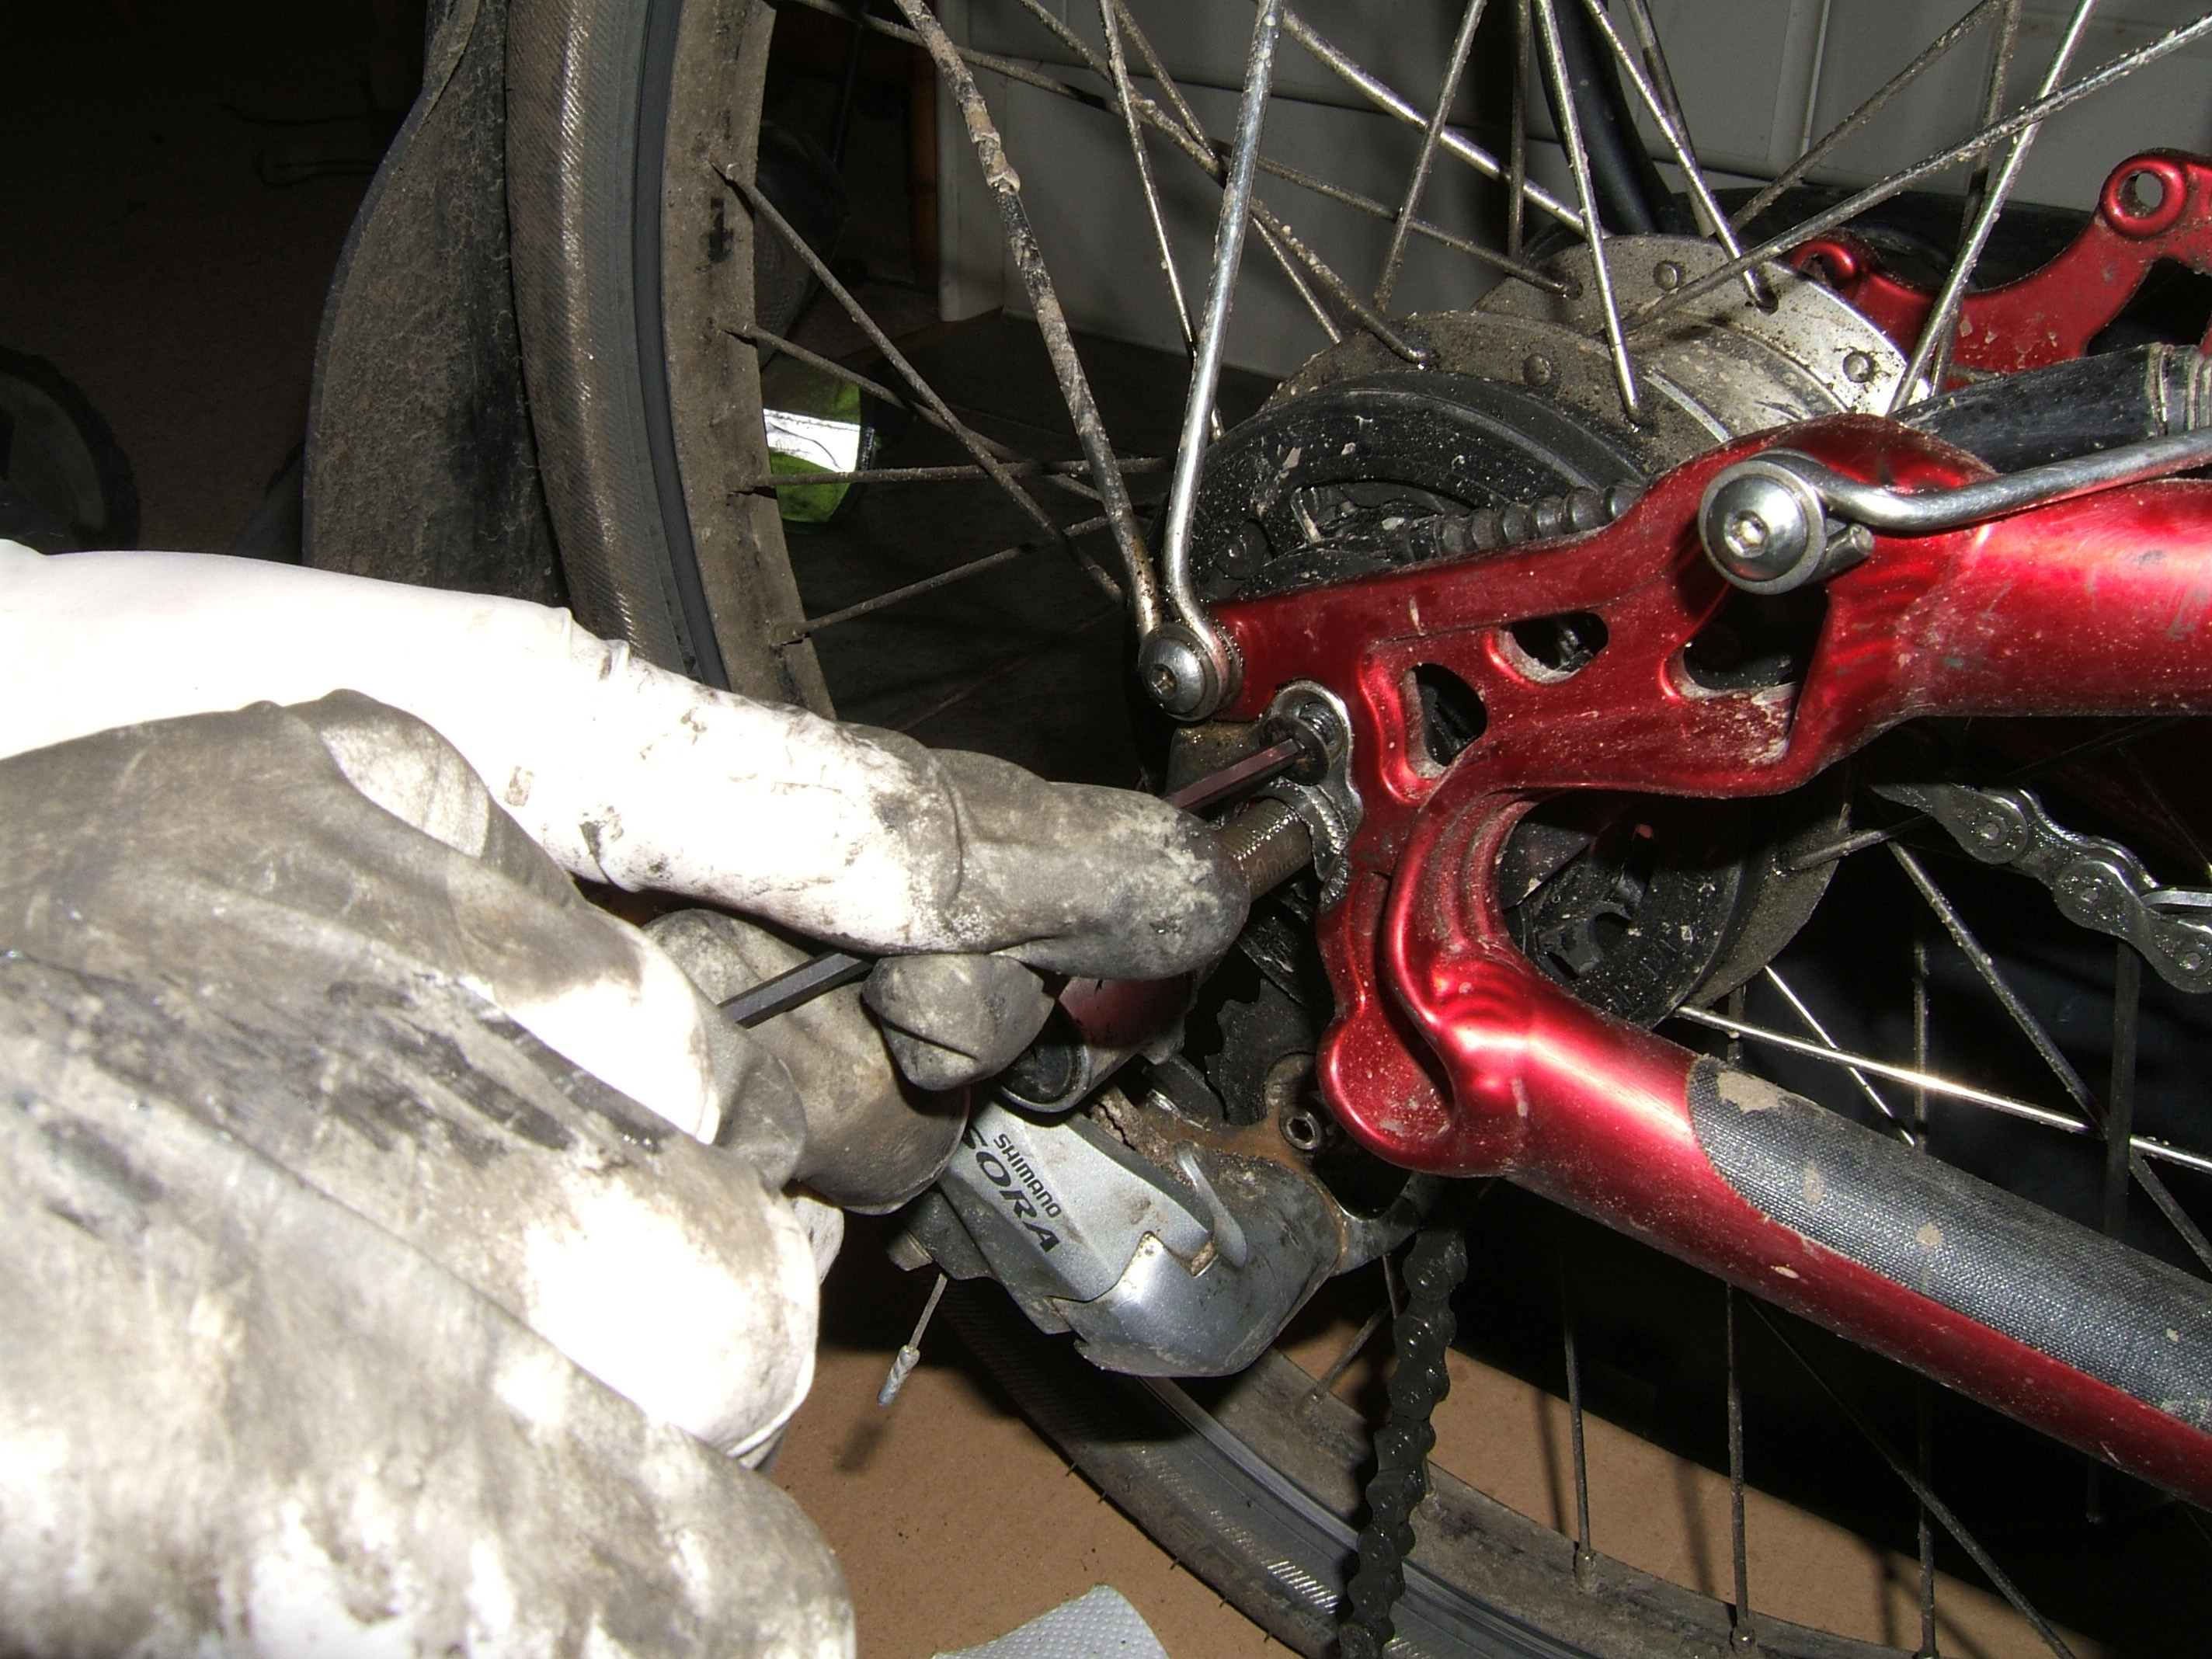
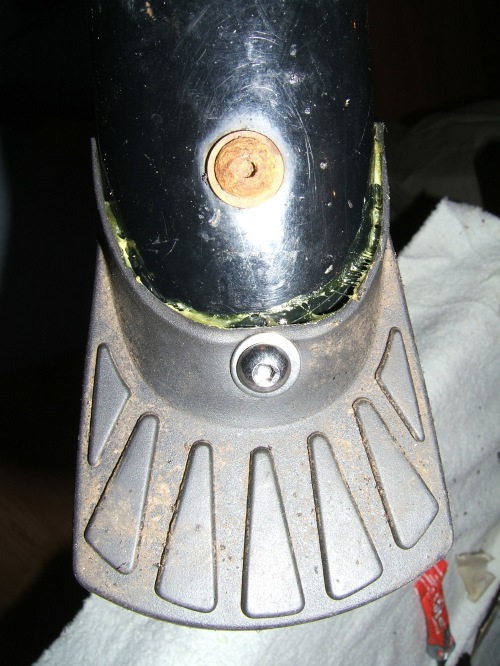
Firstly I had to scrape out some bits of mud and rust from the allen bolt hole (the trike is lying on its side so I can access this area; the brake cable rather gets in the way though!)

DSCF8100

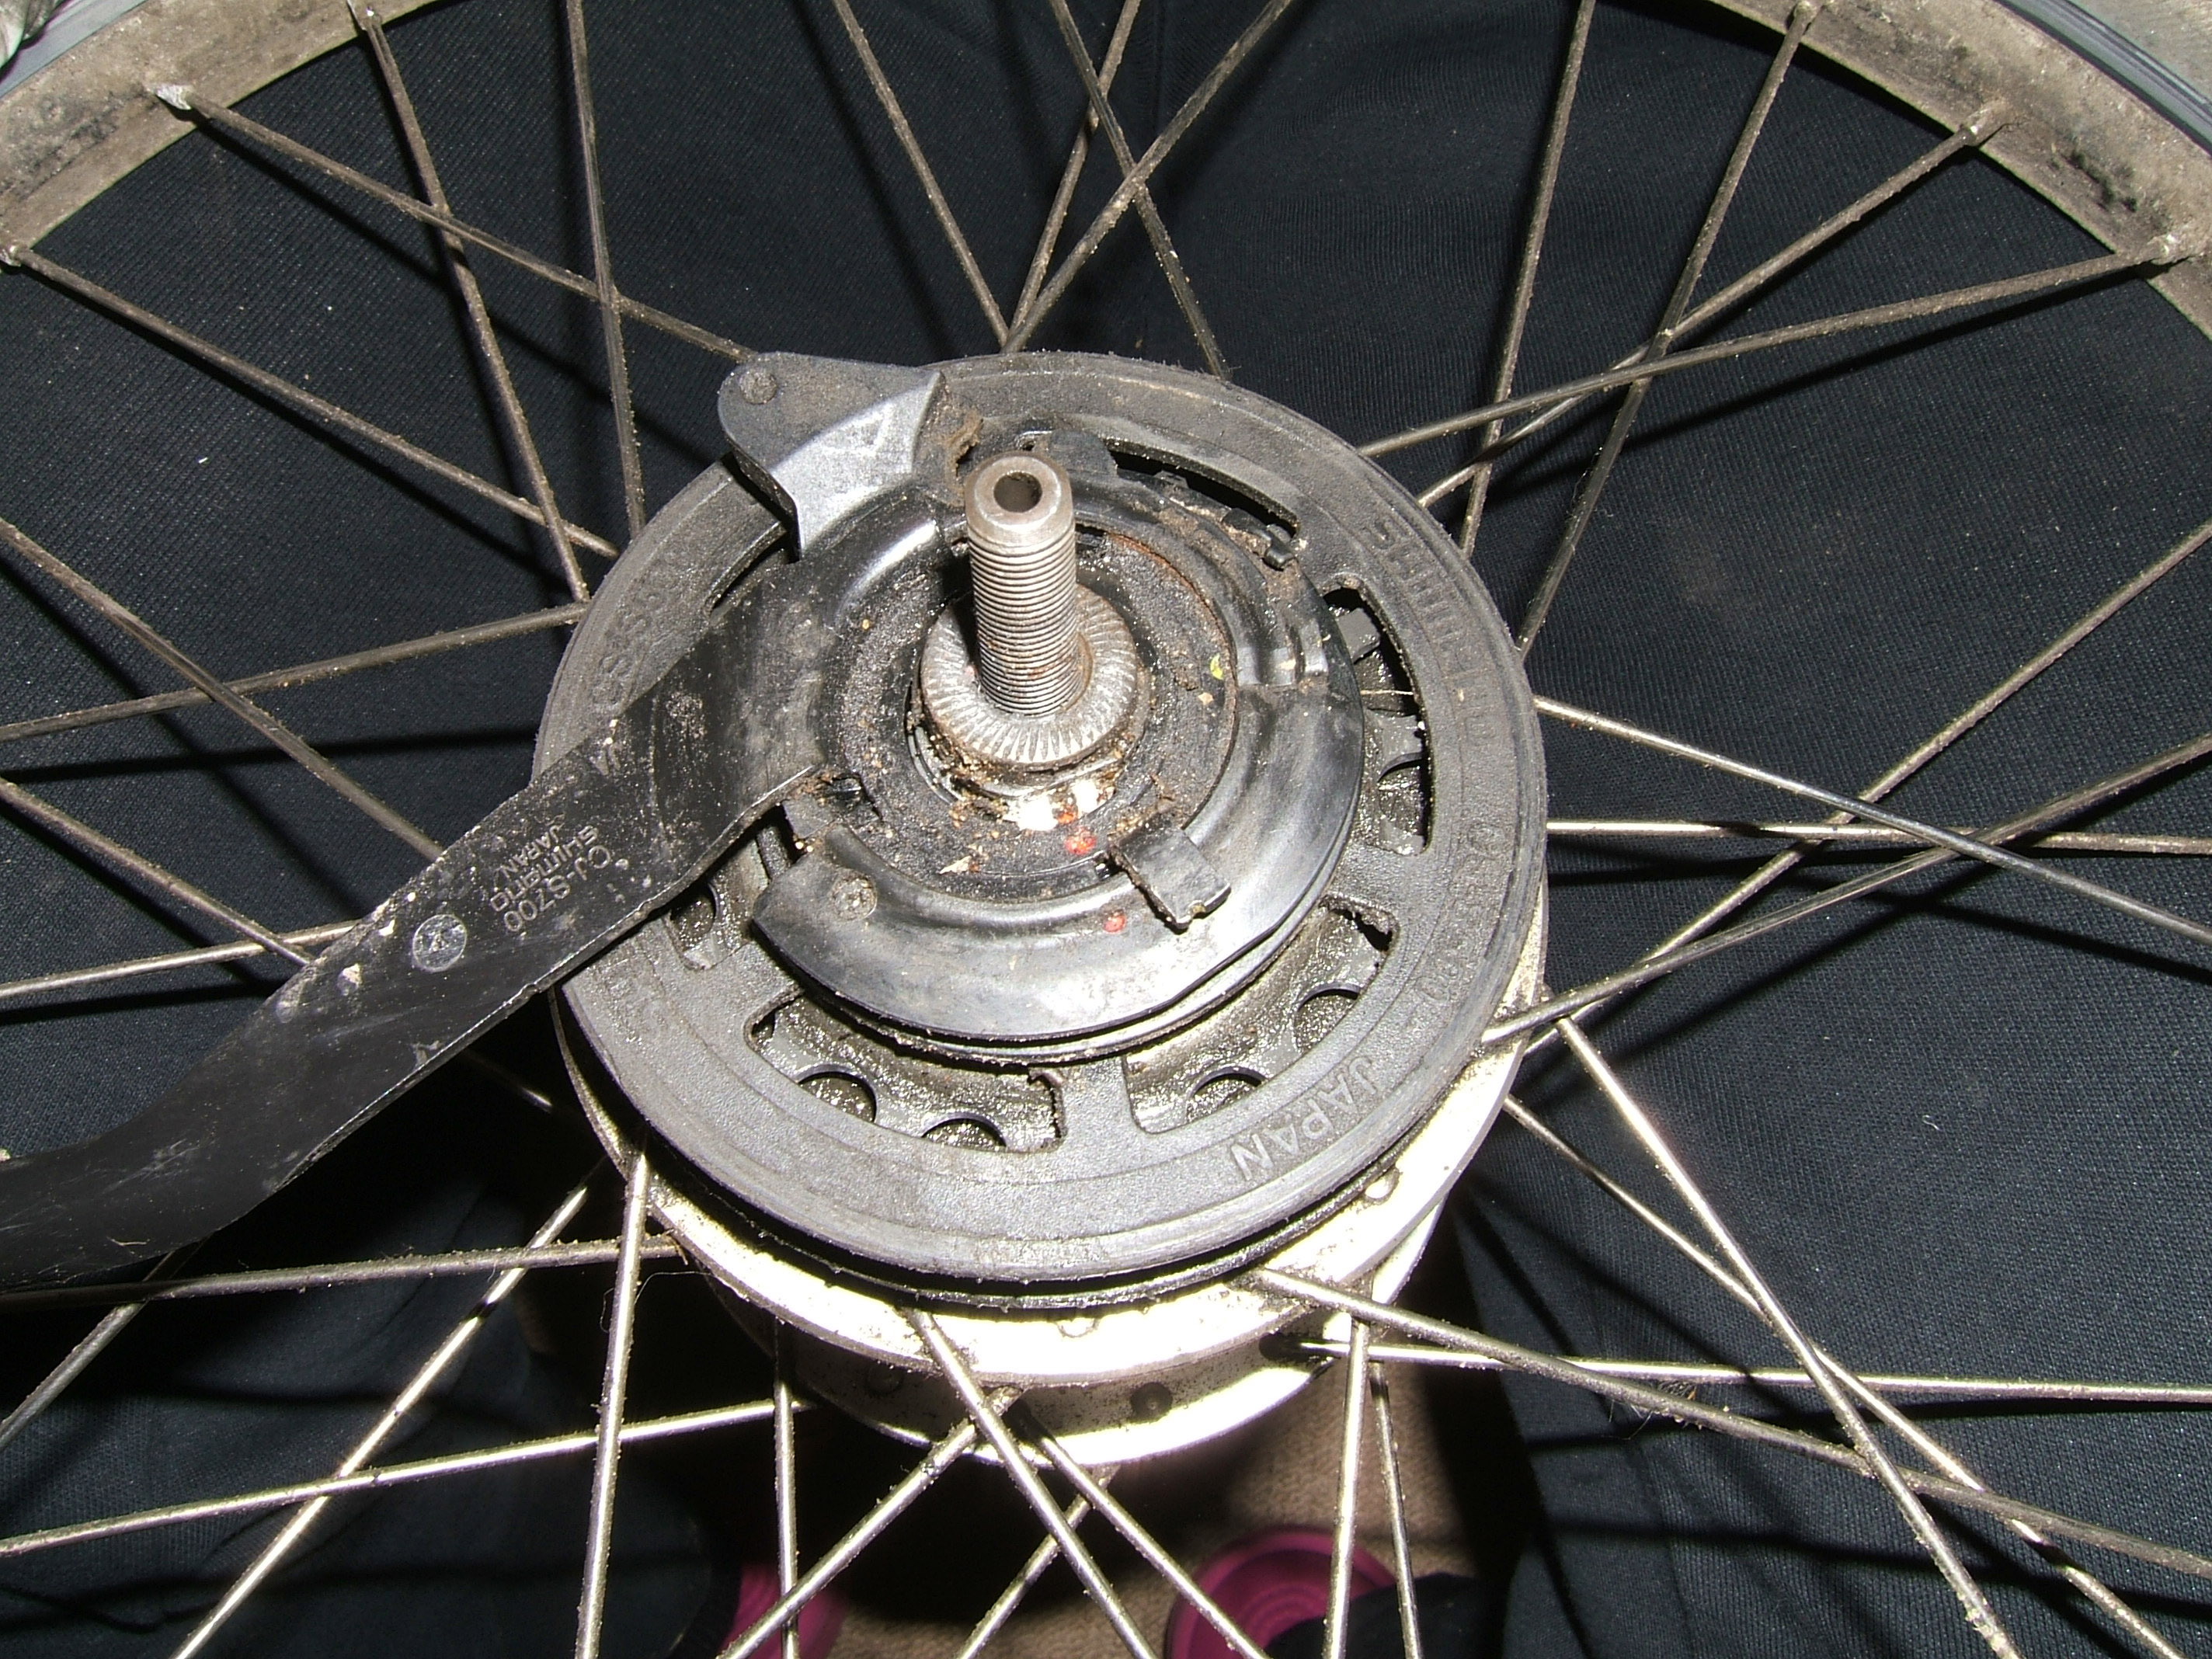
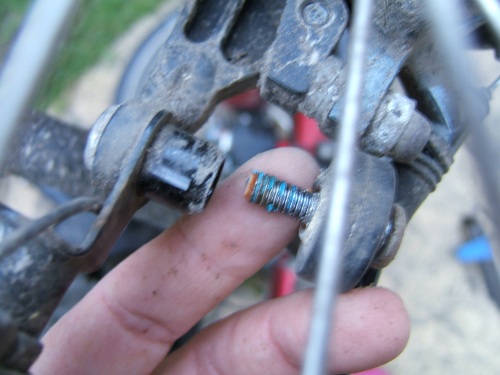
After some scraping I was able to get the allen key in and after a bit of effort it started undoing.

DSCF8103

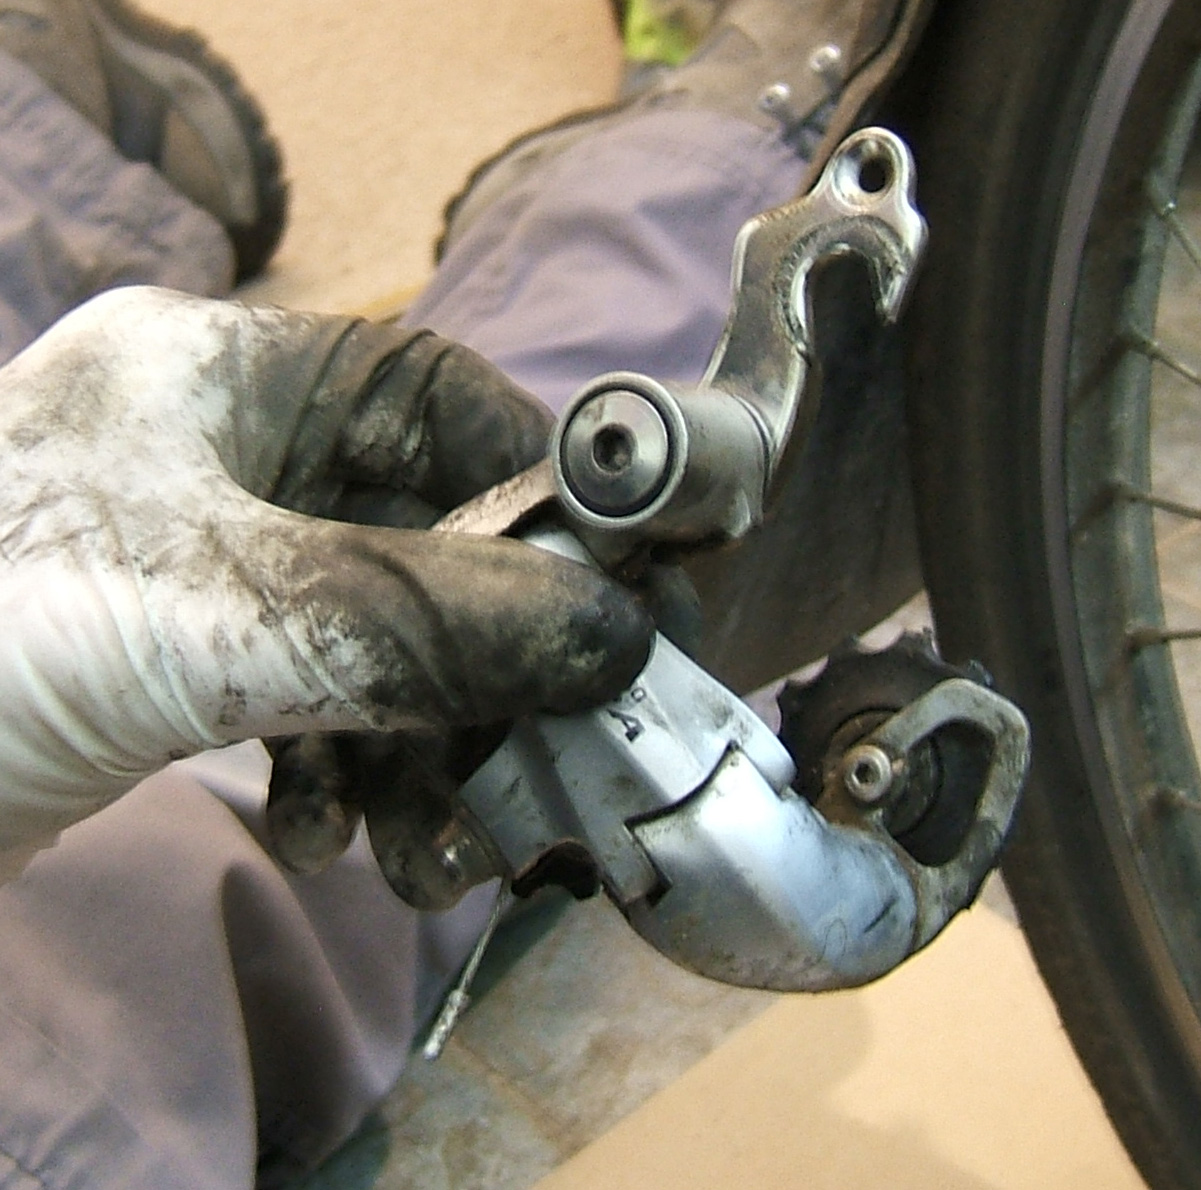
And here it is undone. I was able to move the cycle computer mount as necessary.

DSCF8105

I did it all straight up again – at least I know now what to do if I ever need to remove the bike computer mount. Thanks to Dan Dickson for his comment below!

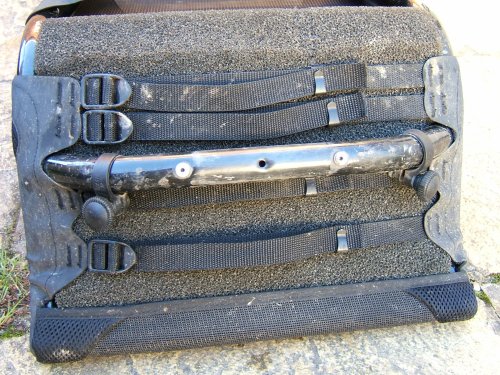
This is the back of the seat. Can you spot the difference? Within about five months I’d lost the little plug for the hole which stops the mounting for the seat slipping too far either side. At the moment it is theoretically possible for the seat to slide to one side but in reality the fixings at the bottom of the seat stop this happening (mostly). You can see that the plug on the right has been fairly squashed as well.
DSCF7979

This is the base of the seat where it fits into the curved frame (see photo below). This looks OK on this trike, on my Trice Q this area has no paint left and has really suffered. It looks as though this fits slightly better on Alfie than my Q.
DSCF7981

Here is the trough that the seat fixes into. That little silvery slash in the middle of the picture is a paint scratch, probably from the bolts that I have to turn to tighten the seat up. The right hand side bolt has a tendency to undo itself fairly quickly and I think it can then rattle around a little and scratch the paint. I usually tell eventually that this has happened when I do a fast corner and feel the seat move slightly…
DSCF7996

And here’s another scratch in the paintwork. I did this one within the first couple of weeks of owning this trike. It is a result of flopping the handlebars forward when folding the trike, not backward (i.e. the brake lever was touching the frame and made this cut in the metal). As soon as I realised what had happened I got into the habit of folding the handlebars towards the back of the trike and then folding the back wheel inwards and it was fine.
DSCF7983

You may have noticed that the frame looks a bit wet – that’s because I decided, after taking the previous photographs, that I really needed to clean Alfie a bit if I was going to post lots of photos of him on the internet. So I gave him a quick wash down – the freezing weather outside and the fact that it was nearly dark meant I had to do it quickly so he’s still pretty mucky, but hopefully you can see a bit more!

Here is a freshly-washed front left brake. Notice the little rubber top for the cable slides up and gets stuck – that’s probably because I have my brakes set for not too much travel before they work. This is the side with my weak arm and I want to be able to use the brakes without too much movement. The fact this rubber cover isn’t in place means (presumably) that water will run down the brake cable and I imagine when we have more cold weather I might have some exciting braking sessions when it’s freezing outside!
DSCF7985

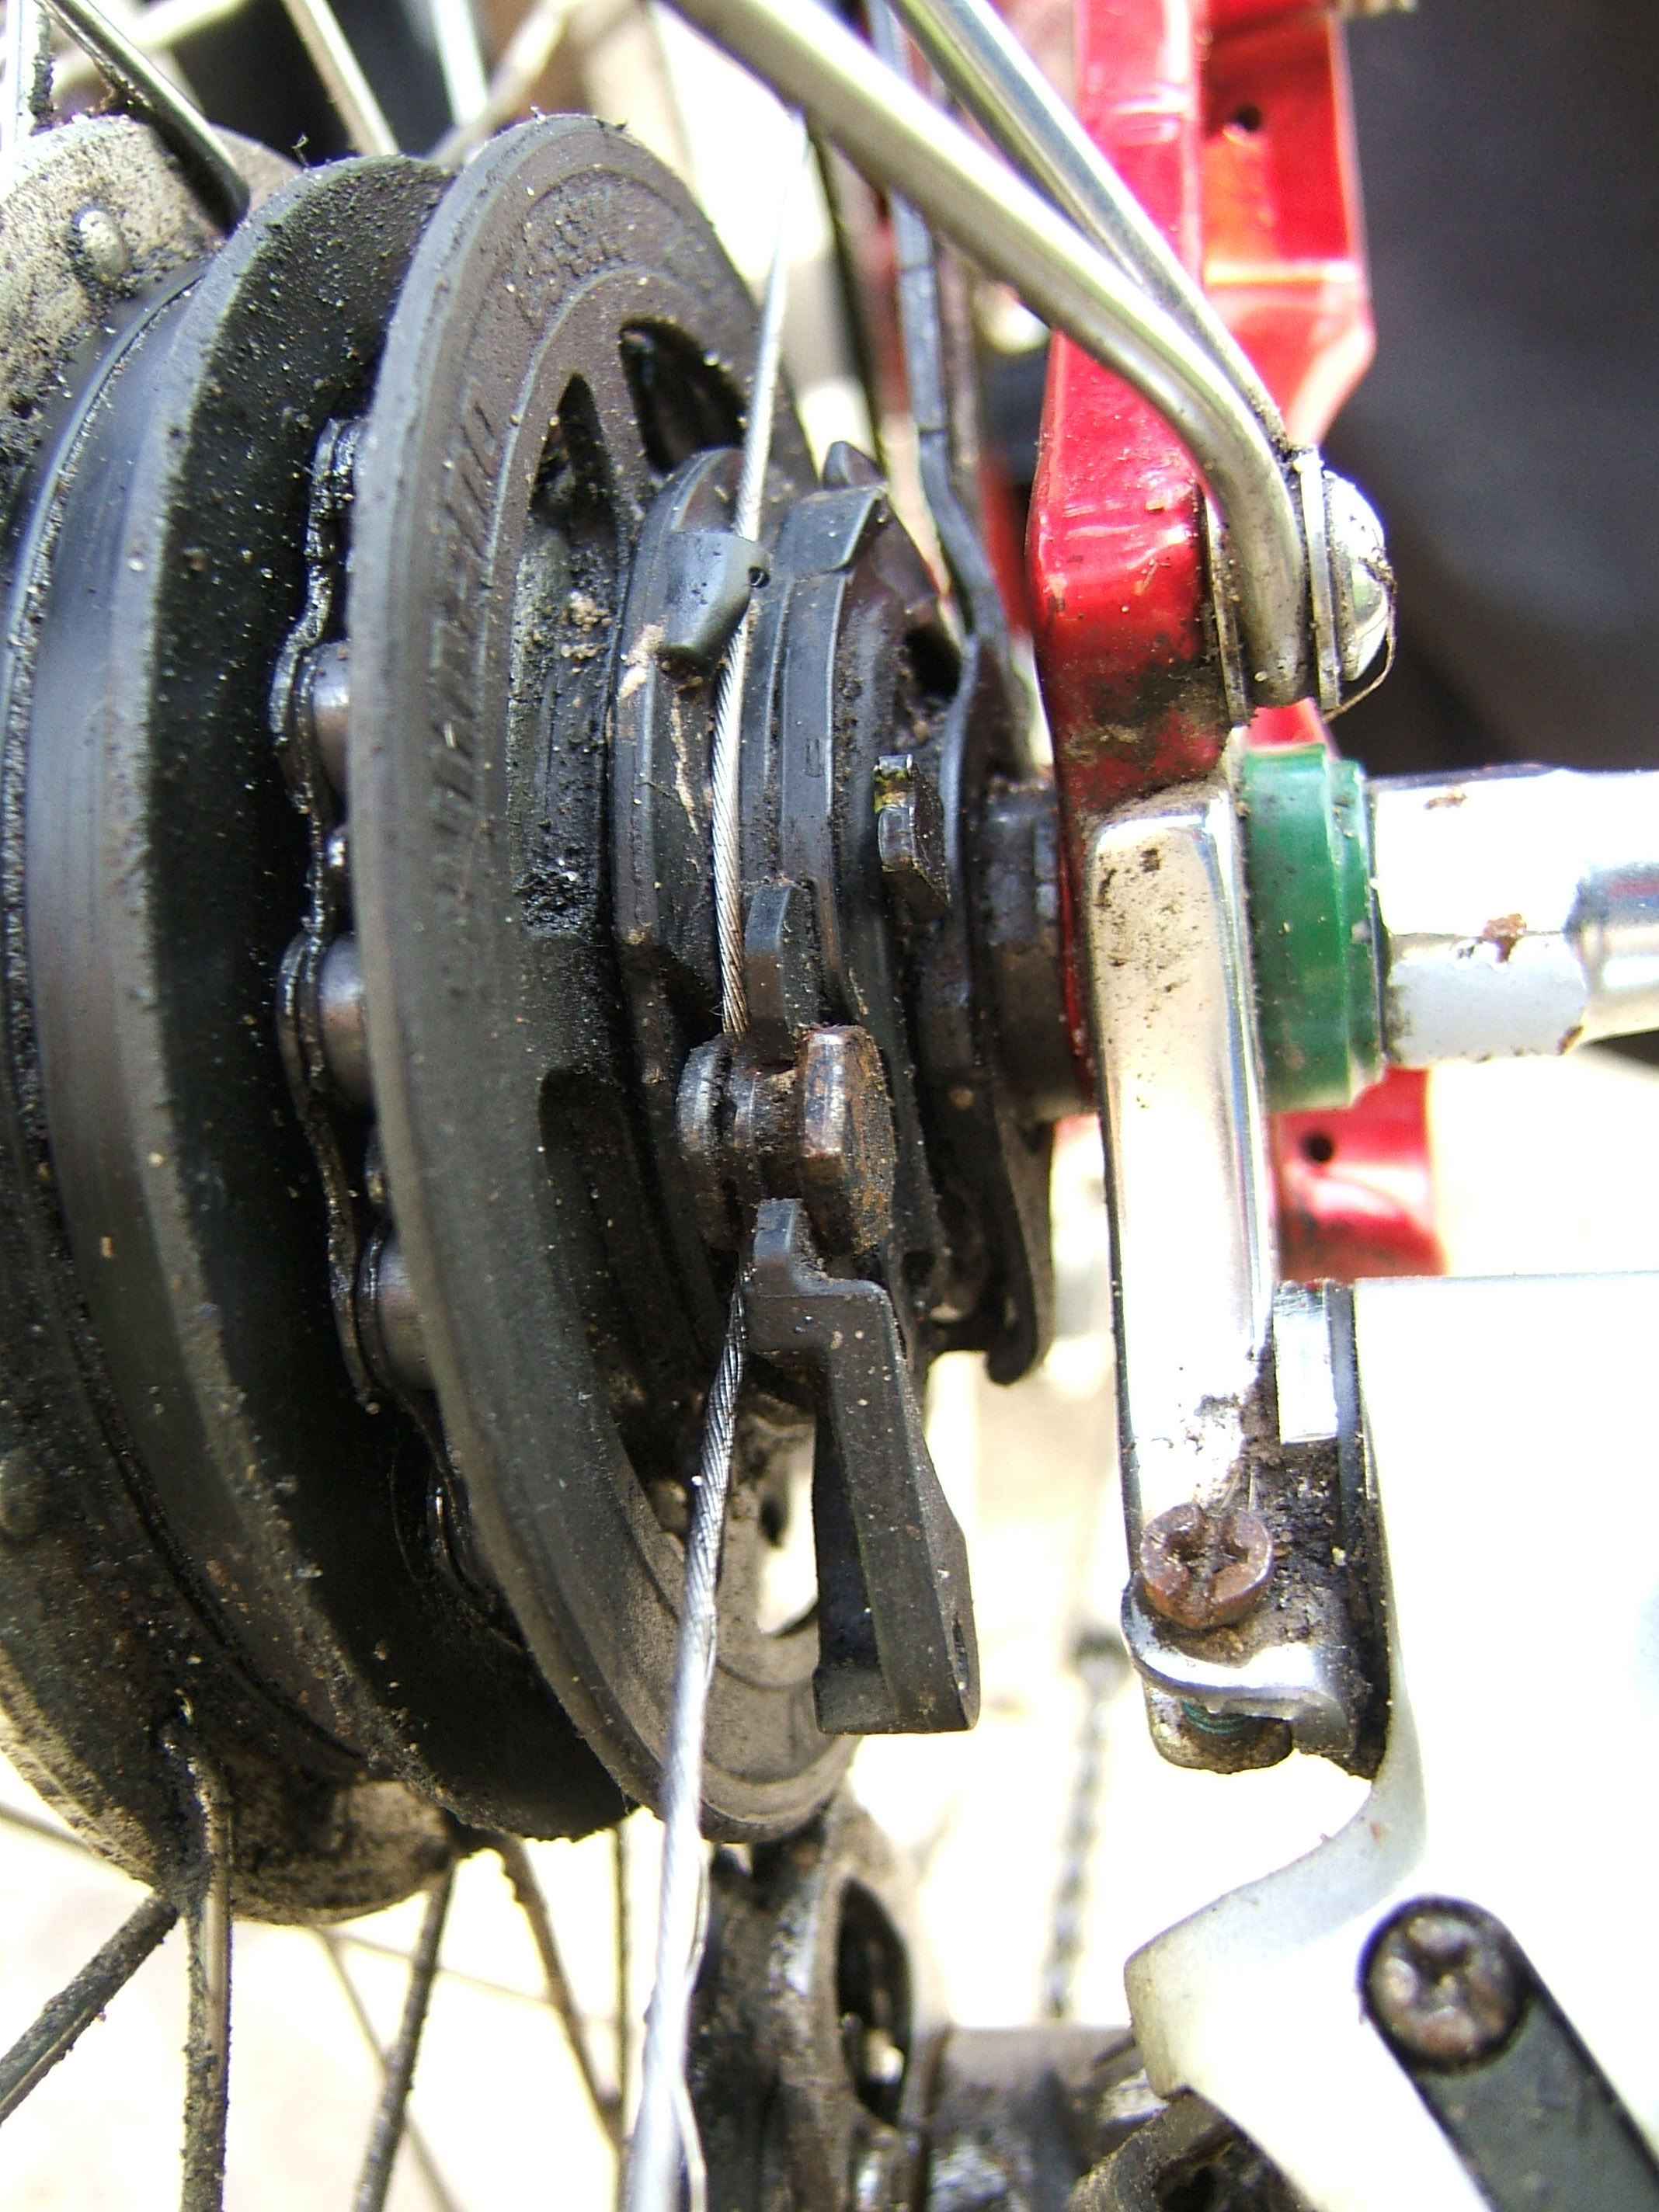
This is a side-on view of the brake on the right hand side (the one that hangs under the trike). You can see that the nuts for the wobble washers are pretty much rusted into place but I don’t think I will need to adjust these so I’m not too worried. The nuts that I need to undo to remove the brake (if I am removing the wheel) work fine still.
DSCF7986

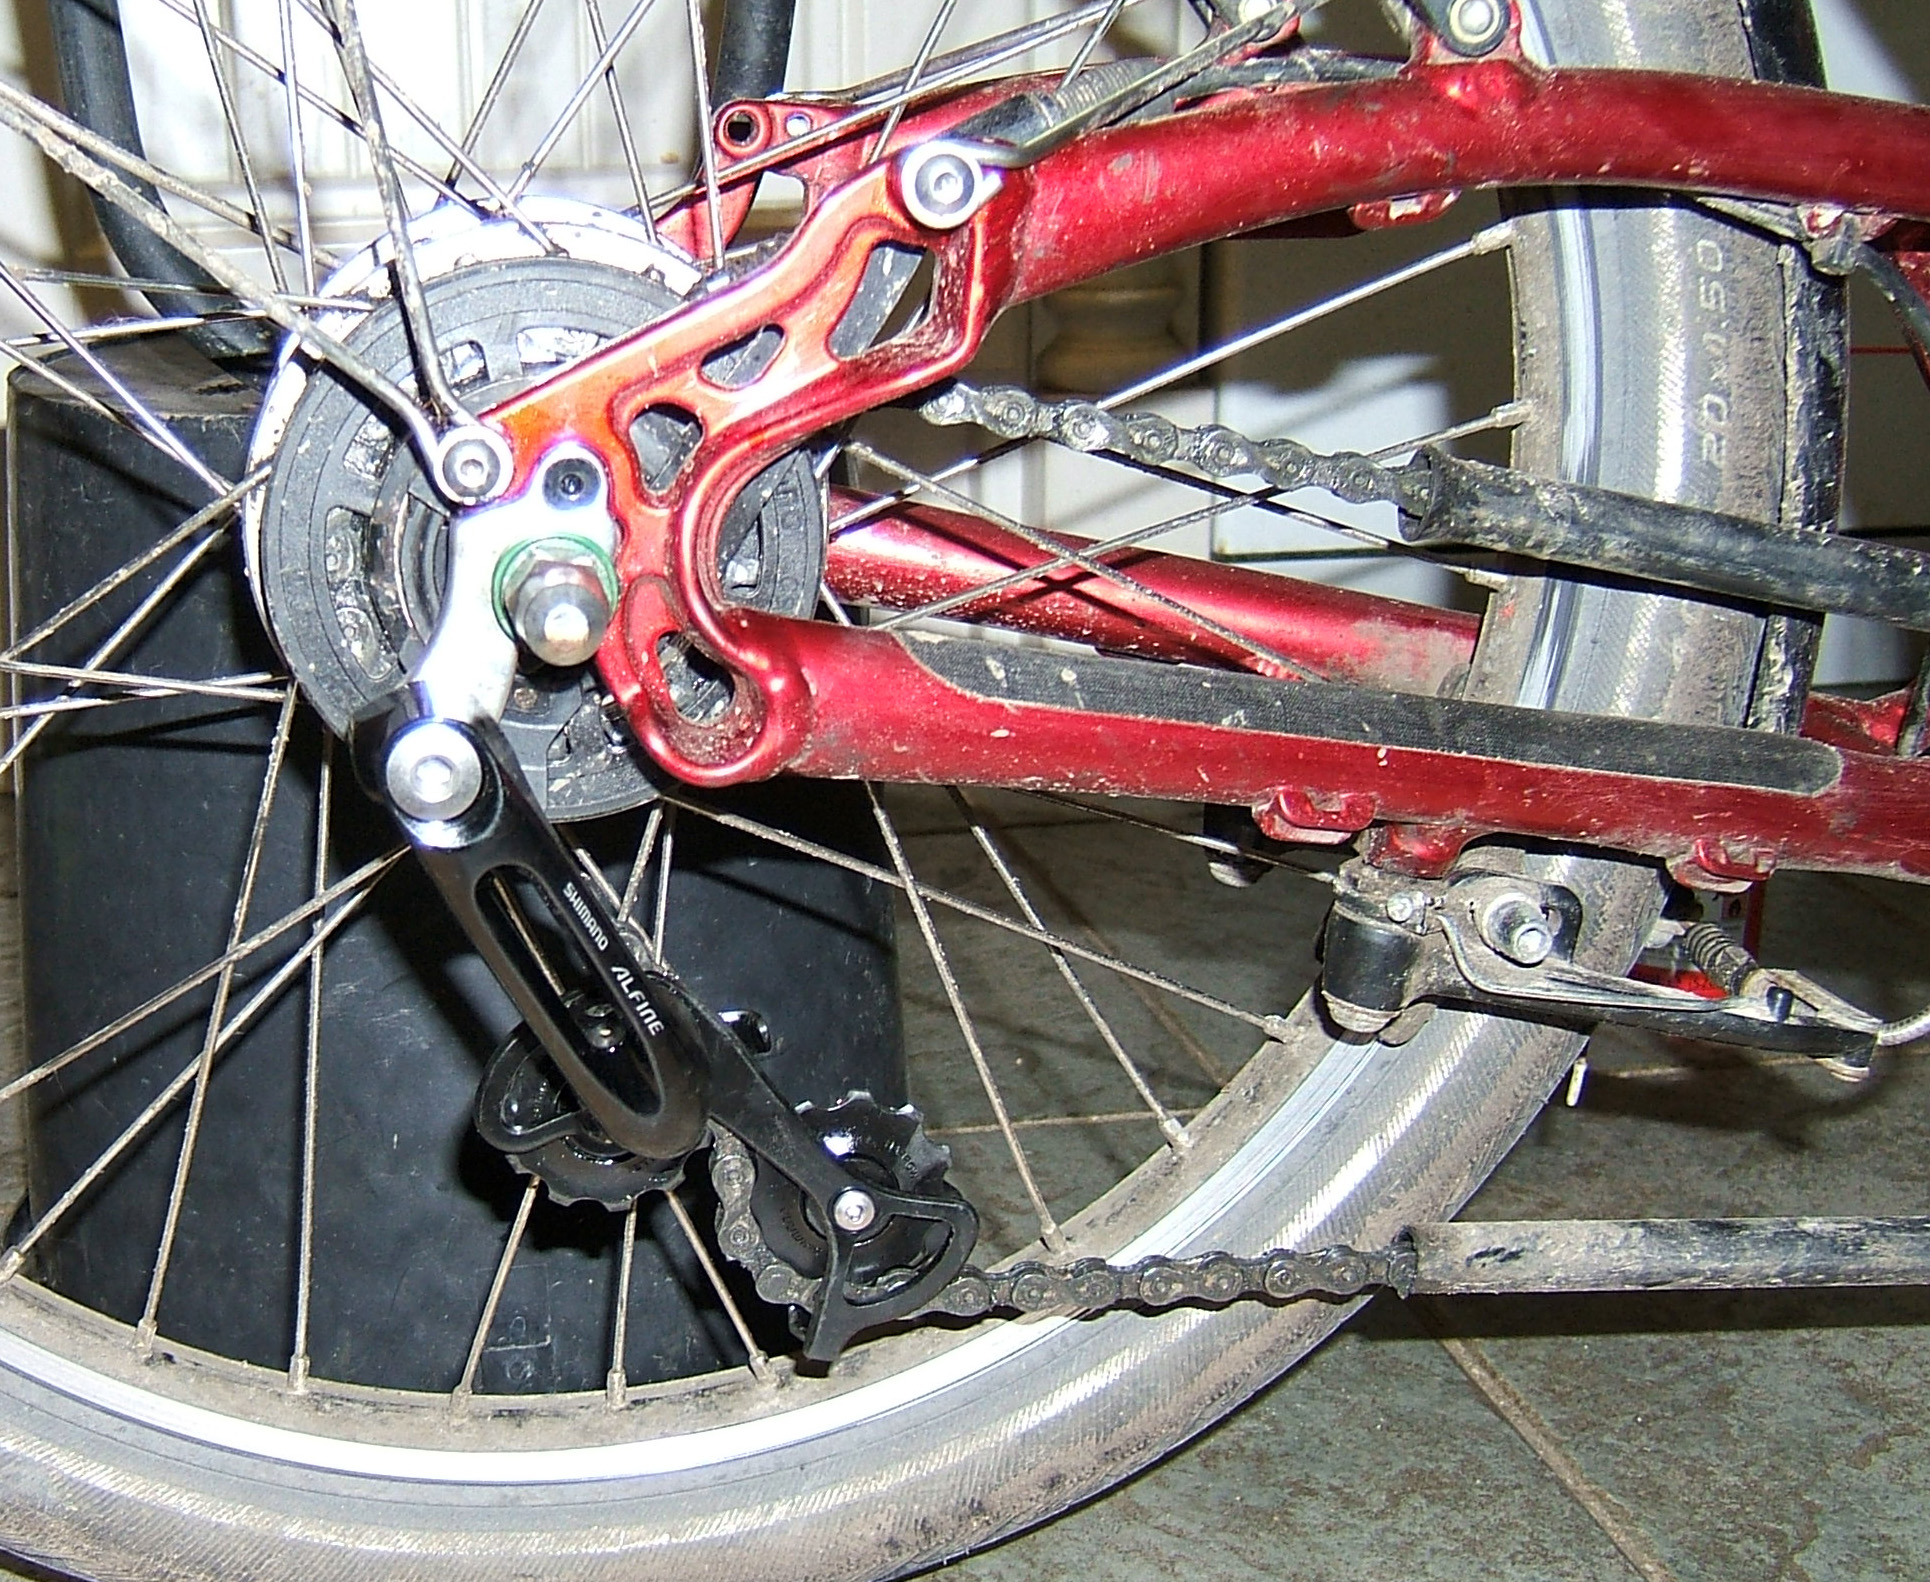
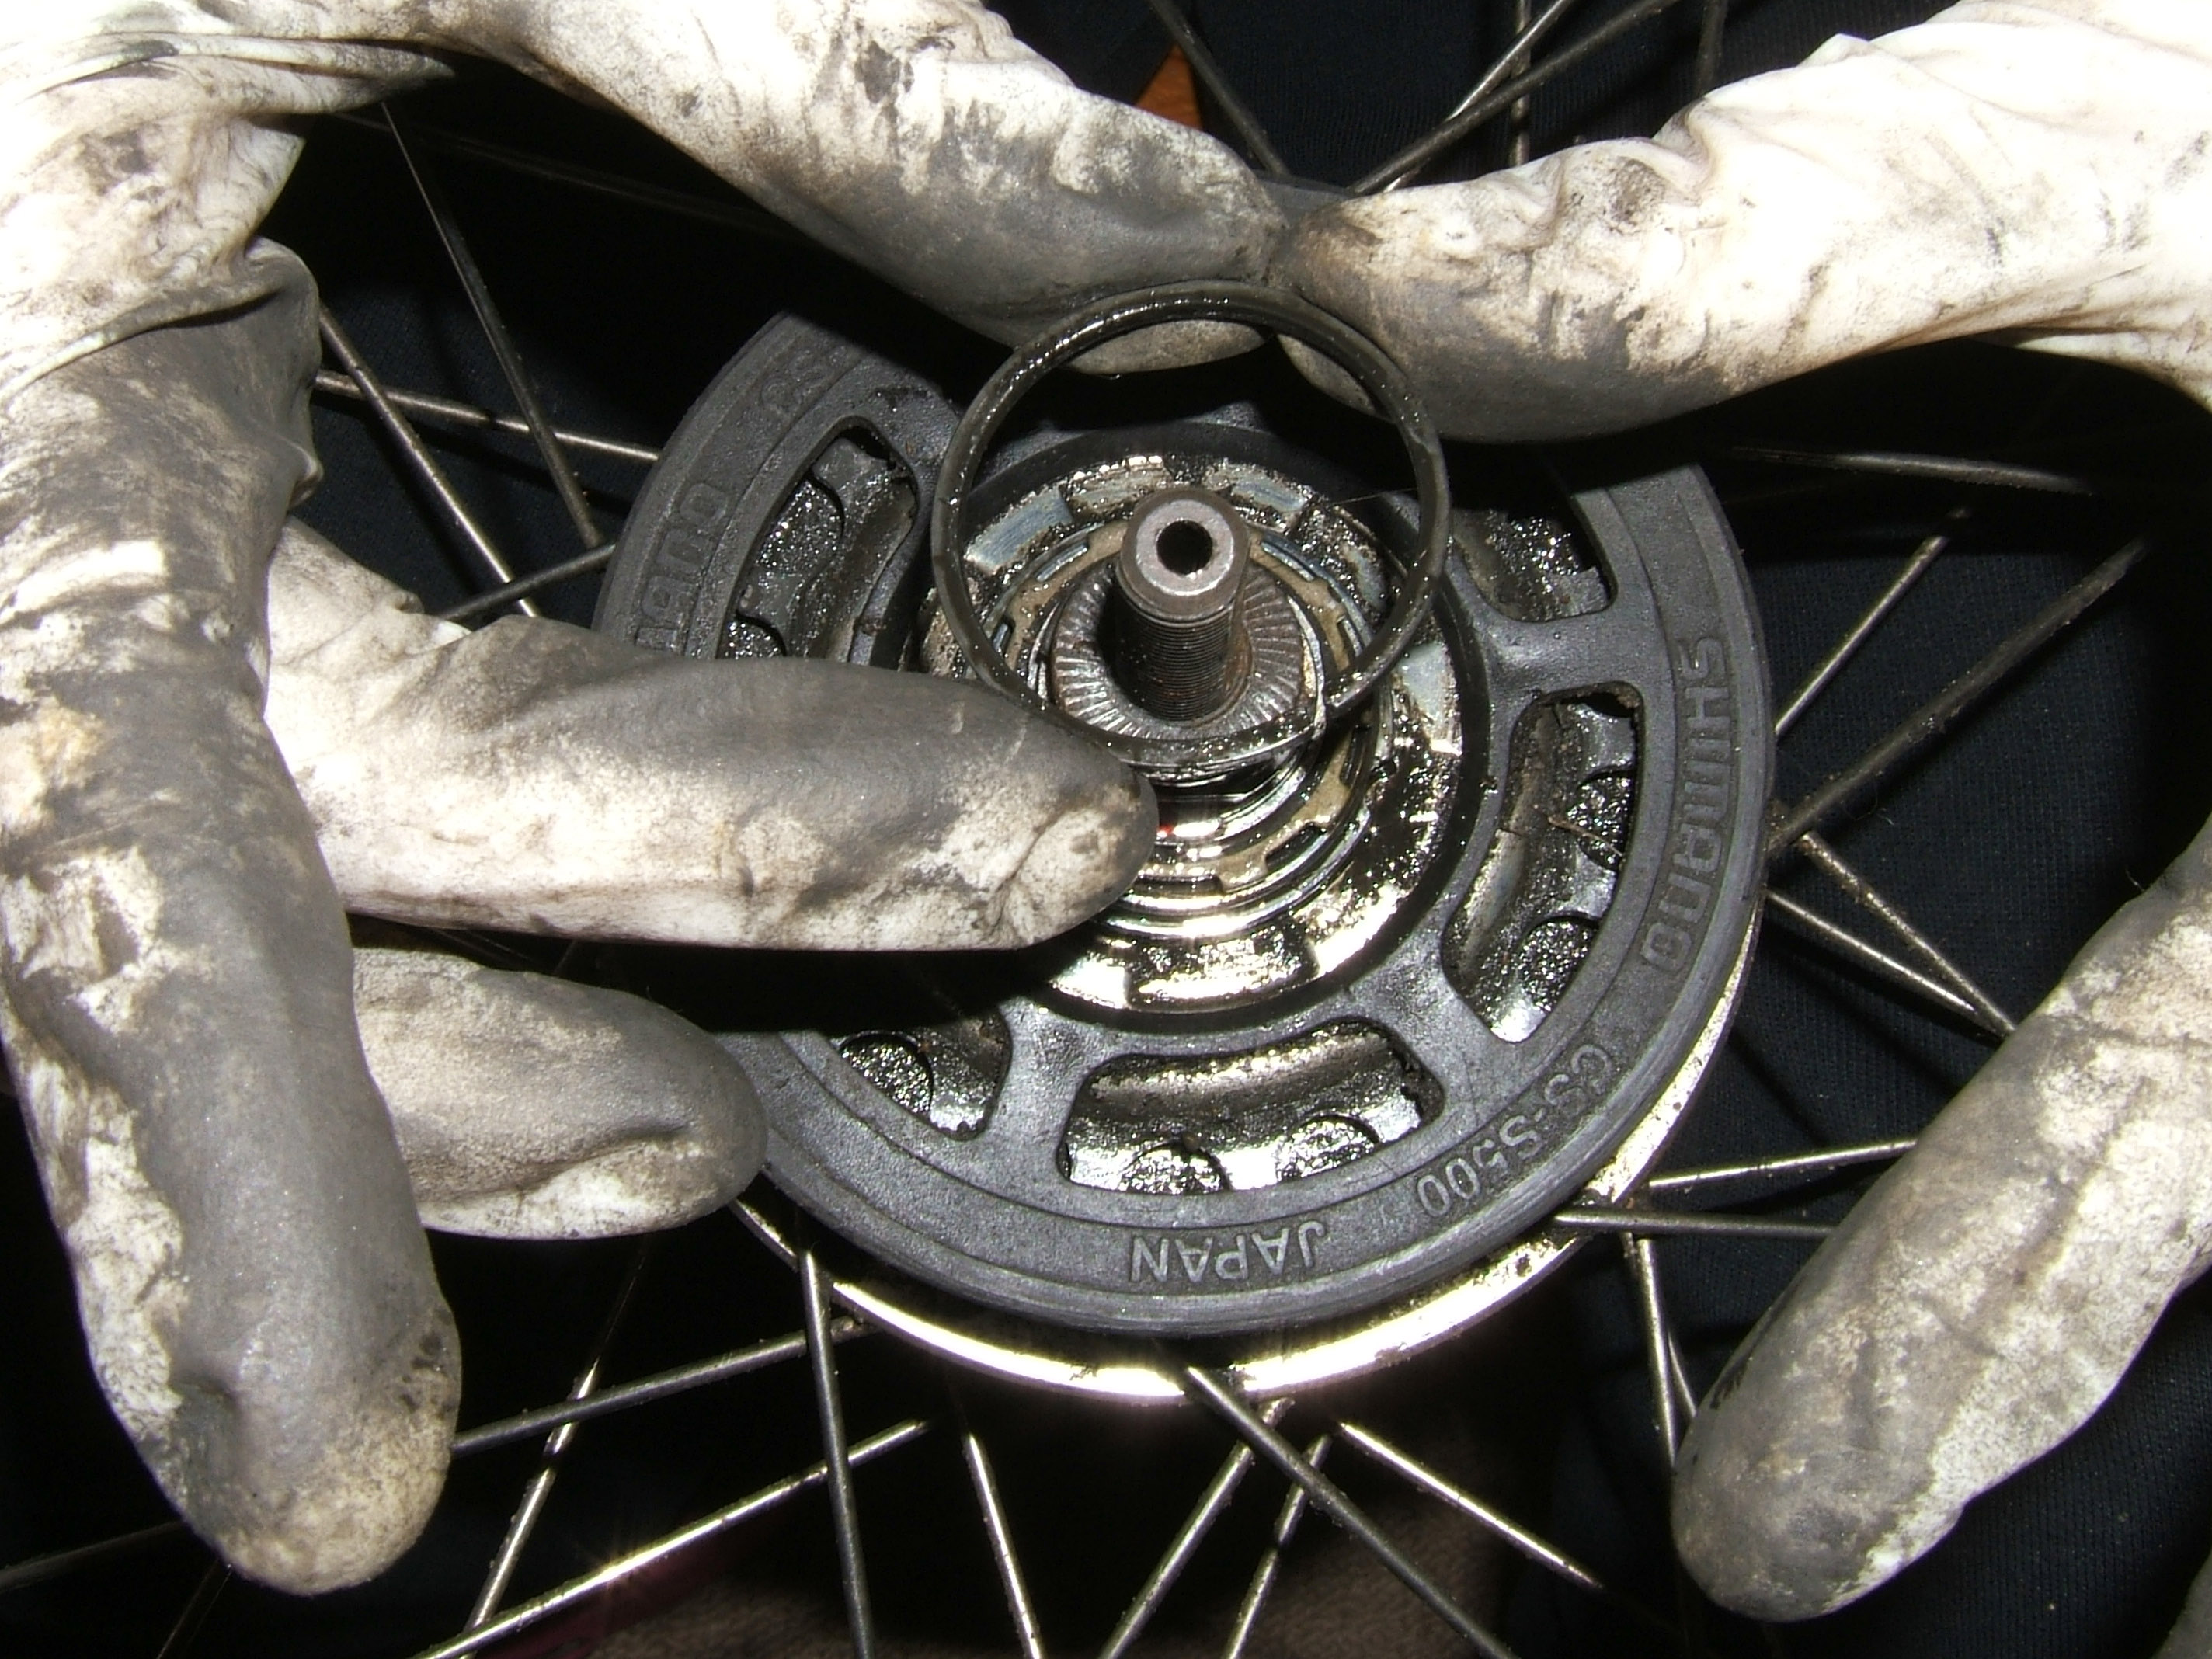
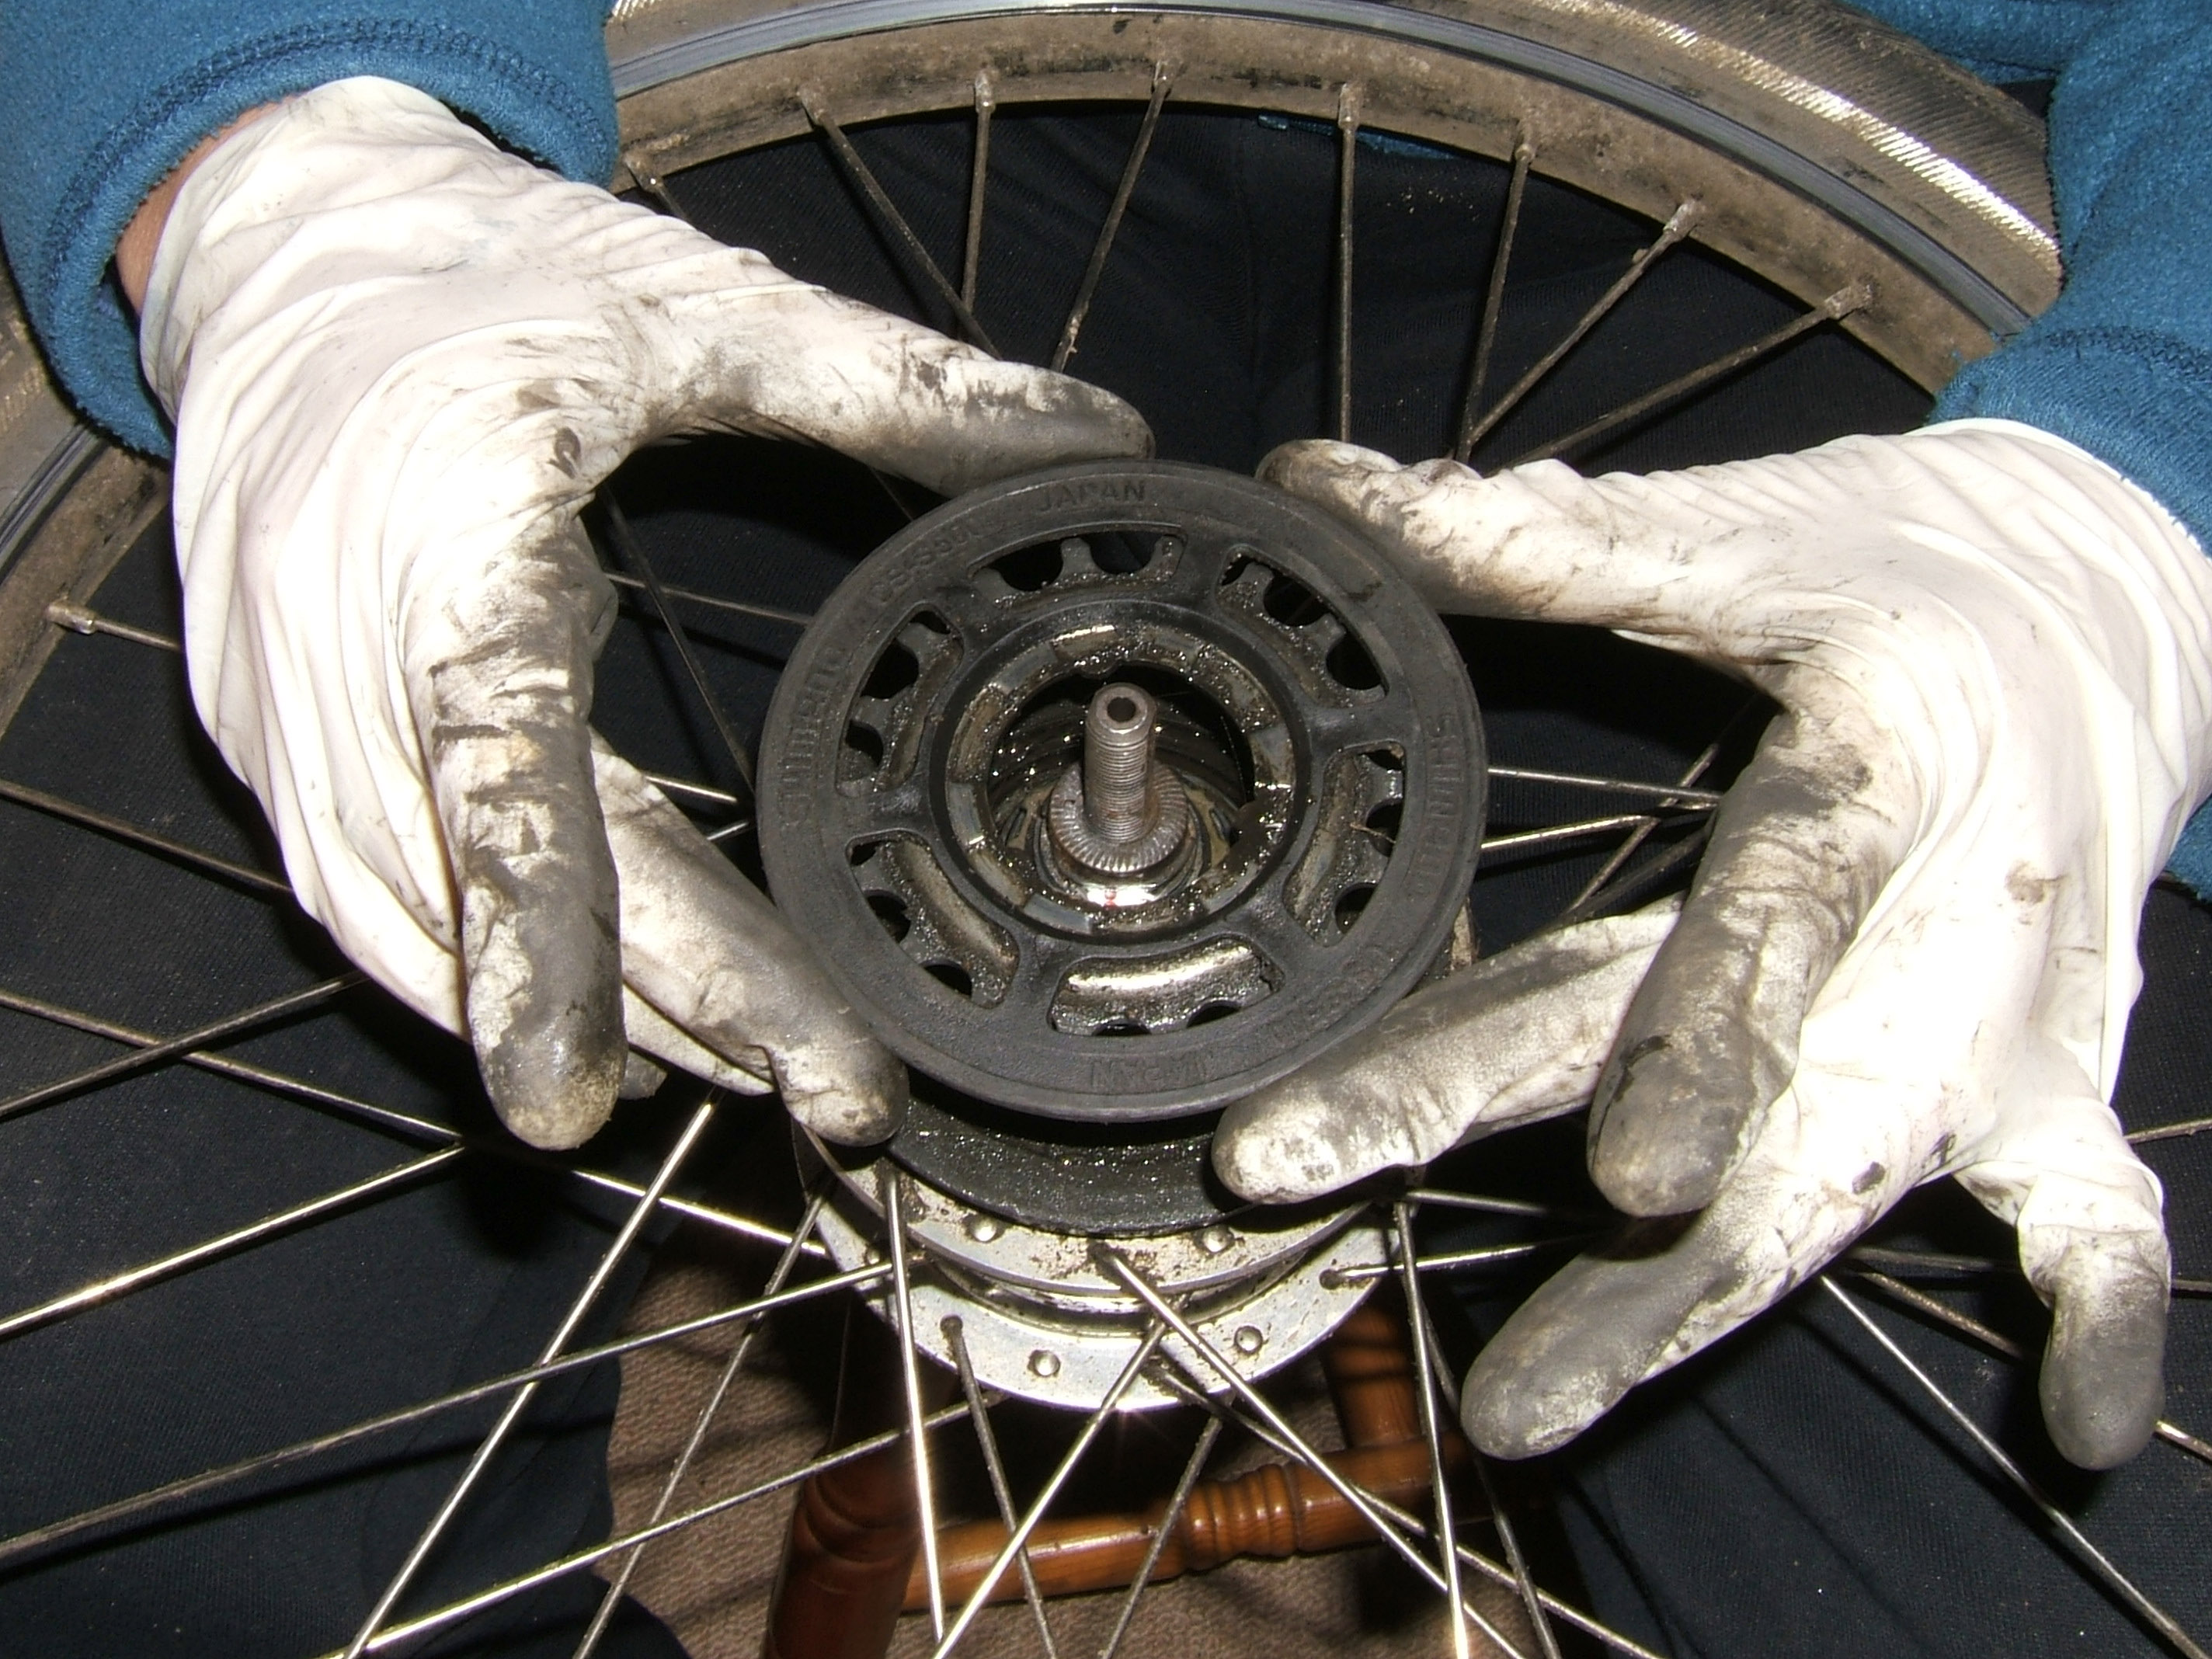
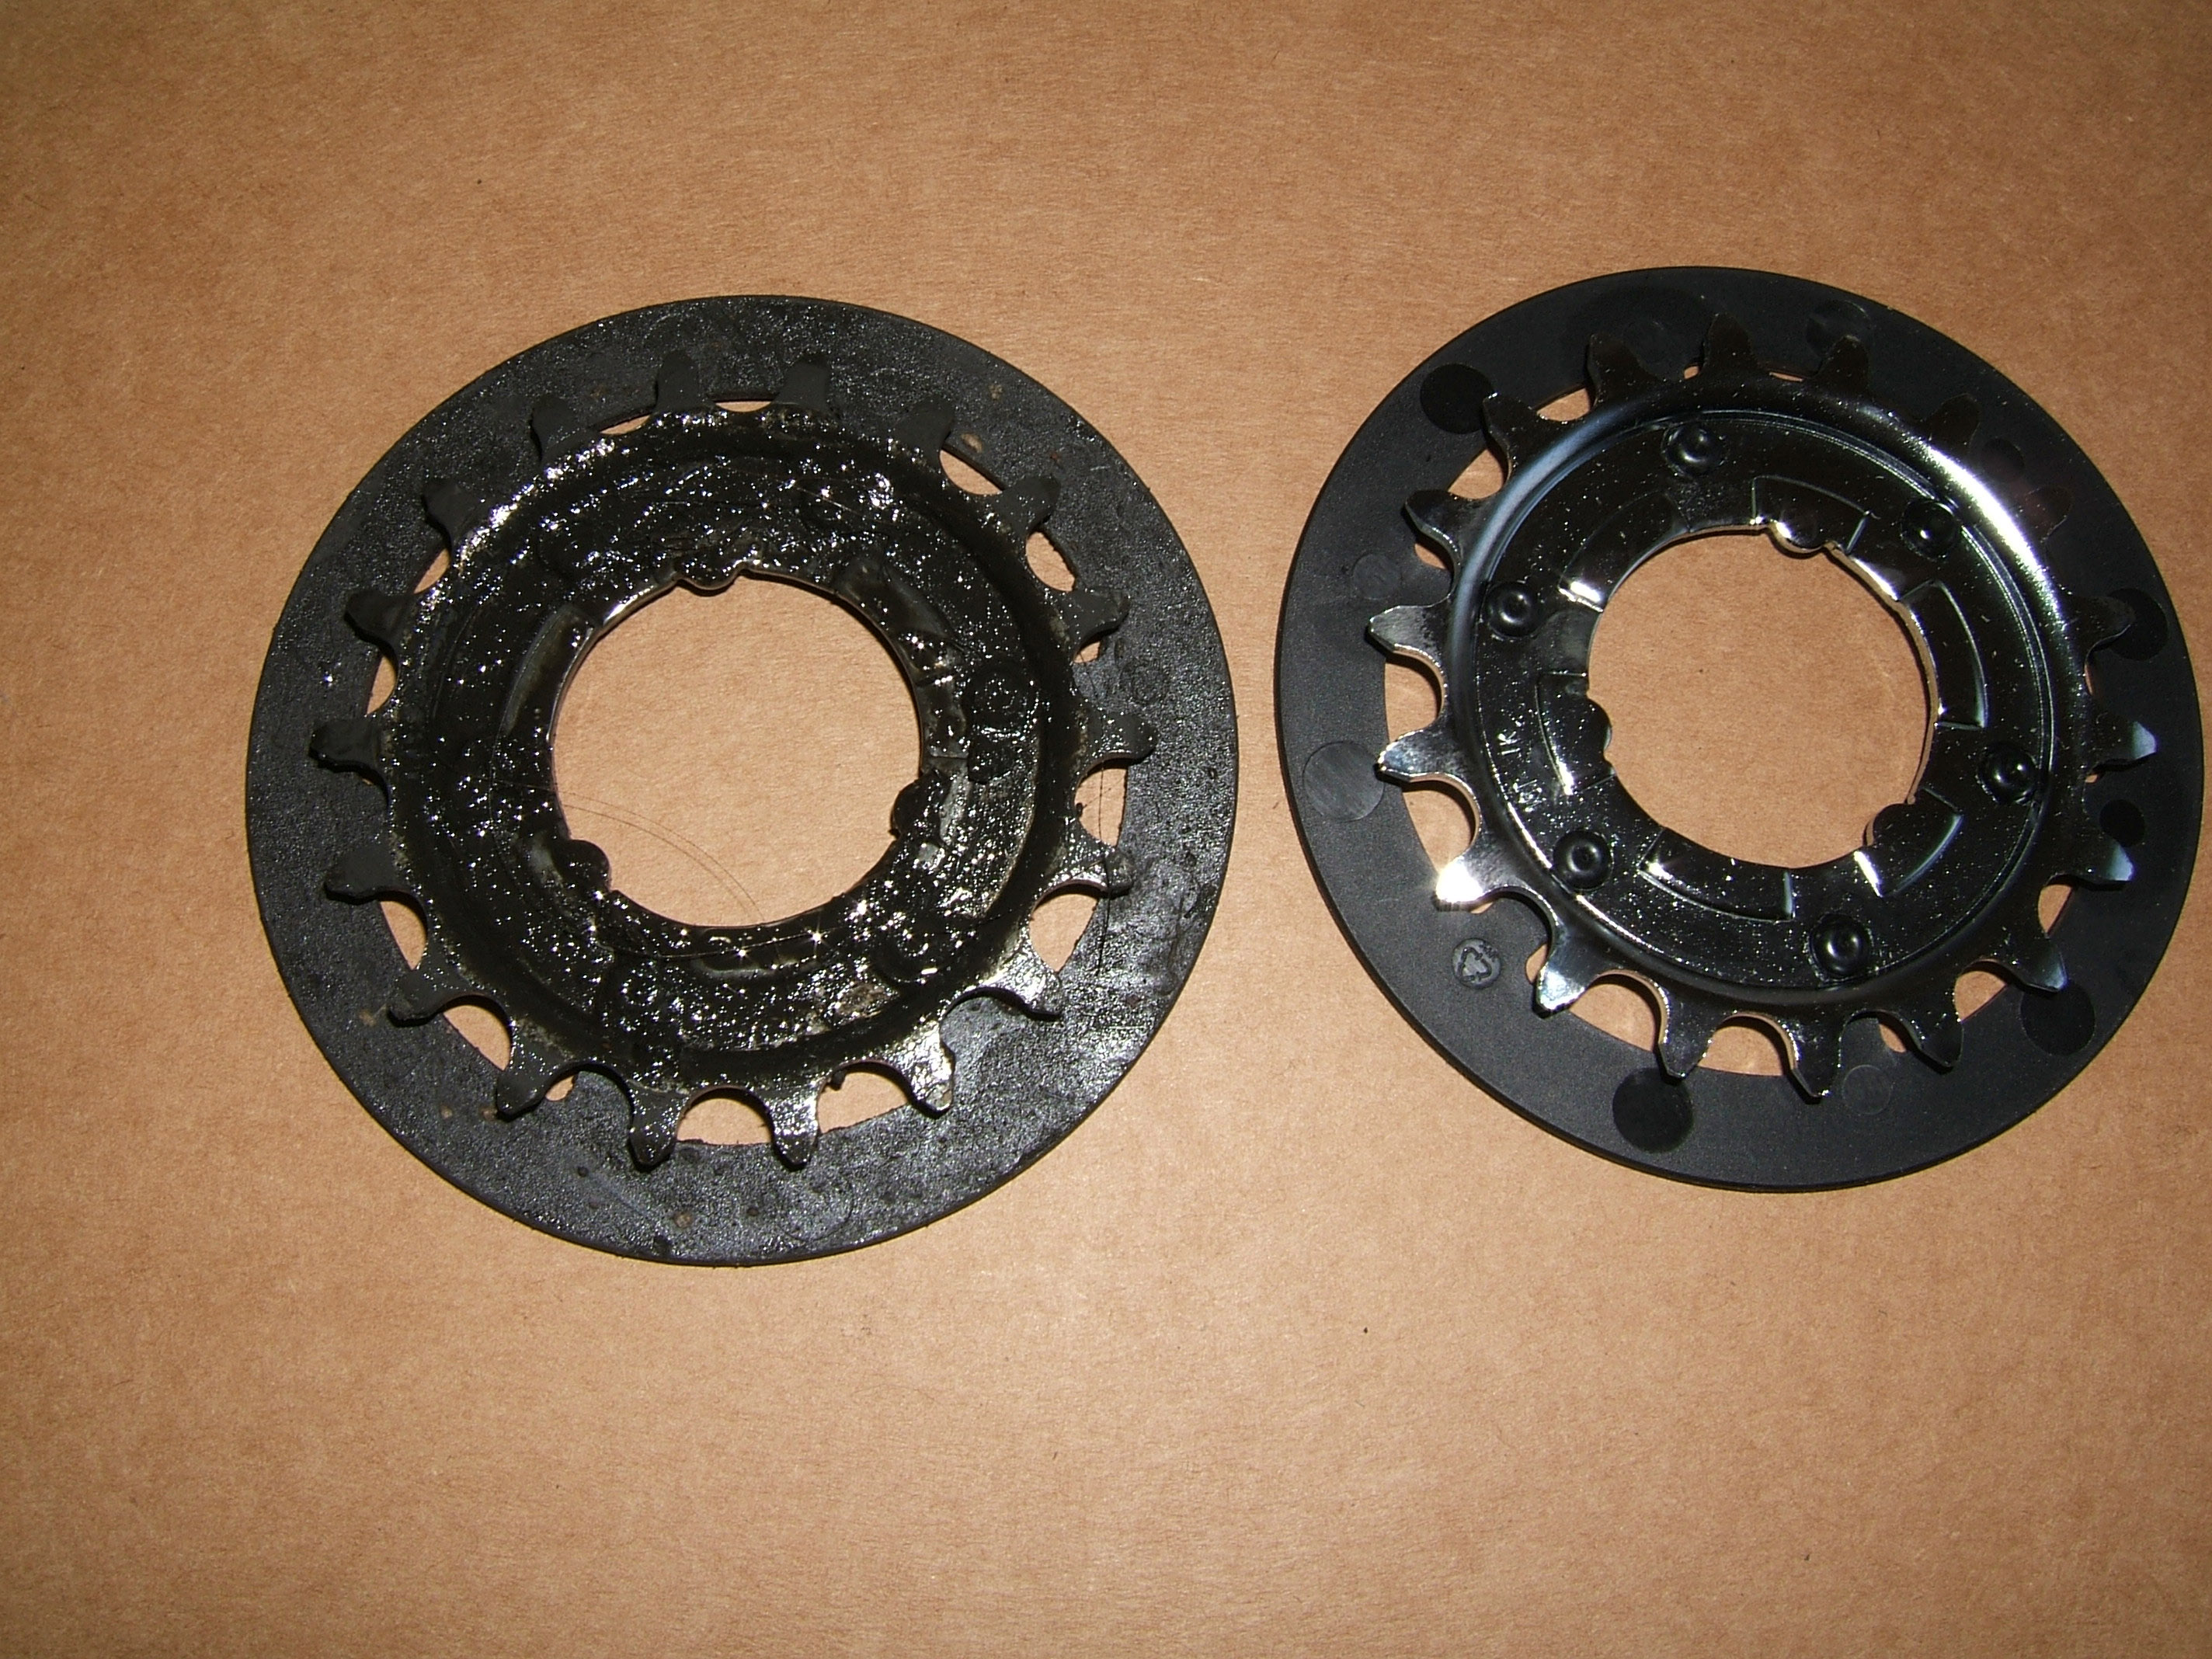
Here’s the Alfine hub still looking quite mucky. It’s very tricky to clean this without removing the wheel which I didn’t feel like doing. The carrier (the plastic bits that sit either side of the chain as it goes around the hub) tends to collect bits of grass and grot and I have to scrape thick chunks of goo out periodically. I also find that if there’s too much muck where the gear change cable goes then some of the gears tend to slip a bit – looking at this photo I really need to sort that out else I’ll have some weird gear changes over the next week or so.
DSCF7989

Note lots of small spaces for bits of muck to get caught.
DSCF7991

DSCF8003

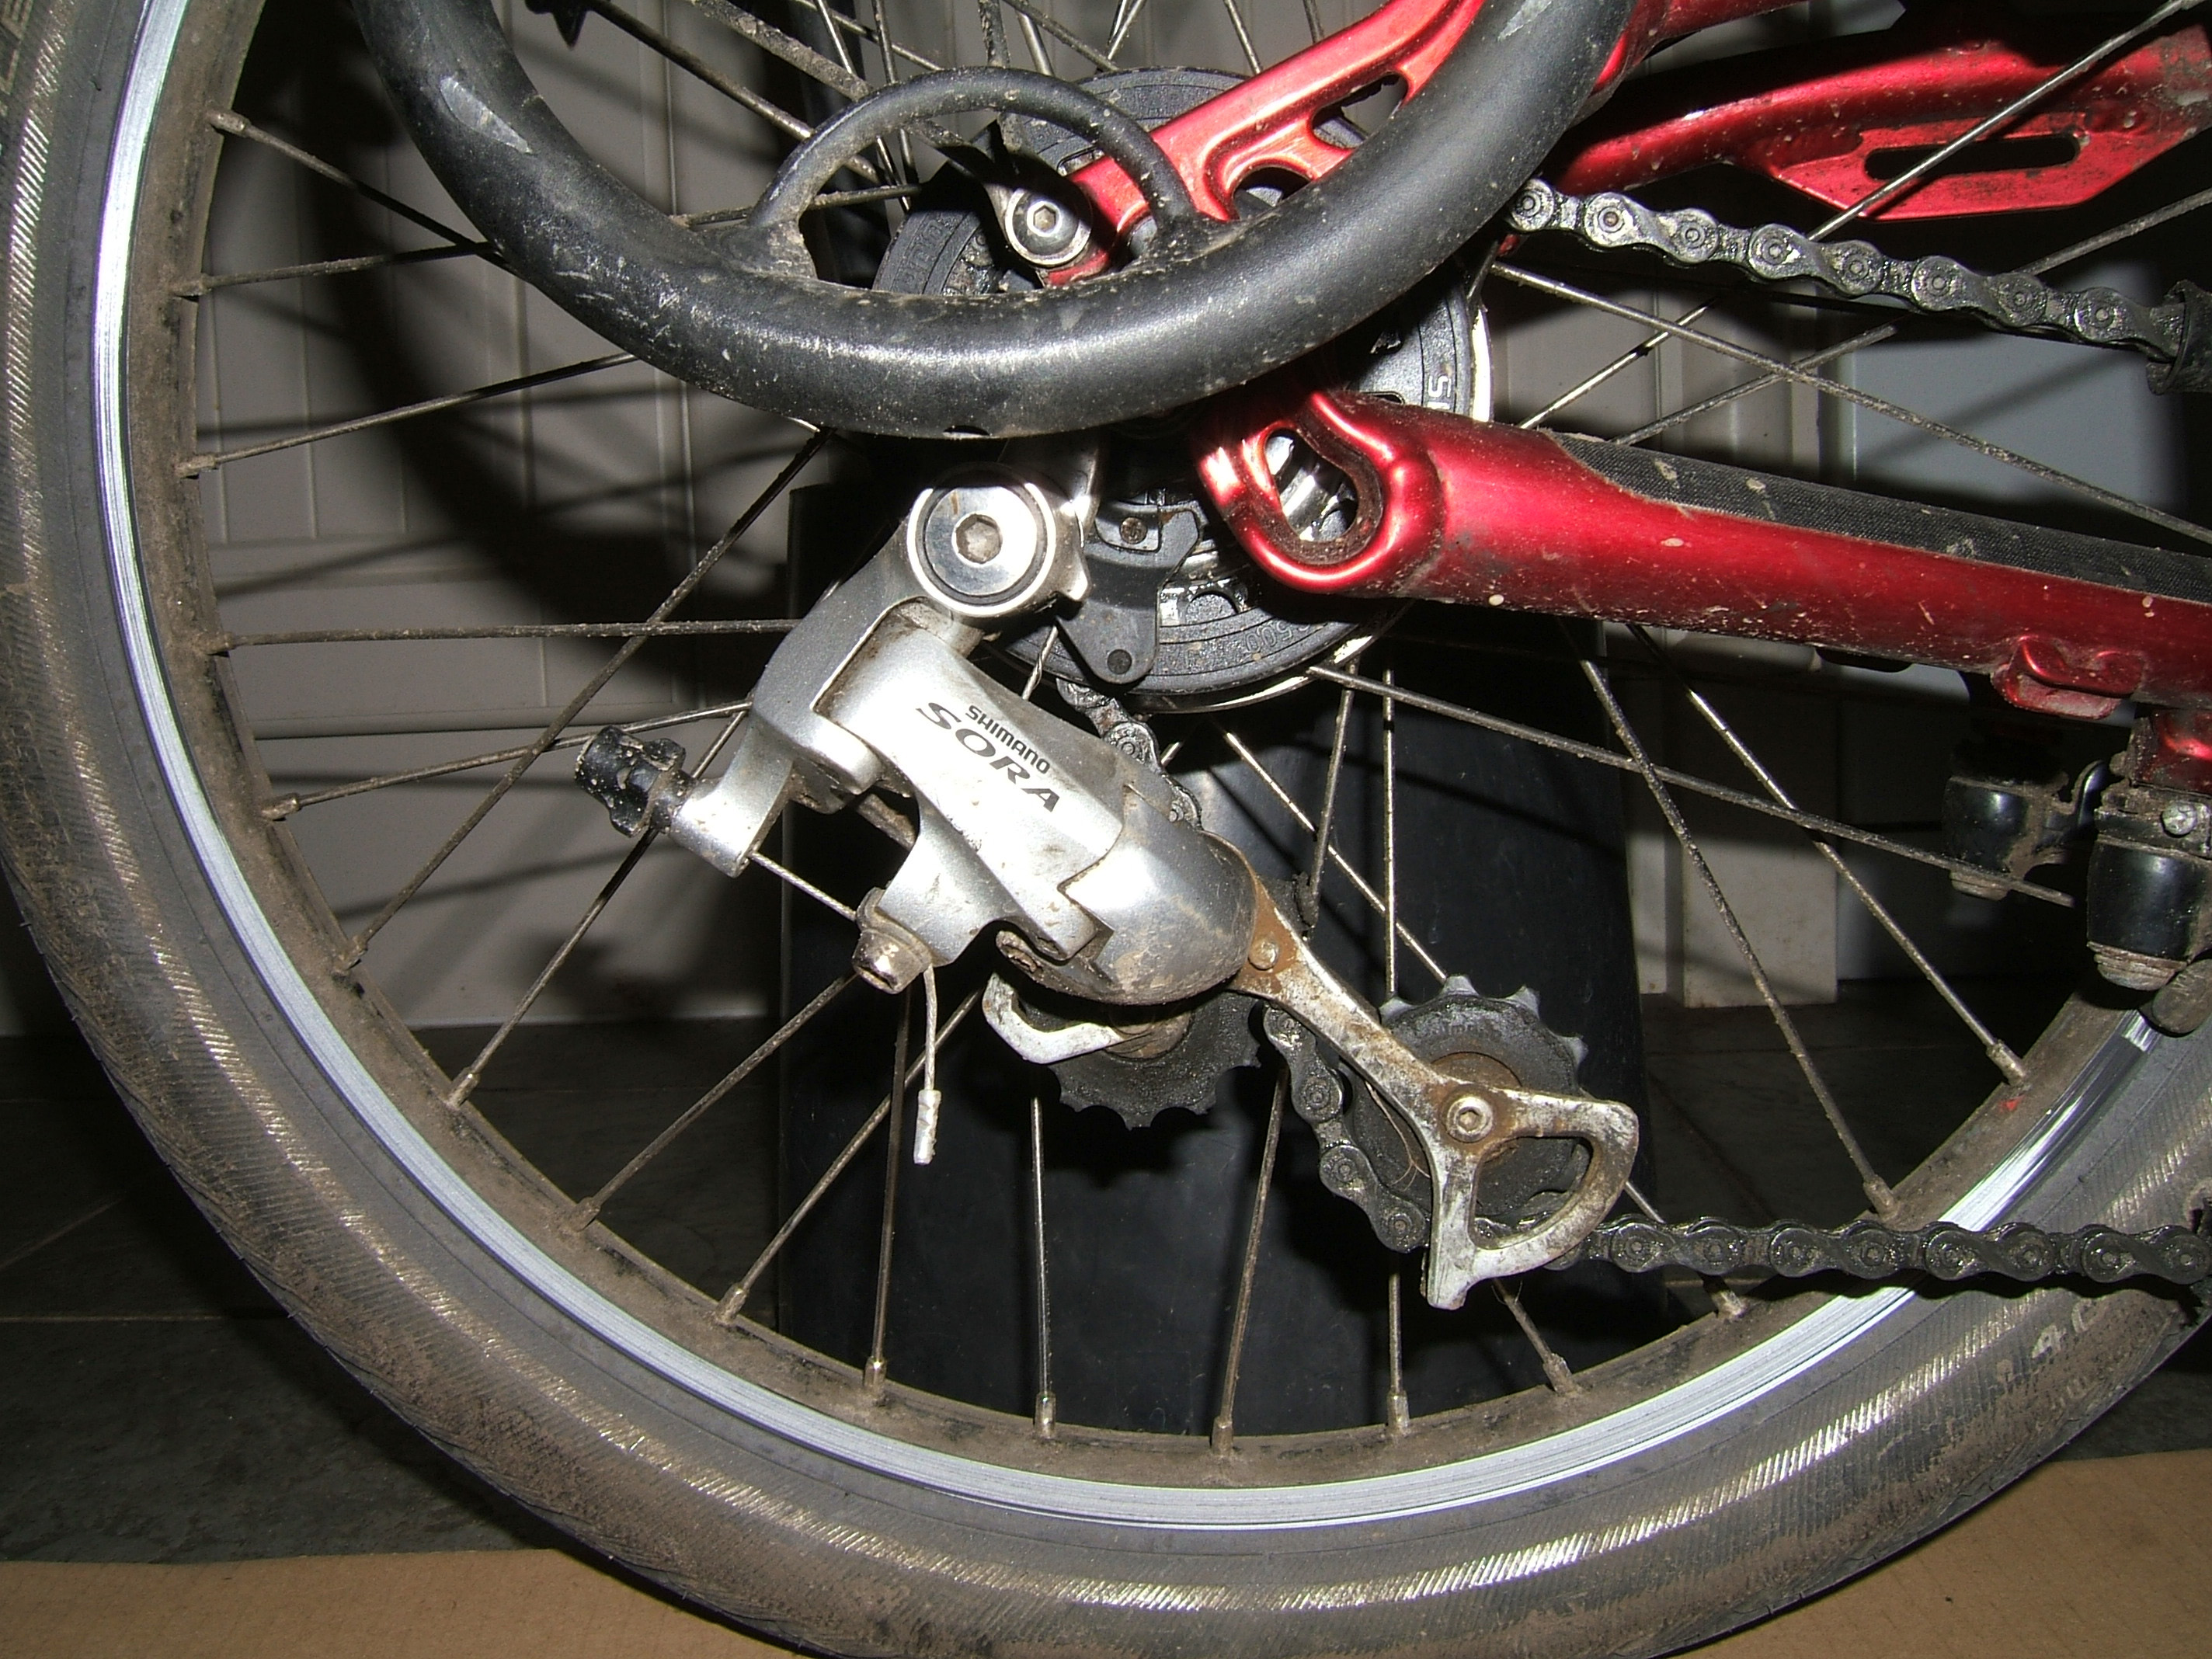
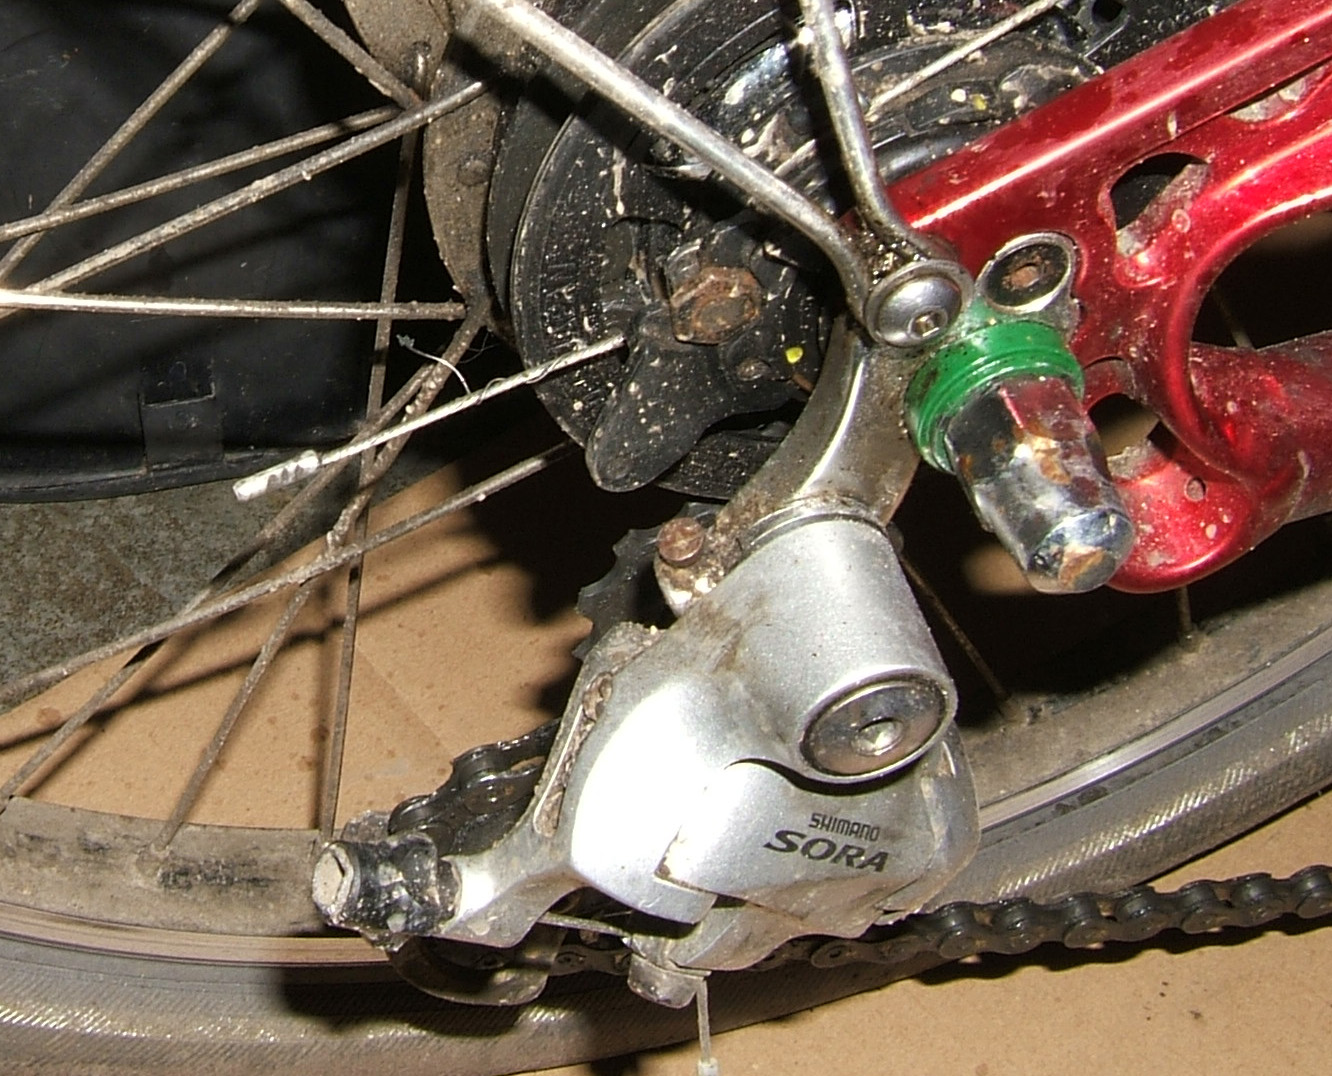
I’m still on the original jockey wheels for the chain tensioner (the Sora derailleur). Although the jockey wheels have worn a bit, they don’t have to do any work except keep the chain in a straight line so I can keep them until they are virtually toothless. Which is a good thing as they aren’t as cheap as you might think!
DSCF7990

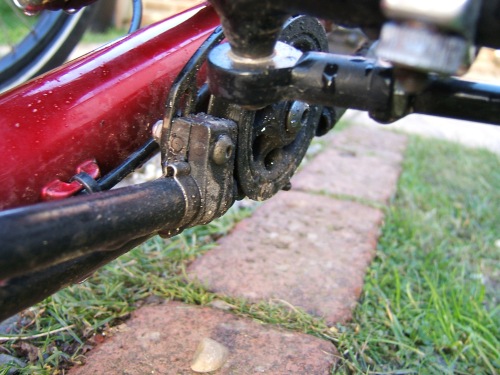
This is a view of the idler, which is a little pulley/wheel thingie that guides the chain from the front of the trike to the back. I learned a lesson with the Trice Q when we were unable to loosen the bolt that holds the idler in place (when we wanted to change the idler) and so every few months we just release this bolt and then tighten it again. It’s at pretty much the lowest point of the trike and gets no end of water splashed up at it.
DSCF7993

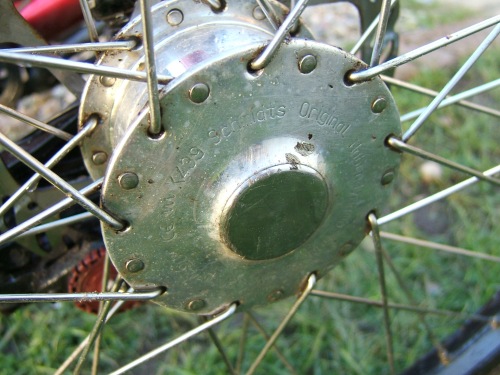
And here is my SON (Schmidt) dynohub. This is one of my favourite things about the trike but, as mentioned above, the metal has not survived the last seventeen months as well as the Alfine hub’s metal. It’s gone quite dull, presumably as a result of the salt on the roads last winter. It’s impossible to clean the gunk out from the spoke holes, of course.

You can also see a darker mark in the middle – this is actually a gouged bit of metal where I miscalculated the width between two metal pillars. CLANNNNNNNGGGGG! Going from 5mph to 0mph in record time, I left a small piece of my dynohub metalwork at the gates of Essex University.
DSCF7999

This is the previously-mentioned bolt holding the bike computer sensor to the top of the track rod. The bolt that is immovable. Oh well.
DSCF8001

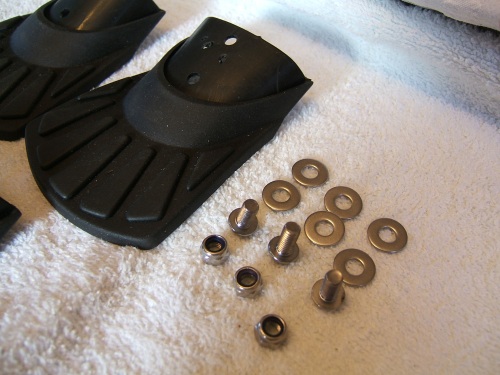
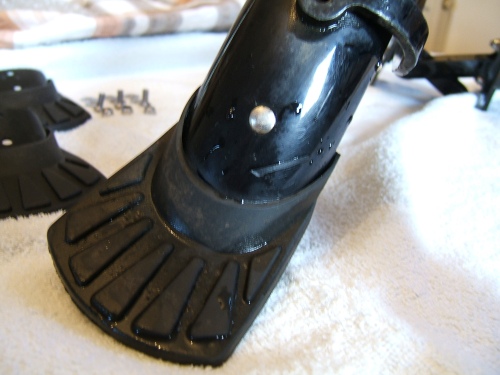
And this is the part of the trike that is absolutely my bete noir. And there are three of them! Three on both trikes! Yes, the mudguard flaps.
DSCF8002

The mudguards always seem to be the weak spot on these trikes in my experience. The front guards rattle like billy-oh, the back mudguard tends to be a bit better behaved but only if you have normal small tyres and not Big Apples. But all three mudguards have these mudguard flaps which are great when you first get the trike but after a few thousand miles start to rattle. And rattle. And rattle. And rattle even more.

The rattle is caused by the rivet (which you can’t see in my photo as I have gaffer taped over it to try to stop it rattling). The problem is that occasionally the mudflap gets twisted to the side (if someone walks too close to the back of the trike, for example) and the twisting gradually grinds away at the rubber and soon it is all loose. And then the rivet starts rattling, if you go really fast round a corner the mudflap slides across and starts rubbing, and you get a very annoyed Auntie Helen who tries to gaffer tape it within an inch of its life. Which works until it rains and the gaffer tape gives up.

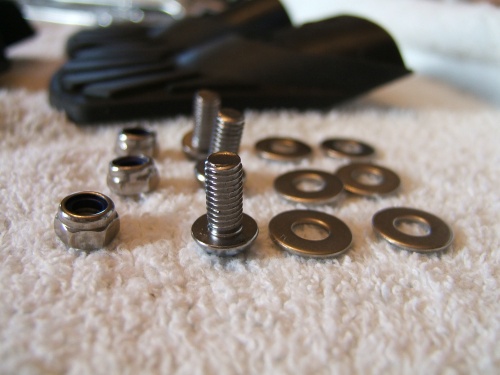
On my Trice Q I got so fed up with it a couple of years ago that I ripped the mudflaps off. Much quieter, hurrah, but on the first rainy day I discovered that the wheels now flicked 90% of the water into the trike rider’s face (and the rear mudguard, without mudflap, flicked 100% of its water into the face of my husband riding behind). A quick email to ICE, with me feeling very abashed for being destructive on my mudguards, solved this issue as they sent me three new mudflaps with some fixings screws (I don’t have a rivet gun) but these replacements still rattled.

So I have learned not to rip the rotter off on Alfie but I am still really cheesed off with the rattling. This means if I think it’s going to be a dry day I take the mudguards off so I can ride in silence. This does mean there is the occasional issue with unexpected rain/puddles…
photo

Overall thoughts about the trike after 10,000 miles
Regular readers of my blog will know that I am very happy with Alfie and find him a very comfortable trike. Issues with the mudguards aside, he still feels as well put together as he did the day I first rode him, without lots of mystery squeaks and noises that the Trice Q tends to suffer from. He still goes in a straight line and the brakes work well.

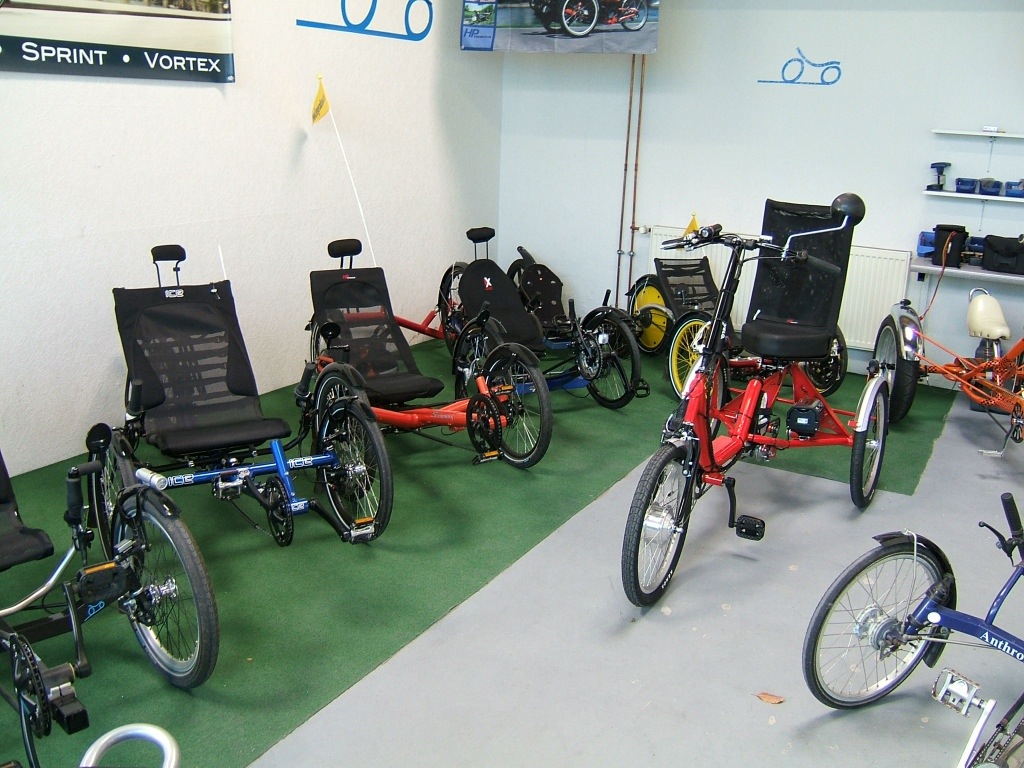
Alfie was not an off-the-shelf ICE trike option as I specified the hub gear and the hub dynamo which weren’t standard. I am very happy with both of these items and would definitely choose them again if I had to buy a new trike. The German trike assemblers in Willich were trying to convince me the other day that the Adventure is a better option (it’s higher off the ground) but I like the Sprint’s speedy feel and the fact that it always feels very stable and safe. I suppose something I might have considered a bit more is the larger rear wheel which might make some of the gearing a bit easier (I have a whole set of low gears I never use but do spin out on the high gears above 30mph).

This trike is much kinder on chains. The Trice Q got through chains every 3000 miles, this trike seems to manage double that. I assume that’s because I don’t have a derailleur at the back to twist the chain, just the front derailleur (which doesn’t get used all that much each ride – I usually just stick it in the big ring and leave it there). However the hub gear built into the rear wheel does mean this trike feels a bit heavier at the back, particularly when you are starting off. Not a problem but it is something I notice when swapping between this and the Trice Q with its standard derailleur system. I absolutely love the fact that I can change gear when stationary on this trike, though, and I tend to use that feature all the time – which makes for some amusing high-gear starts when I swap to the Trice Q and forget to change down when approaching traffic lights/a junction.

Alfie was an expensive bike but it’s well worth it for me and my usage, particularly with regard to the build quality (I’d be interested to see what a KMX is like after 10,000 miles, if it could actually be ridden that far in fact!). Once again the service from ICE (Inspired Cycle Engineering) is fantastic; I haven’t had to ring them recently but whenever I do call them they always give excellent advice and are really helpful. It’s good to know they are continually developing their product range and bringing in new features for the new trikes. If they could sort out the mudflaps someday I would be a very happy customer for some new ones!!!

So, 10,000 miles of slow sprinting – slow because I average less than 11mph over that time; sprinting because Alfie is a sprint (although I am definitely a more touring kind of person). But I have enjoyed every one of those 10,000 miles and I look forward to the next 10,000!

13 Comments

Filed under Alfie the Trike, Cycling

Mönchengladbach – a visit to Mars and a recumbent trike shop

Thursday 6 December 2012: A trip to a crater on Mars and a visit to a recumbent tricycle shop!

Today was my last full day in Mönchengladbach and I had nothing at all on the schedule. The morning’s weather forecast looked very favourable – a good day for a cycle ride!
20121206-172151.jpg
I had previously noticed a strange blank area on the map of the Niederrhein area – the paper map just shows a couple of crossed tools as an icon and the words “Tagebau Garzweiler I”
20121206-182113.jpg

Mind you, Google Maps has even less information!
20121206-172329.jpg

When you look at Google Satellite View you get this complicated image:
20121206-172343.jpg

I had mentioned this to Babs when I saw her on Tuesday and she explained it was an open cast mine. The area on the map is larger than the town of Mönchengladbach so I thought it worth going to have a look, to see what something so enormous looks like.

The plan was to go south to visit this mine – one of my prearranged GPS tracks went along this way so I thought I’d follow it as far as the mine workings and then do something different. My ‘different’ was originally a vague plan to cycle across to Düsseldorf for lack of any other inspiration until I received an email from Chris aus MG who has been commenting on my blog and he said:

I came accross your blog through a recumbent trike handler in Willich, Liegeradbau Schumacher, after asking if anybody had built a trike using the Schimano Alfine 11 Hub. ICE sent him a link to your blog.

Well if ICE have been mentioning me to this bike shop I really ought to pay a visit, I thought. The factory/unit is up to the west side of Willich which is of course entirely the other side of Mönchengladbach to the open cast mine but it would give me a bit more cycling to do so I thought it would be fun to go up there.

Anyway, I set off in beautiful bright sunshine. It was very cold though – there had been a few flakes of snow overnight and my car windscreen was very frosty when I extracted Alfie and put his seat back on ready to go.

There were a fair few patches of ice around on the roads but with three wheels this is no issue. I headed south and soon left the city behind, enjoying the frosty fields and the crisp air.
20121206-172313.jpg

I crossed over the A46 motorway and knew that dead ahead was this mine area so I stopped the trike and walked over to a small earth bund to see what was the other side. Here is Alfie – check out his wheeltracks!
20121206-172421.jpg
20121206-175238.jpg

This is where I had cycled so far:
To Garzweiler

What I saw when I looked over the earth bund was just amazing. Like a crater on Mars, Germany’s own version of the Grand Canyon (but not quite as deep), with a weird mist rising off it all as the frost defrosted. It was an awesome sight.
20121206-172457.jpg

20121206-172549.jpg

20121206-175316.jpg

20121206-175334.jpg

20121206-175355.jpg

20121206-175407.jpg

And in the distance belching out huge amounts of smoke was the Grevenbroich Power Station which is burning all the brown coal they are digging up.
20121206-175425.jpg

I cycled on a little bit further east, hoping to get some better photos when I wasn’t looking so much towards the sun, and I found an area where Alfie, too, could get a look.
20121206-175443.jpg

20121206-175454.jpg

20121206-175505.jpg

Here I tried a few shots to get Alfie in as ICE are running a little competition on their Facebook page for photos of your trike in interesting places. I’m not sure which of these pics is the best really.
20121206-175529.jpg

20121206-175547.jpg

20121206-175601.jpg

20121206-175611.jpg
I took a last picture of the mine and then it was time to head off again.
20121206-175520.jpg

I crossed under the A46 again and entered the town of Jüchen. It must be a bit weird to live there with that huge hole in the ground just a stone’s throw away. Anyway, I was now heading north and boy was it cold – the wind was very chilly and I was on extremely open ground a lot of the time. I tried to ride a bit faster to warm up some more, but it was mainly my hand getting cold when I had to fiddle with my phone to mark a waypoint on the ‘trackmytour’ app (can’t use my phone with gloves on, unfortunately).

I carried on roughly north for a fair while and eventually ended up in Giesenkirchen which has the obligatory nice church as well as the obligatory nice bakery.
20121206-181055.jpg

I headed in to the bakery to warm up and also ate a Nuss-Striesel (although an Austrian friend has told me it can’t be called that so I must have misremembered it).
20121206-175648.jpg
I was now following my Garmin’s selected route to Willich from Giesenkirchen and it all started off OK until I reached the fast road through Korschenbroich which is signposted no bicycles and doesn’t have a cycle lane beside it. This caught me out a couple of days ago when riding back from the Streithöfe so I had to do some planning on the Garmin to work out a route to avoid this road (which really is the obvious route to take to get to Willich from Korschenbroich!)

In the end I worked out a route taking some very quiet lanes, some of which are really just cycle paths, and I headed off through Herzbroich, passing this interesting metal bicycle outside someone’s house.
20121206-181110.jpg

As I was approaching Schiefbahn I turned off the road cycle path onto a cycle track called the Fietsweg (or something similar – definitely had ‘Fiets’ in it which is Dutch for bicycle). This was a long, straight road heading west alongside the A52 motorway but far enough away that you can’t really hear or see the road.
20121206-181125.jpg

From there I went under the motorway and then pootled along very quiet roads in horsey country, also going along a former railway track which has turned into a cycle route (there’s a very similar one near Nettetal – in fact it could be a continuation of the same railway, the one from Nettetal to Grefrath) and then back to country lanes again. It was a very nice route and a bit more sheltered so I didn’t feel quite as cold.

I was now on about 32 miles cycled and was relieved when the road magically turned into a posh industrial estate – this was now the outskirts of Willich where Liegeradbau Schumacher had their unit.

Here is the map of my ride so far:
garzweiler to Bike Shop

I found Liegeradbau Schumacher with all the doors closed. I knocked on the door and lo and behold a roller shutter opened and I stepped in to a building full of recumbent trikes (mainly ICEs and HP Velotechnik Skorpions).
20121206-181213.jpg

20121206-181227.jpg

I had a really good chat with the chaps there, one of whom seemed very keen to sell me an ICE Adventure HD (this is for the heavier, wider person which a wider track and a wider seat – what does this say about how lardy I was looking???) He was also keen to show me how many different ways they were able to fit electrical assist and I was able to test how possible it is to pick up the trikes when they have electric assist. They’re manageable but pretty darned heavy – the battery etc weighs 7kg. The chap said they get a lot of people buying electric-assist trikes as they are getting elderly, can’t cope with a normal upright bike but haven’t the energy to ride a long way without assistance. I think this is why he also sells far more Adventures than Sprints as the Adventure is much higher up than the Sprint so easier to get on or off.

They also make their own trikes but ship in ICE’s seats for them as they are the most comfortable seat (said the chap).

He suggested I have a seat on one of their unusual trikes (sorry for fuzzy photo)
20121206-181151.jpg

And here it is without me on it. I can’t say it was very comfortable!
20121206-181202.jpg

And here’s a bit of ICE marketing in German: “Because quality can also be beautiful.”
20121206-181245.jpg

I spent half an hour chatting with the chaps at Liegeradbau Schumacher, including talking about the Alfine and the Rohloffs they fit, complaining about rattling mudguards and more. It was all very interesting and, apart from Kevin at D-Tek, has the most trikes I’ve ever seen in one place.

It was half past one when I left and I was feeling pretty hungry. I decided to ride back to the north of MG where there is a large restaurant Kastanienhof (which was another option to meet Babs on Tuesday so I knew it would be OK). I’ve passed it twice before on my travels and it looked fine so I headed off towards Neersen, passing through and then arriving at the Kastanienhof around 2pm.

I ordered a Schnitzel and they arrived with some bread and also some olives and other goodies. Yum.
20121206-181259.jpg

And here is the Champignon-Rahm Schnitzel. With salad of course.
20121206-181314.jpg

There were two weird things about the Kastanienhof (which was otherwise very pleasant).

The first is that when I arrived they gave me this card with loads of tiny holes punched into it. When I ordered food the chap punched extra holes to tot up the amount. Everything on the menu was in multiples of 50p.
20121206-184415.jpg
When the time came to leave I had to hand this in at a till at the door and then pay. I think the theory is you can pay with an automated system and credit card but as there were only a few other people in the restaurant at the time they had plenty of staff!

The second weird thing, and this was most decidedly peculiar, was that in the ladies toilets there was a vending machine for a disposable vibrator. You don’t see that kinda thing very often.

It was five miles back to the flat but I decided to take a very minor detour to a bike shop (Bike-Center Pfennings) that Chris aus MG had recommended to me. It was just a couple of miles to the west of my flat and so I headed directly there.

They had a LOT of bikes!
20121206-181329.jpg

20121206-181349.jpg

I managed to come out without buying anything, which was a bonus.

I then headed home, feeling pretty tired now.

On the way I passed what I think is Schloss Rheydt.
20121206-181408.jpg

And then found myself detouring a little to REWE to get myself something to have with my afternoon cup of tea – a nice Apfeltasche.
20121206-181421.jpg

This was my entire route for the ride today:
Garzweiler

Alfie is now back in my car ready for our journey back to the UK tomorrow. We’re leaving here around 9am and heading off to the Hoek van Holland for the 2:30pm ferry sailing (I’m giving myself loads of time in case of a slow, snowy journey like on my drive here on Monday). I took the car to fill up with petrol when I got back and, rather a bonus, the price had dropped by 3 cents per litre since yesterday! I also took the opportunity to pick up a few bottles of beer for James. I haven’t bought anything for Poppy the dog – I did pop into Fressnapf (like Pets At Home) yesterday and was very tempted by some woolly jumpers but she doesn’t really like that kind of thing and so I will come home to her empty handed. Mind you, she’s apparently been sleeping on my side of the bed whilst I’ve been away (rather than in her crate) so she’s already had her Holiday Bonus I think!

I’ve really enjoyed my time here in MG and have been amazingly lucky with the weather. I expected it to be rain and snow the whole time and yet I’ve barely had any bad weather whilst I’ve been out on the bike. I’m glad I’ve got some decent Roubaix trousers though to keep me warm (mostly). I’ve also cycled almost 140 miles over these four days which means sometime next week Alfie will cross the 10,000 mile mark!

And best thing of all is that I’ve found somewhere suitable for my year over here and I look forward to making more plans for 2014/5 in Kempen.

Statistics for today

Distance travelled: 40.71 miles
Time taken: 4 hours 2 minutes
Average speed: 10.1mph
Maximum speed: 23.7mph

1 Comment

Filed under Cycling, Germany, Mönchengladbach 2012

Mönchengladbach – Kempen and Krefeld

Wednesday 5 December 2012: A ride from Mönchengladbach to Kempen, Hüls, Krefeld and then back to Mönchengladbach

In yesterday’s blog I wrote about talking with Babs (who lives near Willich) about where would be a good place for me to live during my year in Germany. I had come to Mönchengladbach on this little trip to get an idea of the city and see if it would be a suitable base for my year.

Although I’m enjoying it here I think that the city is too large for me (I prefer quieter places) and you have to do a fair bit of cycling before getting out in the countryside. Plus there are a heck of a lot of traffic lights! I’m not convinced MG is the right place for me, although I did like the look of Windberg.

Anyway, Babs had suggested that I considered Kempen, Hüls (a suburb north-west of Krefeld) or Krefeld itself, all of which she thought might suit me better. I looked at them on the map and discovered that all three places would make a nice cycle ride, so that was today’s plan sorted!

As I hadn’t pre-planned today’s route on my computer at home to download to my Garmin I would have to make it up as I went along. I spent a few minutes over breakfast today setting some waypoints into the Garmin which I would ask it to route me through – this meant I could roughly plan the route and ensure it wouldn’t try to take me down a motorway or something. Just putting in waypoints doesn’t give me a terribly accurate idea of the distance of the route but I estimated it was 15 miles to Kempen, 5 from Kempen to Hüls, 3 from Hüls to Krefeld and then 12 back, making 35 miles in total. A nice gentle day’s ride! If I felt too tired to ride back, or if it was too cold/rainy, I could get a traini from Krefeld to MG (which is why I planned the route that way round – I don’t think there’s a train from Kempen to MG).

Here is the map of where I went today:
Kempen and Krefeld

The forecast for today was dry in the morning but some wet snow mid-afternoon so I decided to head off fairly early. I also thought it might be nice to have a big lunch in Krefeld and just have a sandwich in the evening. It would be nice not to have a take-away!

So I set off northwards, along the road which goes past the station. I noticed this sign in the middle of acres of concrete and asphalt:
20121205-171232.jpg
The Gladbach river is of course what Mönchengladbach was named after. It now appears to be entirely buried under the city.

It was a good four miles of riding (on cycle paths beside the road of varying quality) before I was out into the countryside. I was then alongside some main roads and the cycle paths were a bit smoother (plus there were fewer side roads so I could maintain a higher speed).

I went through the village of Neersen and then headed slightly more west towards Anrath. When I was leaving Anrath I was stopped at a level crossing and the people in the car beside me had a chat. They were amazed to hear that earlier this year I had cycled from Berlin to London (and wondered if I had swum the channel as well) and kept saying how comfortable I looked. I suppose I do look comfortable but I am wrapped up for the arctic with hat, gloves, buffs, waterproof jacket, thermal trousers, Gore-Tex boots and more which isn’t as comfortable as summer cycling clothing (shorts, jersey and sandals!)

I then cycled through Vorst and the route turned slightly more northwards, next stop Kempen! Here you can just see some spires and towers of Kempen in the distance.
20121205-171256.jpg

20121205-171318.jpg

As mentioned previously, I paid a flying visit to Kempen when on holiday in Nettetal and thought it was lovely. It’s an interesting walled town dating from 1290ish and was the original home of Thomas à Kempis. Here’s a screenshot I took of the map so you can see what it is like – most of the area within the walls is pedestrianised.
20121205-174400.jpg

As it happens the approach from the south took me through some nice housing areas and it all seemed very pleasant and open and green. When you get into the walled part of the town of course it’s lots of cobbles, alleyways and more.
20121205-171348.jpg

There are several of the old gates still visible.
20121205-171404.jpg

Once I rode to roughly the middle I stopped at the first bakery I found and had a Bienenstich and a cup of tea.
20121205-171430.jpg

As I was leaving the bakery I was stopped by a man who said he was the chap in the car who had talked to me at the Ansbach level crossing. He couldn’t believe how quickly I had got to Kempen (which wasn’t that quick at all) and was amazed when I told him I was carrying on to Krefeld and then back to Mönchengladbach. In the UK my cycling distances and speed are seen as fairly average but they seem to be a bit out of the ordinary to average Germans.

It was an easy ride out of Kempen and I was soon out amongst the fields again. I think that this is something I like – living somewhere where I can be out and away from houses fairly quickly. Anyway, here is a view across at Hüls and Krefeld.
20121205-171448.jpg

And this is another standard wintry view of this part of Nordrhein-Westfalen.
20121205-171507.jpg

For some weird reason my Garmin took me on a minor detour at this point along some quiet farm tracks rather than the main road. This was OK except I entered Hüls via a wood factory and general industrial estate which was slightly less attractive. Anyway, this was a view of the church steeple and water tower.
20121205-171528.jpg

The handy thing about churches in German villages and towns is that you can usually navigate your way to the pedestrianised centre by just aiming for the church. Which I did, and I found the centre.
20121205-171547.jpg
I have to say that I didn’t find Hüls particularly exciting and so have struck that off my list of places for my year.

There was a ribbon development between Hüls and Krefeld which was actually quite a long way. The last mile or so into the centre of Krefeld was a bit hair-raising as there were tram tracks to contend with. They’re OK generally but if you have to pull out to pass a parked car (as I often did) you have to cross the tram track at a sharp enough angle so that your wheel doesn’t get dragged in. With three wheels to think about this involved some concentration!

Anyway, I soon found myself in the centre of Krefeld and lo and behold stumbled on a Christmas Market.
20121205-171612.jpg

20121205-171633.jpg

20121205-171645.jpg

I had a quick look around the market and then popped into a couple of bookshops to try to find the Bikeline Cycle Touring book for the Romantische Straße route (which James and I will do in September to celebrate our 20th wedding anniversary) but I had no luck with that book although I could have bought dozens of different Rhein Radweg books if I so wished (but I already have them so no need). I will have to order the Romantische Straße book when I’m back in England I suppose.

Krefeld Centre had a very good selection of shops and nice, wide pedestrianised streets. I suppose in some ways it could be any German town (Berlin, Köln, München) as it’s the same shops you always see (including C&A and Woolworths, long gone from the UK), but it had a rather nicer atmosphere than MG although I can’t work out why. It seemed perhaps a little less grey. Still, Krefeld isn’t on my list of places to live in as it’s too big again and there’s too much of the city to cycle through to reach the countryside. However it looks like it would be a good place to go shopping now and again!

I then decided it was time for a nice hot lunch and found a nice Italian restaurant and ordered a lasagne. They gave me olives and dough balls while I was waiting which was nice. Then the lasagne came and the whole meal was only 7,20€. Bargain!
20121205-171657.jpg

The rain was still holding off as I left the restaurant and set off back to Mönchengladbach. I was heading south to leave Krefeld and was clearly going through the slightly rougher area – I had a few groups of lads shout and laugh at me (which I am used to – it happens all the time in the UK!) There was some interesting architecture though with very ornate façades on some of the buildings.
20121205-171711.jpg

20121205-171725.jpg

My route back was mostly along the B57 Gladbacher Straße (B roads being like British A roads) and the cycle path alongside was generally pretty good. For a while the road ran 100 metres or so from the A44 motorway and I found myself musing about the fact that there seem to be fewer cars on the roads in Germany when I am cycling about. I think this is probably because people use their bikes for shorter journeys where most people in the UK would use cars – after all, it’s these short journeys around towns that clog up roads, not so much motorway traffic.

I soon found myself in Neersen again where I rejoined my outward track, heading southwards to MG. I saw this sign that I hadn’t previously noticed – an interesting group of towns that MG is twinned with. Thurrock isn’t a terribly exciting option!!
20121205-171746.jpg

Rather than going directly back to my flat I cycled on to the REWE supermarket and bought myself a Berliner.
20121205-171806.jpg

I also took the opportunity to photograph this German Beer Advent calendar (it has 22 different 330ml beer bottles within) as I had mentioned it on Facebook and various people seemed interested!
20121205-171837.jpg

I await to see if I have any orders to import one or two of these – fortunately I have a large car with me which has lots of empty space!!

So overall this was a very successful day as we now have a winner in the “Where should Helen live in 2014-2015” – Kempen! I really liked it and it seems very suitable in terms of location, distance from civilisation and green and pleasant environs. I will do some more research of course (and I suspect accommodation might be a bit more pricey than in MG) but it’s good to know I have found somewhere that I think could suit me very well. Thanks to Babs for suggesting I visit it again!

I was back by 4pm just as the rain started (another excellently-timed cycle ride to avoid the worst of the weather) and enjoyed my Berliner. I plan to go out walking a bit this evening for some variety, now Alfie is safely tucked up in my car again.

Tomorrow is a free day at the moment and the forecast is good (blue sky, sun, chilly but not too windy). I’ll go out on the bike again but haven’t yet decided where; I could head over to Düsseldorf to say hello to the Rhein, I shall see how I feel when I wake up.

Statistics for today:

Distance travelled: 38.4 miles
Time taken: 4 hours 14 minutes
Average speed: 9.1mph (this is pretty good taking into account the amount of time I have cycled at walking pace through various pedestrian precincts; I suspect my average speed on the open roads was nearer 12mph)
Maximum speed: 15.1mph
I have no calories burned figures as my heart rate monitor seems to have packed up. It may want fresh batteries but they are at home in England so I’ll have to wait and see!

4 Comments

Filed under Cycling, Germany, Mönchengladbach 2012

Mönchengladbach – Windberg and Willich

Tuesday 4 December 2012: Windberg and Willich


A half-circle around Mönchengladbach

Today was my second day in Mönchengladbach and had the only fixed event in the whole holiday – a meeting with Babs from the Toytown Forum (for English speakers in Germany). She suggested that we met at 2:15 at the Landescafé Streithof which is east of Willich (12 miles from my apartment) so I had plotted a route there and back whilst at home and looked forward to getting out to somewhere new.

However, the morning turned out to be clear and bright with a fair amount of blue sky. It seemed a shame to waste good cycling weather so I decided to head off on the circular ride around MG that I had vaguely thought of doing yesterday. If I was running out of time then I could go straight over to Willich and meet Babs, or maybe I would have time to go home first for lunch.

This was my planned route:

And this was the route I ended up doing:
Windberg

Here is Alfie all ready to go outside the apartment.

20121204-121802.jpg
I started off by riding south towards Rheydt, down the cycle track in the middle of the road.
20121204-121826.jpg
I headed west past yet another big cemetery and past the wonderfully-named Pongs before heading northwards to Holt. Some of this riding was on cycle paths alongside fields and it was very attractive.

I rounded a corner and saw this fine chappie:
20121204-121847.jpg
The writing on the back includes the words “de luxe”. I looked inside and it looked vastly unluxurious!

I carried on northwards to Rönneterberg (which wasn’t very mountainous) on some very attractive paths.
20121204-121835.jpg
I had now reached the north-western point on the route and the track turned eastwards which afforded me a rather enjoyable tailwind. It was a useful wind as I had a little bit of uphill; not loads, but enough that they named the area “Windberg”.

Windberg was very posh with nice houses, lots of cycle paths through woodland and green spaces and the Botanischer Garten which I cycled through.
20121204-121917.jpg
20121204-121925.jpg
They were also fiddling about with a bridge on my route and it was closed so I had to do a bit of a diversion. However this was no bad thing as I passed a very singular second hand shop which had one of Alfie’s distant relatives displayed outside!
20121204-121904.jpg

20121204-121856.jpg
20121204-121909.jpg
I didn’t feel like selling Alfie so I carried on!

As usual when cycling around towns in Germany using cycle paths the going was quite slow and I decided that I was way too early to go to the Streithöfe but I would be pushed for time if I did the second half of this route (I was now halfway round it, having done eight miles) so I decided to ride directly back to the flat.

The Garmin routed me through the pedestrian precinct of Regentenstraße which was nice but strangely empty.
20121204-121934.jpg
And at the bottom of this road I found myself somewhere I had been before (albeit in a hurry), the main station.
20121204-121950.jpg
I continued down the main pedestrian shopping street, the Hindenburgstraße, which has buses down the middle (no cars) and a rather nice cycle path.
20121204-122006.jpg
I stopped off a the supermarket on my way back to get some rolls for lunch. I got in at 11:30 and had to leave at about 12:30 so I had plenty of time for a restorative cup of tea!

Distance: 10.81 miles
Time taken: 1 hour 20 minutes
Average Speed: 8.1mph
Maximum Speed: 19.3mph

To Landescafé Streithof, Willich

So I was heading off to the north east which was great with the strong tailwind but boded a little bit ill for the cycle ride home, especially as heavy rain was forecast at 4pm. Oh well, I had my waterproofs with me and decided I could cope with a bit more weather.

This was my planned route out:

The route out went past the Volksgarten which looked very nice for walking before heading north through Lürrip.

I crossed over a small canal and saw these signs. This one has various cycle paths:
20121204-202602.jpg
And this one shows that I am leaving the Mönchengladbach region and heading into Neuss which is part of the Rheinland (Neuss is the other side of the Rhein to Düsseldorf).
20121204-202628.jpg
This goose farm was interesting as a whole bunch of geese had escaped from their fenced area (out of shot to the right) and massacred a field of sweetcorn but also in the background not that far away at all is Mönchengladbach airport. You wouldn’t want a goose to hit you when you are coming in to land!
20121204-202640.jpg
I headed up to Schiefbahn, crossing over the Nordkanal which comes from/goes to the Rhein further east.

As I was approaching Willich I saw this sign to advertise the farm shop at Broicher Hof; these figures were huge!
20121204-202647.jpg
I’d made very good time as I was mostly cycling on good, fast cycle paths beside long, straight roads with few junctions/traffic lights and it was only 1:30pm when I had just two miles to go so I diverted into Willich centre and had a little look around, including photographing the church.
20121204-202716.jpg
I then headed east for a mile and a half until I saw the sign for the Streithöfe
20121204-202731.jpg
The Hof with the café was a square with buildings around three sides. The open side happened to be the side from which the strong wind was blowing and it was freezing standing outside locking Alfie. I wasn’t looking forward to riding back into the teeth of that wind, particularly if we had icy rain, so I thought it best to fortify myself with some cake.

20121204-202748.jpg
I had arrived first (was half an hour early) but decided to wait for Babs before eating/drinking. Some chaps who were in the café asked me if I were Norwegian. This was after I had taken off my waterproof coat to display my Union Jack jersey.

The choice of cakes was good (of course).

Here is their stack of Windbeutel, but of course I had one of these yesterday:
20121204-202807.jpg

There were also these apple and marzipan and Puddingsahne thingies
20121204-202822.jpg

I popped to use their loo and when I returned Babs had arrived. We said hello and then got down to the important business of choosing cakes and drinks. Well Babs eschewed a cake but I decided to go for the Mohnstreusel (with cream) and of course a cup of tea.
20121204-202839.jpg
20121204-202849.jpg
Babs and I chatted for ages (we ended up leaving at 5:45pm so I’d been there for four hours!) In that time I wasn’t able to finish my Mohnstreusel as it was such a generous portion. Me unable to finish a cake!!!!! This is what was left.
20121204-202904.jpg
Here is a pic of me and Babs. I am holding a little parcel of biscuits that she has baked for me (traditional German Christmas goodies).
3220121204-202917.jpg
It was a really enjoyable afternoon and the mega bonus was that the rain held off until I arrived at the café (it started about 15 minutes after I got there) and had completely stopped by the time I was ready to leave so I had an entirely dry day!

This was my originally-planned route back:

The twelve miles back home in the dark was quite enjoyable and I went at a good speed. It was a slightly different route than my outward journey (I had plotted a variation for the fun of it) although one bit of the road didn’t have a cycle path alongside and seemed a bit busy for me to ride on in the dark so I had to do some Garmin-assisted diversions which were fine.

As I approached MG I had a real hankering for a Chinese take-away for tea. I checked on my Garmin if there were any Chinese restaurants on the way back and it suggested one near the main station so I did a small diversion to there (which became a larger diversion when there were yet more road works without cycle path provision). When I arrived at the Chinese I discovered it was an all-you-can-eat buffet without take-away service. Argh!

So I looked at the next offering on the Garmin which was in Rheydt (i.e. past the flat and a mile further on). I still fancied a Chinese so I went for it and found Lin’s Palace was fairly decent. I brought my spoils back to the flat and had the delay of packing Alfie into the car before I could go up to my room but in due course I was back and scoffing the food. I was very hungry after a big mileage today!

This is the route of my actual journey – you can see my diversion to see Willich Church at the top and the Chinese Restaurant at the bottom!
Streithoefe

My conversation with Babs about where might be suitable for my year in Germany was very helpful. She suggested the possibility of Kempen which I had visited before and really liked – it’s much smaller than MG and has a very friendly feel. I am beginning to think that MG might actually be a bit too big and I might prefer somewhere smaller. Babs also recommends Krefeld (although I think that is also big) and I might go there tomorrow by bike/train to have a look. Although we have more snow forecast tomorrow, although Thursday is dry and sunshiny. I shall see how energetic I feel tomorrow morning!

Statistics for this afternoon’s ride:

Distance: 28.35 miles
Time taken: 2 hours 44 minutes
Average Speed: 10.3mph
Maximum Speed: 16.8mph

Total distance for today: 39 miles

3 Comments

Filed under Cycling, Germany, Mönchengladbach 2012

Mönchengladbach – a snowy welcome

I am in Mönchengladbach!

Not for the first time, of course – I cycled from Venlo to the railway station in MG a couple of years ago on a cycle tour but you don’t get much of an impression of a town when running late for a train and pedalling as fast as you can!!

Anyway, last night I headed off at 8:30pm to Harwich to the ferry. I’m getting very used to travelling with Stena to the Hoek of Holland although usually just with the bicycle – this time I had the car (with the trike inside).

It always seems a horrible early start when they wake you up with a PA address; although it’s 6:30am Dutch time that’s 5:30am for us Brits and it did feel rather early! I think they hope you will have breakfast in one of their restaurants but I am a cheapskate and decided to get something on the road. 5:30am is too early for breakfast anyway.

This very bad photograph (with a reflection of me and my phone) is the lights on the other side of the Maas as we approached the Hoek van Holland.

20121203-182114.jpg

We returned to our cars and started unloading at about 8am. I was parked behind this white van with an amusing message on the back (Cleaner than the plates at Nando’s):
20121203-182124.jpg

As we headed out of the giant ferry I was slightly surprised to discover it was dark. And snowing.

The darkness reminded me that I had meant to bostik on the old headlamp beam reflectors onto the car. I wasn’t expecting to drive it in the dark and so thought just sticking the old ones on would fulfil the law and not cost me extra (as mentioned earlier, I am a cheapskate about some things). However I had forgotten to do this and the sleet falling quite heavily meant that undoubtedly the things wouldn’t stick anyway, even if I stopped to put them on, so I decided to carry on.

They are still digging up the roads around the Hoek van Holland so there were a few diversions. I had Norma the Garmin car Satnav with me and she coped reasonably well. And so did I, driving on the wrong side of the road; I’ve done it a lot these last few years but this time it was instantly natural to drive on the right and I had no difficulties at all in the journey remembering how I should be driving. Practice clearly improves things like this!

Anyway, I pootled my way across the Netherlands, watching the sleet turn to slow and the temperature indicator in the car hover around 0.0 degrees, sometimes getting up to 2 degrees but generally showing 0.5 degrees. I had a slight issue last night when leaving the house in that my car’s tailgate had frosted shut so I couldn’t open it until I got to Harwich when things had thawed out a bit on the 20 minute journey. The plan is to keep Alfie in the car (there’s no bike parking in the apartment I have rented) but it occurred to me that if it’s really cold whilst I’m here I may not be able to get him out of the boot without going for a drive. Mind you, it was minus 2 when I left home yesterday so hopefully it won’t be an issue during the daytime (temperatures forecasted 3-5 degrees over the next few days in MG).

I had about an hour’s driving before daylight (or what passed as daylight under thick snow clouds) finally appeared. No-one flashed me about my headlights so I assume they wwere OK, plus I had peered at various other English cars in the queue for passport control at the Hoek van Holland and none of them had the headlamp beam deflectors either!

I have probably mentioned before on this blog that Norma the Satnav is a bit long in the tooth. We bought her in early 2007 and haven’t updated her maps since. I have once or twice taken a minor wrong turn on journeys because of a change in road priorities but this wasn’t too much of an issue. However, today I did quite a significant diversion where I followed Norma’s directions but a new road has subsequently been built and the roads have been rearranged. I realised immediately (I was driving on a flyover over a road with the signage to where I wanted to go) but of course had to do a bit of creative navigation to get back onto the right track. I managed it eventually – Norma added 10 minutes onto my journey time so it wasn’t a disaster but was annoying.

Annoying because the journey was very slow. MG isn’t that far from the Hoek van Holland really – Google on my iPad reckons 2 hours 20 minutes. That was a bit over-keen as it’s actually 140 miles. However, the reality of a journey in falling snow with grey skies was that I rarely went above 60mph and the “Time of arrival” field on the Satnav stretched further and further into the distance. I had originally told the Apartment owner I expected to arrive at 11:00 but when I hadn’t even reached Venlo at 11 (having left the ferry at 8:15) I decided to stop and ring the apartment owner to let him know I would be there at midday instead. I needed a break and some food too!

Motorway service stations are never that great but the petrol stations usually have a coffee bar and the Shell that I stopped at did. Tea and cookie for 2,50€.
20121203-182134.jpg

Then it was time for the loo and I discovered I had to pay 50 cents for this. There was a note in Dutch which looked like you could get it free if you’d had a coffee and biscuit (which I had indeed had) so I went back to the cashier and asked about this. “That is not possible,” she said. The man at the cashier paying for his fuel rolled his eyes and said to me “welcome to the Netherlands where we make you pay for the toilet.”

So I paid my 50 cents and it turned out I then received a voucher for 50 cents off my tea and cookie. So I did it in the wrong order. Anyway, if I happen to stop at a Shell on the way back I can get the 50 cents discount.

I felt nicely refreshed after this and headed off again in the snow, knowing I only had about 45 minutes to go. Which in fact was slightly less as there was another completely new road that Norma didn’t know about – the signage was very clear that it was the motorway to Mönchengladbach and Koblenz so I took the route although Norma showed me driving across fields as she kept panicking and shouting “recalculating!” It joined up with the motorway she knew about after a couple of miles and as I approached MG the snow had eased a little, which was a relief.

It was very easy to follow Norma’s directions into MG and to find the little area where I am staying. I had looked on Google Earth beforehand and seen what looked like a car park for the church but this turned out to be parking for the flats, free of charge. Bonus! So I parked my car and went to find my accommodation. After a quick call to the Landlord his father appeared with the key, showed me round, took my 150€ for five days (bargain!) and disappeared again.

This is the view from my balcony of the car park and the church – not that it was balcony weather with the snow still gently falling.
20121203-182141.jpg

After a quick walk to the local supermarket (REWE) to buy some lunch and, more importantly, milk for my tea, I unpacked and then had lunch. The snow had turned to drizzle and after I had finished my lunch I thought it looked worthwhile going out for a cycle ride. So I extracted Alfie from the car and got ready to go.
20121203-182150.jpg
This was the route of my trip today.
MG to Rheindahlen

My first job was to top up my German mobile phone SIM so that I could use the data. I rode to the Vodafone shop which is in the main shopping street, Hindenburgstraße. Lo and behold there was a Christmas market there although I didn’t stop to look around, just got a new phone SIM (a different Tariff this time) and headed back southwards.

Sorry about the finger in the corner of this pic!
20121203-182158.jpg

My vague plan was to do one of the routes on my Garmin, the 16 mile circle around MG. I set off on this but wondered if it might not be the best idea as time was marching on and I’d end up riding some of it in the dark. I’d already cycled down to Rheydt as I was thinking about this and then saw a sign to Rheindahlen so thought it would be fun to go and visit the home of the British Army in the Rhineland.

On the way I saw this sign that made me laugh – “Friedhof” is German for cemetery, it seems to have a description above it!
20121203-182233.jpg

The first part of the route to Rheindahlen was on cycle paths on pavements beside the road. These are OK generally although there were some patches which suffered from tree roots pushing up the tarmac or bricks. There also seemed to be a fair number of traffic lights in MG. Still, it wasn’t long before I had left the town behind and was cycling along past open fields in a very light drizzle.

Rheindahlen was just four and a half miles away so I soon arrived. I initially parked outside the church to have a look around the little central square.
20121203-182246.jpg

I had spotted, on my way in, a café and I decided that my nine mile ride deserved a tea break. Unfortunately I hadn’t yet put any teabags in my cycling kit so I had to buy some German tea which was rather underwhelming. However, in compensation they served me up a Windbeutel!!!
20121203-182255.jpg

And here it is a bit closer – it had cherries in!
20121203-182304.jpg

I had an enjoyable half hour break and then set off back to MG, following the route my Garmin plotted. I had cycled out on the road that goes through Günhoven but the route back was along the K57 which is a slightly more major road (and which had a rather better cycle path beside it). I passed the Ayrshire Barracks which had lots of security fencing and stern warnings not to take any photographs.

The route took me to Holt and then down a little country lane which eventually spat me out just half a mile from the flat – much more scenic than I would have expected. I had only done 14.5 miles by now so decided to ride on a bit further south to Rheydt again to try to find the Karstadt department store (they had a kettle in stock that I wanted to buy).

I found the kettle, on special offer (10 Euros off) but when I got to the checkout they rang up the original price and didn’t believe me that there was a discount. So I said I wouldn’t have the kettle, went back to the electrics department and got a lady there to check the price and then come with me and tell the cashiers the correct price, which she did and I got my kettle at a bargain price.

20121203-201432.jpg

Rather amazingly, whilst queuing for the cashier I didn’t find myself grabbing extra items from the display next to the queue:
20121203-182321.jpg

I went back outside to where I had tied Alfie to a lamppost and it was definitely becoming dark. I managed to just about squeeze the kettle in its box into my trike sidepod bag but I couldn’t do it up properly; no problem, it wouldn’t fall out with the clip done up.
20121203-182312.jpg

I was quickly back at the apartment. Here are a couple of pics of it so you can see me at work. Oh, and the other traditional bike ride decoration – various cycle jerseys drying around the place! I have enough clothes with me that I don’t have to wash things whilst I am here but I didn’t want to put them away in the suitcase wet and sweaty after the rain and the ride as they’d be rather smelly by Friday!

20121203-183834.jpg

20121203-183841.jpg

I walked round the corner to the pizzeria for my evening take-away. I’m feeling pretty tired now after a three and a half hour drive in the snow as well as an early start!

Tomorrow I am going to meet a lady, Babs, who I’ve contacted through an internet forum for English-speakers who live in Germany. She’s German but an anglophile and lives near MG and we’re meeting for cake in a farm shop thingie she has recommended. Should be nice! Shame the weather forecast for tomorrow is cold and rainy but I have my waterproofs with me so no problem!

Distance travelled: 16.31 miles
Ride time: 1 hour 53 minutes
Average speed: 8.7mph
Maximum speed: 24.6mph
Calories burned: (to be included when I have downloaded the track from my Garmin when I am back home)

2 Comments

Filed under Cycling, Germany, Mönchengladbach 2012

Koblenz – a boat trip to Boppard

No cycling this morning, instead we took a boat trip from Koblenz to Boppard and back.

First of all, though, we had to walk to Deutsches Eck. The long route involves going over the Balduinbrücke (bridge) but there’s a shorter option via  little passenger ferry, which James and I and Poppy took. 1€ each for James and I, 50 cents for Poppy.

20120920-220651.jpg

20120920-220734.jpg

Once on the other side we watched the ferry return to the north side of the Mosel where it was picking up the in-laws shortly.

20120920-220756.jpg

Here is the ferry with M-i-L in white cap and F-i-L to her right. In the background you can see the very complicated boat-launching tracks.

20120920-220816.jpg

Heading up the steps to the Deutsches Eck monument.

20120920-220835.jpg

Dog and human in the middle window of the three tall ones!

20120920-220922.jpg

20120920-220901.jpg

And then we walked along from Deutsches Eck to find our ship for the day.

20120920-220943.jpg

A bit of info on the bridge just down from the boat’s mooring. One we destroyed in WW2.

20120920-220959.jpg

Poppy enjoying the vantage point

20120920-221018.jpg

With a convenient headrest

20120920-221035.jpg

This is the point of land that Helen got ‘stuck’ on her first long ride.

20120920-221048.jpg

More dozing dog

20120920-221109.jpg

20120920-221125.jpg

Approaching one of the bridges – there are two that cross the Rhein here and none southwards for a long way (past Bingen/Rüdesheim); you have to use ferries after this point.

20120920-221330.jpg

20120920-221345.jpg

Looking up to the cycle path on the railway bridge – complete with holes!

20120920-221404.jpg

This tour guide told us that this building contains 15 million litres of beer!

20120920-221425.jpg

Dog on a different, comfy lap. You can see from the blue square with the flashing light on the left hand side of this picture that our boat was on the wrong side of the river! They use this system to show that they are driving on the left, not right, because of turning/current issues.

20120920-221441.jpg

This is the cafe we had stopped at the day before.

20120920-221506.jpg

This is where the Lahn flows into the Rhein. A fairly nondescript junction for a rather pretty river. Burg Lahneck in the distance.

20120920-221533.jpg

Schloss Stolzenfels – impressive!

20120920-221607.jpg

An attractive church at Braubach (I think!)

20120920-221654.jpg

Marksburg Castle at Braubach.

20120920-221805.jpg

Vineyards between Spey and Boppard, called the Bopparder Hamm.

20120920-221831.jpg

Boppard landing stages – the ship stopped for just a couple of minutes.


20120920-221854.jpg

We had got a bit chilly on the journey so decided to enjoy the return trip (which was half the time as it was going downstream) downstairs with some food and beer/wine.

20120920-221909.jpg

James the sailor was very impressed by this rope repair – a huge, thick rope repaired by a very thin piece.

20120920-221936.jpg

The boat on our return.

20120920-221949.jpg

This sculpture / fountain in one of the main squares of Koblenz depicts the history of the city in layers.

20120920-222012.jpg

Rude spitting-boy fountain! We hoped to trick Poppy into getting wet (whilst I stayed out of the fountain aim) but she wasn’t in the right place when he did his spitting act!

20120920-222031.jpg

20120920-222053.jpg

James and Poppy outside the bike shop where we purchased a back tyre for the trike and some waterproof SPD shoes for James.

20120920-222209.jpg

Our goodies from the bike shop!

20120920-222227.jpg

A restorative cake each.

20120920-222243.jpg

We got back at 5pm and Poppy had been awake the entire day, which is exceptionally unusual (she spends a lot of the day asleep). In consequence she was absolutely shattered and jumped straight into her basket for a snooze.

20120920-222258.jpg

Whilst we went downstairs and fitted the shiny new back tyre to the trike. The bumpy wheel bumps no longer!

20120920-222324.jpg

We obviously had to go for a ride to test this out so James and I headed northwards towards Sankt Sebastian (where we bumped into the in-laws coming back – they’d been for a ride whilst we fitted the tyre) and then we came back inland which involved cycling past some nice fields which eventually turned into cycling through an industrial estate (less nice) which had a whole row of caravans parked beside the road which we soon realised were a troupe of travelling prostitutes. It’s surprising what you find on bike rides!

Once we got back Alfie was disassembled (seat and both front wheels removed which also involves removing the disk calipers) and put in the car ready for the full packing job tomorrow morning as we return home from Koblenz. It’s been a great holiday with lots of good cycle rides and I can certainly recommend the Lahntal route for a very enjoyable and picturesque (and downhill!) route!

Leave a comment

Filed under Cycle Tours, Cycling, Germany, Koblenz 2012